Raspberry Pi: Make a Workbench Automation Computer
Click to play
Build a touch-screen driven application and control appliances and devices using a Raspberry Pi.
Course last updated in August 2022
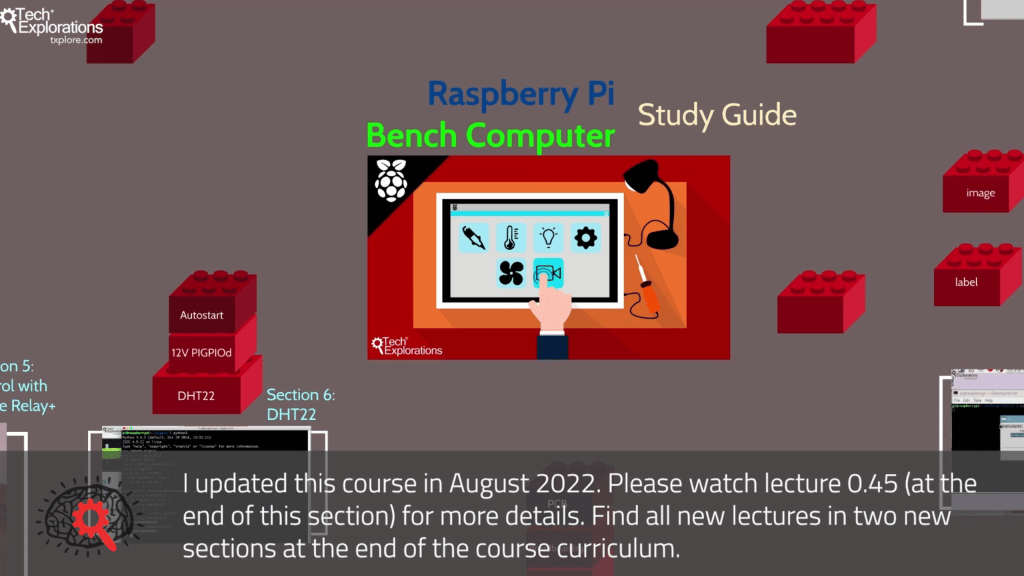
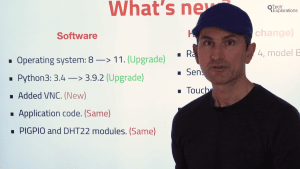
In this update, you learn how to upgrade the Bench Computer operating system to Raspberry Pi OS version 11 (Bullseye), added VNC for remote control and access, and tested all functions of the application. The new content includes 15 new lectures in two sections.
This Raspberry Pi project course will show you how to integrate a variety of components into a gadget that you can use to automate your work bench.
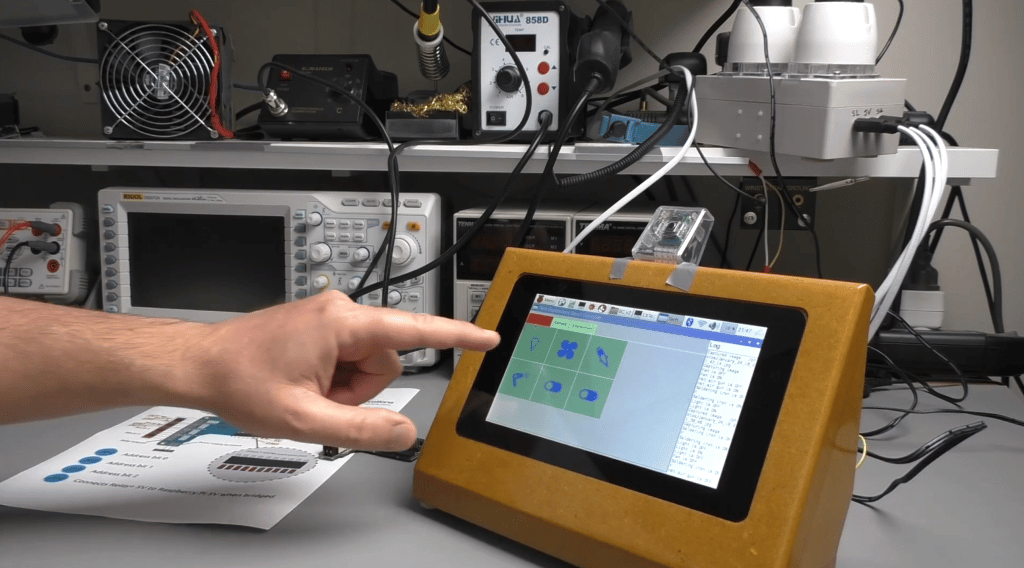
I call it "The Bench Computer".
With the Bench Computer, you will be able to control any device and appliance on your electronics work bench, like turn on and off your bench lights, soldering iron and fume extractor.
The Bench Computer provides a great framework on which you can build your own home automation projects Out of the box, you will be able to control anything with a simple on/off switch, like lights, fans, heaters etc.
I have designed this course to help you get started. What you get the Bench Computer to do is entirely up to you!
Here are the main components (software and hardware) that you will learn about by taking this course:
- The Raspberry Pi (version 4 or 3 is recommended, but any model with a 40-pin header will do).
- The Raspberry Pi 7-inch touchscreen.
- The Raspberry Pi Camera v2.
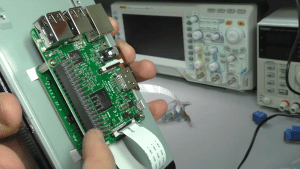
- The Piface Relay+ HAT (contains the small relays used to control 12V devices) OR a Keyestudio 4 Channel Relay board.
- A GPIO board breakout.
- Larger external relays used for controlling mains appliances like lights and your soldering iron.
- Python 3 and the Tkinter framework for building the application.
- Things that you want to control, like low-power 12V LED strips and fans, and mains appliances like a soldering iron.
All code is available on Github, and is free to download and use as you wish.
This course does not include any hardware. To complete the course and create your Raspberry Pi Bench Computer, you will need to purchase a Raspberry Pi and other components from retailers such as Amazon, eBay and AliExpress.


What is this course about?
This video will give you all the details. It contains a walk-through the sections and lectures that are part of this course.
Click to play
Bench computer demo
Click to play
Required software
Click to play
Required hardware
Click to play
Introduction to tkinter

Click to play
August 2022 update briefing
Click to play
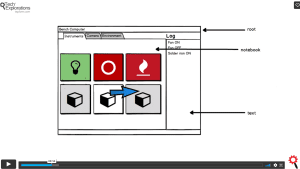
Application design wireframing
Click to play
Testimonials from some of our students
Lots of detail and everything is explained clearly. And there's LOT's of it! This is by far one of the best courses I've seen on the RPi and its many uses.
Rick Christmas
I thoroughly enjoyed the course. A couple of times it went a bit fast, but I was able to rewind, review the material, and catch up. I've built the bench computer and will be demonstrating it at my next radio club meeting. It's the first really useful thing I've done with the Raspberry Pi. I've got several ideas for things to add to it. Thanks, Peter
Lee Mager
Peter is a fantastic teacher. the instructions are clear and he designed this course in a way that it is very easy to follow. This is not my first course that I am taking with him, and I can say with confidence that when you see the name of Peter Dalmaris in a course, you can't get wrong, it means that will be a great quality course.
Geoffroy Givry
Not only is this course is enormous fun, I have made a big jump in knowing how to use the Raspberry Pi. This is the best course I have ever taken. Peter Dalmaris is an excellent teacher who pays close attention to his students. He has designed a well-thought out course around a cool project. The instruction is clear and detailed and so far, everything has worked. Unfortunately, the parts required are not cheap. Check out the free videos where he describes all the parts needed. If you are interested in learning about the Pi, I highly recommend this course.
Gail Lipfert
This course is very practical. It's the second course by Peter Dalmaris about Raspberry Pi, that I have been watching and it is excellent like the other.
Eduardo Halfen
This course has motivated me to dig into the inner working of the Raspberry Pi 3, particularly terminal command, telnet and remote desktop programs for Windows, RSA key generation software and use, and BASH scripting and Python scripting.
I have learned a lot about configuring and running BASH and Python scripts while setting up and operating the Version 2, 8 megapixel Rpi camera.
The Piface Relay Plus looks like a good tool for interfacing loads that pull a little more amperage than just a few sensors and I am looking forward to working with it. I am glad the cardbox box has been upgraded to wood, I wasn't a fan (no pun intended) of the duct tape and cardboard implementation.
I would like to see an acrylic case design someday. Enjoying the course and am glad I am taking it.
John Cantlin
I have taken several of Peter's courses on Udemy and this one continues to impress me. Peter has spent a lot of time designing a course for the Raspberry Pi that is both useful in helping to setup a workbench and to utilize the Raspberry PI for control.
As always Peter is clear and concise in the information presented and presents the info in easily digested pieces. A class well worth taking.
LarryB
Here's what you are getting:
Which option is best for you?
Solo
Once-off payment, best for self-sufficient learners on a budget.
...
Once-off.
...
Once-off.
Community
Best for the social learner: be a member of the course community.
...
Once-off.
...
Once off.
Mentor
Get one-on-one live meetings with a mentor, learn to master.
US$299
US$299
This button will take you to Stripe, our payments processor.
Consider a subscription
Did you know, you can get a subscription for immediate access to this and 20+ of our courses. All for a low monthly payment, cancel anytime.
Do you prefer to learn on Udemy?
On Udemy you will find all of the Tech Explorations courses at the lowest possible price.
Each course is individually priced by Udemy based on your location. We don't have control of the price on Udemy and so we can't display it on this page.
Click on the button below to open a new window where you can see the price of this course on the Udemy website.
How about a Subscription?
Get a Tech Explorations subscription and access all of our video courses immediately.
With a catalog of 25+ premium video courses (and growing), this subscription gives you an amazing resource to boost your learning.
What's in this course?
1 - Introduction
[0010] - Required Software
[0020a] - Required Hardware, Part 1
[0020b] - Required Hardware, Part 2
[0030] - Things to drive with the Bench Computer
[0040] - Residual current device
What me first! A study guide
2 - Basic Setup
Introduction
[0050] - Setup the Raspbian operating system on an SD card
[0060] - Attach the touch screen on the Raspberry Pi
[0070] - Boot for the first time
[0080] - Attach the Piface Relay+ to your Raspberry Pi
Conclusion
3 - More setup: enclosure and networking
Introduction
[0090] - Make the enclosure
[0098] - Connect a Bluetooth keyboard
[0100] - Setup Wifi using a keyboard
[0110] - Setup Wifi using Ethernet
[0120] - SSH without password
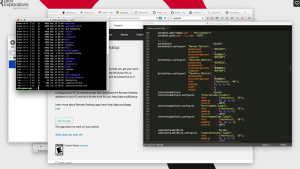
[0130] - Setup remote desktop
Conclusion
4 - Taking photos and video with the RPi Camera
Introduction
[0140] - Connect the camera
[0150] - Taking still images
[0160] - Taking video
[0170] - Converting H264 to MP4 video
[0180] - Splitting large video files into smaller ones
Conclusion
5 - Control with the Piface Relay+
Introduction
[0190] - What is a HAT?
[0200] - The Piface Relay+
[0210] - Piface Relay+ software setup and demo
[0220] - Blink script walk-through
[0230] - Connect and control a 12V LED strip
[0235] - Shrink tubing
[0240] - Connect and control a 12V fan
[0245] - Improving the wiring
Conclusion
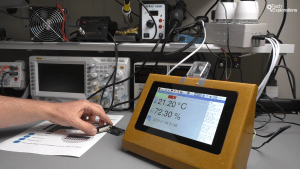
6 - Environment monitoring with the DHT22
Introduction
[0250] - DHT22 wiring and demo
[0260] - The PIGPIO daemon
[0270] - Set autostart for PIGPIOD
Conclusion
7 - Controlling mains loads with an external relay
Introduction
[0300] - Using a 5V relay with the Raspberry Pi
[0310] - Calculate the relay driver circuit
[0320] - Test the circuit on the breadboard
[0330] - Design the relay driver PCB
[0430] - Test the relay driver PCB
Conclusion
8 - Construct the relay controller box
Introduction
[0350] - Walk-through the enclosure features and construction
[0351] - Testing
[0352] - Tools
[0353] - Demonstration
[0360] - Relay box controller external wiring
[0370] - Test the finished relay controller box with software
Conclusion
9 - Meet Tkinter
Introduction
[0380] - Introduction to Tkinter
[0381] - Labels
[0382] - Events
[0383] - Text Entry Box
[0384] - Images
[0385] - Custom styling
[0386] - Notebook
[0387] - Grid Layout
Conclusion
10 - Write the Bench Computer application
Introduction
[0390] - User interface design with a wire-frame
[0400] - Step 1: Create the skeleton application
[0410] - Step 2: Implement the Control tab
[0420] - Step 3: Implement that Camera tab
[0430] - Step 4: Implement the Environment tab
[0440] - Test the completed application
Conclusion
11- Bench Computer Mk II using the Keyestudio 4 Channel Relay (or similar)
[1001] - Introduction
[1010] - RPi Bench Computer Mk II demonstration
[1030a] - Disassembly planning
[1030b] - Disassembly
[1040] - A look at the GPIO breakout board
[1050a] - A demonstration of the Keyestudio relay board using RPI.GPIO
[1050b] - A demonstration of the Keyestudio relay board using pigpio
[1060a] - Assembly of RPi Mk II, GPIO breakout board
[1060b] - Assembly of RPi Mk II, electrical check
[1060c] - Assembly of RPi Mk II, relay board
[1065] - Testing the external wiring
[1070] - Python Mk II application script walk-through
Conclusion
Congratulations
Ideas for improvement
August 2022 update
[1210] Introduction to the application update
[1220] Backup the SD card
[1230] Get current OS and computer versions
[1240] Already running Bullseye? update OS
[1250] Not running Bullseye: rebuild OS
[1260] Setup VNC
[1265] Setup XRDP
[1270] Copy the application using VNC
[1280] Setup DHT22
[1290] Setup PIGPIO
[12100] Test application
How to backup and restore your SD card
[0220a] – Backup an SD card (Mac OS)
[0220b] – Restore an SD card (Mac OS)
[0220c] – Backup an SD card (Windows)
[0220d] – Restore an SD card (Windows)
The course instructor

The course instructor is Peter Dalmaris, PhD.
Peter has created over 20 other courses on technology education.
He is the author of Maker Education Revolution, a book on how making is changing the way we learn and teach.
He is also the host of Stemiverse, a podcast in which he discusses education and STEM with the shakers and movers of technology and science education from around the world.
Copyright 2025, Tech Explorations - Privacy