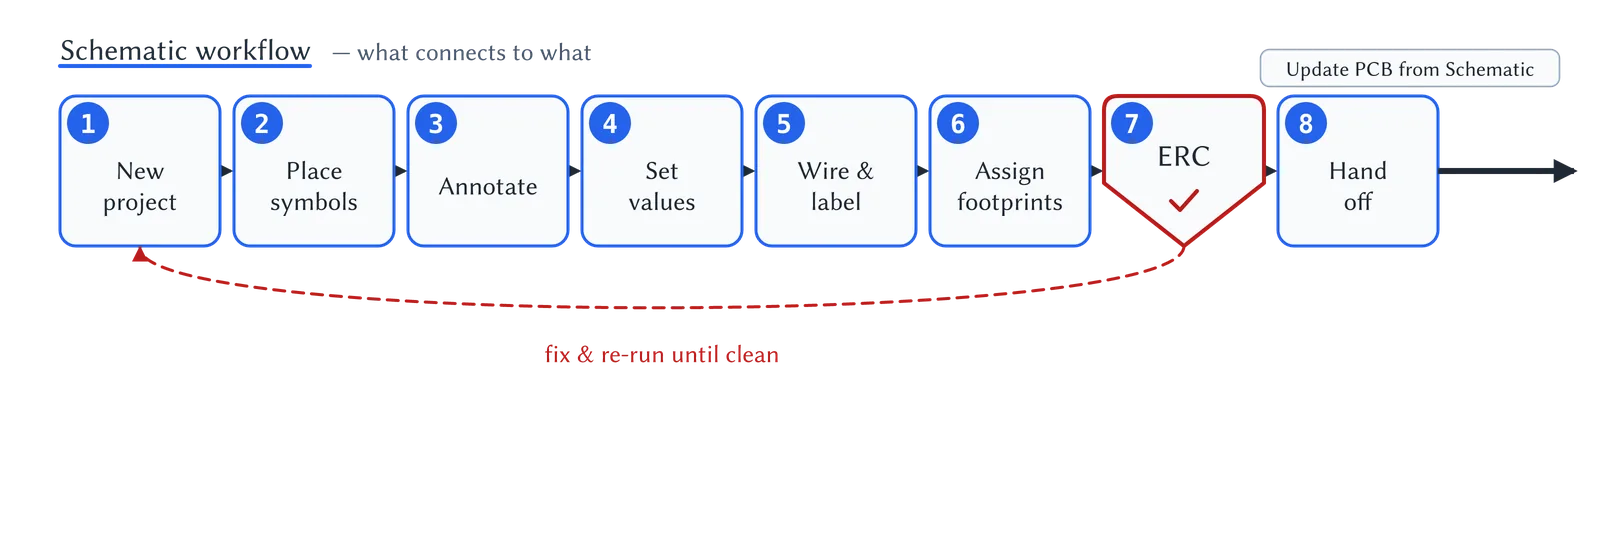

The Two Workflows, Formalised
You have now done the whole thing once. In Chapter 2 you drew a complete schematic, in Chapter 3 you turned it into a manufacturable board, and in Chapter 4 you saw why it all works the way it does. Along the way you completed two workflows, the eight steps of the schematic and the eight steps of the layout, but you did so on one specific circuit, with me telling you which button to click. This chapter lifts those two workflows off the blinker and pins them down as the durable checklist you will reuse on every project from here on.
So there is nothing new to learn in this chapter. This is the chapter you will come back to at the start of every design when you want to remember “what comes next, and how do I know this step is finished?” Everything else in the book hangs off the spine you are about to see.
What follows is the workflow model I actually use, the same order I follow whether I am building a two-part test board or a busy controller. I am laying it out as a fixed sequence because, especially while you are learning, a fixed sequence keeps you out of trouble. Each step leaves the design in a known state that the next step expects. Once it is second nature you will bend the order to suit yourself, skipping ahead and doubling back as real work demands. Use it as it is to begin with, and modify it as you see fit later.
Each step below is written as a small reference entry rather than a tutorial. For every step I give you three things: what the step is and why it sits where it does in the order, and then, in bold, how you know the step is finished. Where a step has one mistake that catches almost everybody, I call it out too. The mechanics of how to click through each step are what you practised in Chapters 2 and 3, so I will point back there rather than repeat them.