
I got a brand-new Raspberry Pi Pico W, courtesy of Sunfounder, and took a day to play with it. In the video (above) and the article in this page I have documented my experimentation with this powerful new microcontroller board.
Table of contents
List of hardware, software, resources
In this experiment, I used this hardware:
- A Raspberry Pi Pico W.
- A 220Ω resistor.
- A red LED.
I also used this software:
- Thonny editor
-
Serial (Mac OS).
- Instead of Serial, you can use:
- The Arduino IDE‘s serial monitor (all platforms).
- Serial Port Monitor (Windows)
- GNU Screen (command line, Linux, Unix, Mac etc)
- Instead of Serial, you can use:
Other useful resources that I mention in the video:
- Raspberry Pi Pico and Pico W documentation.
- MicroPython UF2 binary from Raspberry Pi ORG.
- MicroPython on the Raspberry Pi Pico documentation.
- MicroPython UF2 binary from MicroPython ORG.
- Raspberry Pi Pico W Datasheet.
- Raspberry Pi Pico C++ demos.
- Lot’s of good stuff at Sunfounder.
Wiring
For the experiment, the wiring is very simple. As I have not decided what I want to do with my Raspberry Pi W, I decided not to solder the headers. I still wanted to use an external LED for the blink example.
So, I wrapped the LED and resistor pins together (no soldering needed). Here is how to do this:
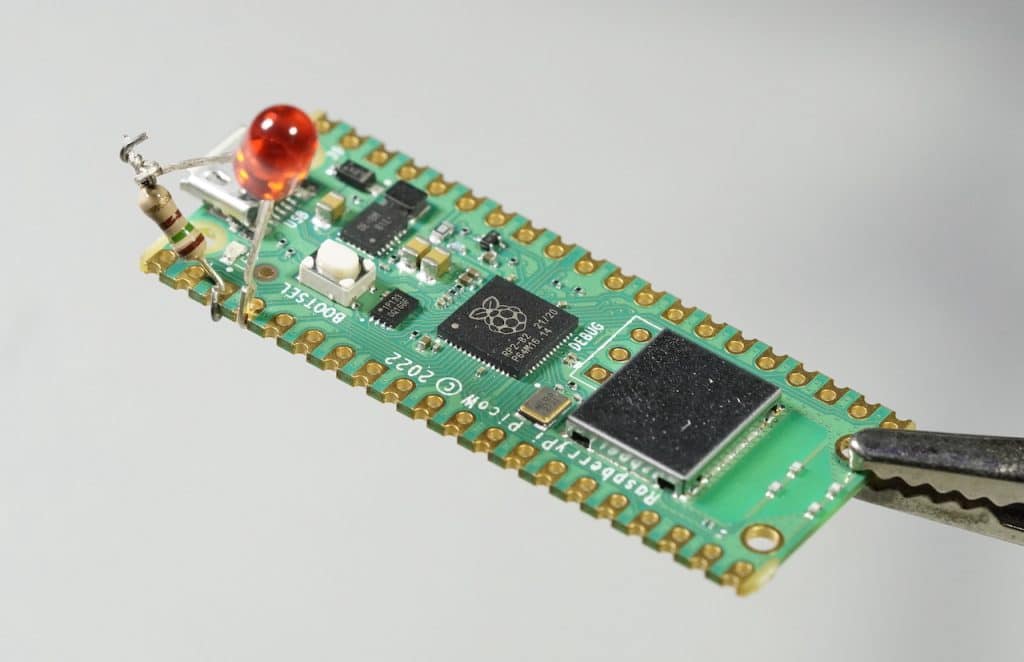
- Find the cathode of the LED (the shorter of the two pins). If both pins have the same length, use the diode function of your multimeter to determine the cathode.
- Take one pin of the resistor, and wrap it around the cathode pin of the LED.
- Take the free pin of the resistor, pass it through the GND pad of the Raspberry Pi Pico. There are several GND pins on the Raspberry Pi Pico; you should use the one that is next to the GP2 pad, close to the USB connector. Gently bend the resistor pin in a loop and wrap it around it self to minimize movement.
- Take the free pin of the LED (the anode) and pass it through the GP2 pad of the Raspberry Pi Pico. Gently bend the LED pin in a loop and wrap it around it self to minimize movement.
- In the end, your resistor and LED should be attached to the Raspberry Pi like in the example in the photo (place your mouse pointer over the image to zoom in).
Example code
In this experiment I used simple Micropython code to control the LED, check the model of the Raspberry Pi Pico, and fetch data from the Internet. You can find this code here:
Make the LED blink
>>> from machine import Pin
>>> led = Pin(2, Pin.OUT)
>>> led.value(1)
>>> led.value(0)
Get the model of the Raspberry Pi Pico
>>> import sys
>>> sys.implementation
(name='micropython', version=(1, 19, 1), _machine='Raspberry Pi Pico W with RP2040', _mpy=4102)
Connect to Wifi and fetch data from the Internet
import network

ssid = 'wifi-id'
password = 'wifi-password'

wlan = network.WLAN(network.STA_IF)
wlan.active(True)
wlan.connect(ssid, password)

# Make GET request
import urequests
#r = urequests.get("https://www.google.com")
r = urequests.get("http://date.jsontest.com")
print(r.content)
r.close()
Learn MicroPython with the ESP32
With this course, you will learn how to use the MicroPython programming language with the ESP32 microcontroller.
MicroPython is a high-level programming language specifically designed for microcontrollers and resource-limited embedded devices. Think of MicroPython as “Python for Microcontrollers”.