Arduino tutorials for beginner and intermediate Makers
Do you want to learn how to use the Arduino in your projects?
No programming or electronics experience?
If you are a Maker, STEM teacher or a student interested in programming, electronics, robotics, automation or the Internet of Things, then the Arduino is the multi-tool that you must master.
Learning how to use any new technology well comes down to these critical factors:
Use Quality educational Content
Learning from the best available sources can make a huge difference in how quickly and how well you can master whatever it is that you want to learn. Excellent educational sources will not only teach you well and fast; they will also delight you.
Be an Active Learner
Technology education is hands-on.
The only way to truly learn something new is by executing your own simple experiments.
Each experiment is an opportunity to learn a new skill, capability, tool, or feature.
Work on Realistic Projects
Once you have acquire a few new skills, how can you consolidate your knowledge so that you can create a fully working machine, like a robot or a plant incubator? Project work is your opportunity to bring together everything you learned into a single activity.
Why learn Arduino?
By learning how to use the Arduino, you will learn about a host of related skills that will open the door to incredible possibilities.
Opens the door to technology education
The Arduino is not only the best way to learn an extensive array of modern technologies, but also the tool that can enable you to create the machines that you imagine.
Friendly for beginners with room to grow
Because the Arduino was created with education in mind, it is the best learning tool for getting started, even if you have never written a line of code before. And, while the Arduino is the perfect learning and creativity tool for people getting started, it is also an amazing platform for advanced designs.
Extensive ecosystem
The Arduino platform has grown into a comprehensive array of hardware and software tools based on which you can create anything you imagine, and it also opens the door to learning many relevant and specialized technologies.
1
Getting Started with the Arduino
So, you have heard about the Arduino and some of the amazing things that you can do with it, but don't know where to start? Perhaps you have some or even no experience with electronics and programming?
No problem. We all have to start somewhere. If you are totally new to the Arduino, this is where you should start.
What is the Arduino?
In this article, you will learn about the Arduino and how it came to be what it is today: an amazing learning and creativity tool.
I also want to try and dispel a myth. The myth is that to learn electronics, and to become a Maker, you need to be a naturally-born tech wizard.
This is important, because I common complain I receive from my students is that “I am not good with technology” or “my mind can’t think like a computer”.
Unless you can deal with inner inhibitions such as these ones, it will be very hard, almost impossible, to become good at anything that matters.
Common Arduino boards, problems and opportunities
The Arduino is a word that describes a whole range of things: that boards that we use to plug components into and create circuits, the editor that we use to do the programming, and the language that we use in the editor.
But before looking at the Arduino boards that make up the core of the Arduino ecosystem, I’d like to suggest that you look at the Arduino as a problem-solving tool, not only a learning or electronics tool.
The Arduino is truly a blank canvas on which you can design solutions to problems
In this article, you will learn about some of the most important Arduino boards and explain that problems are, in reality, opportunities to learn.
Types of hardware that you can connect to an Arduino board
The open-source nature of the Arduino board and software has allowed the community to create a huge range of hardware components that allow us to create elaborate machines.
The Arduino can’t do much on its own. Its purpose is to communicate with external hardware, and to control.
There are many different kinds of hardware that you can connect to the Arduino. And there are a lot of them.
In this article, you will learn about the types of hardware that you can use with your Arduino.
The Arduino programming environment
One of the best features of the Arduino as a learning and creativity tool is that it is very simple to program it.
This simplicity comes from the bare-minimal and friendly application that we use to do the programming: The Arduino Integrated Development Environment (IDE).
Unlike the intimidating and complicated IDEs used elsewhere, the Arduino IDE is outright simple and friendly to use.
In this article, you will learn about what it is like to program the Arduino. You will install the Arduino IDE, and use it for the very first time to upload your first example sketch.
Arduino libraries and how to install them
After the simple and friendly programming environment, the second amazing feature of the Arduino that makes it such a great choice for creative people, is the huge range of libraries.
Libraries are collections of programs that other people have written that you can use in your own programs. By using libraries, you can build on top of other people's work, and quickly implement functions in your gadget.
Libraries make prototyping and experimenting with ideas on the Arduino very fast.
In this article, you will learn how to install and use Arduino libraries.
The basics of Arduino programming (part 1): program structure, functions, variables, operators
The Arduino is a small computer that we can use to control the world around it (via things such as motors and lights), and also sense the world (via sensors that can detect light, temperature and much more). Everything that the Arduino can do, you must program it.
If you have never done any programming, do not worry. Learning programming is much easier than learning a human language.
In this article, you will learn the very essential of programming, and with this knowledge you can start writing simple programs ("sketches") for your Arduino. In this first part of the programming tutorial, you will learn about:
- Program structure,
- Functions, variables,
- Operators.
The basics of Arduino programming (part 2): Loops, conditions, objects, inputs & outputs
In part 1 of this programming tutorial, you learned about the basics of programming the Arduino. You will build on this knowledge and learn three new important concepts:
- The programming structures that allow your Arduino (and any computer) to make decisions and repeat instructions.
- Classes and objects, that allow us (the programmers) to create reliable programs that resemble concepts from our real world experiences.
- Inputs and outputs, that allow us to connect external components like buttons and lights, to the Arduino.
Let's take it one step further and introduce these new concepts:
- Loops,
- Conditions,
- Classes and Objects,
- Inputs and Outputs.
2
How to use buttons, lights and sensors
Once you have completed the tutorials in Part 1, you are ready to roll up your sleeves and do your first few experiments with your Arduino.
To follow along, you will need an Arduino and a few simple hardware components. If you don't have an Arduino at the moment, you can try these experiments with a simulator (I'll show you how to use it in each tutorial).
Using peripherals (actuators and sensors) with your Arduino
The real power of the Arduino comes when you combine an Arduino, a sketch, and one or more peripherals. These peripherals are devices that can sense the world (sensors) or change something in it (actuators).
In this series of tutorials, you will learn how to use some of the most common sensors and actuators, and take your first steps towards creating your first gadgets.
Simple output: make an LED blink on and off
The most common way to start learning how to control an external device with an Arduino, is to play with an LED (a Light-Emitting Diode), and make it turn on and off. Once you know how to do this, you already know how to control many other kinds of devices that have these two on/off states, like relays and motors.
In this article, you will learn how to control an LED by turning it on and off. If you don't have an Arduino handy, I'll show you how to use a simulator instead.
Simple output: make an LED fade on and off
Now that you know how to make the LED blink on and off, let's try something more interesting: make the LED turn on and the off gradually. This give a nicer listing effect, and will also help you learn how to control simple devices like LED and motors with a high level of precision.
In this article, you will learn how to make an LED fade on and off. I will also show you how to do this in the simulator, in case you don't have the necessary hardware.
How to use a button
A button is a simple on-off switch. There are many kinds of buttons, distinguished by the mechanism used to close or open a circuit, but essentially all buttons do the same thing: they open or close a circuit.
In this article, you will learn how to use a momentary button to control an LED.
How to use a potentiometer
A potentiometer is a device that allows you to change the value of a resistance by turning a knob.
In this tutorial you will learn how to use a potentiometer to control the brightness of an LED.
How to use the Infrared line sensor
An infrared line sensor is a simple device made up of an infrared emitting LED and an infrared sensitive photo-resistor. You could use one of these sensors to build a robot that follows a dark line on the floor, or your own heart rate monitor.
How to measure light with a photo-resistor
Measuring light with the Arduino is really easy. There are many sensors capable of detecting or measuring light, but the photo-resistor is one of the easiest to use. A photo-resistor is simply a resistor in which the resistance changes in accordance to its exposure to light.
How to detect tilt and impact
In many cases, knowing the exact force and direction applied to our gadgets is not necessary; just knowing that a bottle has been tipped over is enough to know that the lid should close automatically.For simple cases like that, a 3-axis accelerometer is an overkill. We could use a simple sensor that can detect the shock of an impact or for being upside down.
How to measure acceleration
Having the ability to measure acceleration is very useful. For this purpose, we use an accelerometer. Accelerometers are embedded in smart phones to provide orientation information, and for making games that are played by moving a controller device.
Measure the distance to another object with an ultrasonic sensor
Imagine a robot moving around in a room. The robot can use a distance (or proximity) sensor to detect that it is approaching a wall or another object.
Or, you could use a proximity sensor to automatically open a door if a person is within a meter of the sensor.
Detect motion with an infrared sensor
Passive infrared (PIR) sensors are very common and typically found in home electronics. They detect the heat that is emitted by the body of a person in a room as it contrasts against the background heat.
This kind of sensor is perfect for security applications.
Measure temperature and humidity with the BME280
One of the most popular experiments with the Arduino, is to build an environment monitor gadget that measures temperature, humidity and barometric pressure.
You can do all that with a single sensor, the BME280.
3
Create circuits without a breadboard
using the Grove system
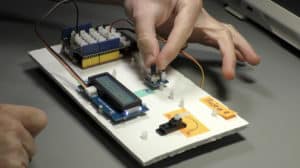
The Grove system uses a standard connector to replace the breadboard.
Breadboarding is a simple way to create circuits. However, as your circuits become larger, the risk of introducing wiring errors increases, your implementation and troubleshooting speed decreases, and your final build is sensitive to any small movement or bump.
How about get rid of the breadboard and replace it is a simple socket-based system? This is what Grove is about. With Grove, you can connect your peripherals to your Arduino using simple snap-on connectors. No breadboard, and no jumper wires. Learn all about Grove for Arduino with our tutorials.
What is Seed Studio Grove?
The Grove system is a set of hardware components that make it super easy and quick to create circuits without the need for breadboards and jumper wires.
The Grove Starter Kit for Arduino
The best way to get started with Grove for the Arduino is by purchasing the Grove Arduino Starter Kit.
This is the kit that I also use in my course Grove For Busy People.
In this article, we'll take a look at the components that come with the kit. I will briefly look at the components, and later in this series of articles (and in the course), I'll show you how they work.
The Grove Base Shield for Arduino
In this article, I will describe the Grove Base Shield and how you can use it to connect Grove modules to your Arduino Uno (or any compatible board).
The Seeeduino Board
In this article, you will learn about the Seeeduino, a board that is 100% compatible with the Arduino Uno.
Experiment: Momentary button
In this article, I'll show you how to use a Grove button module. As you'll see, wiring will be a breeze, with precisely zero margin for error.
Experiment: LED module
In this article, I'll show you how to use a Grove LED module. Just like with the button module, wiring will need only a few seconds and has not risk of error.
4
How to use DC motors, Stepper motors and Servo motors
If you want to create gadgets that move, you will need to use motors. There are three major type of motors: DC (direct current), Stepper and Servos. Each type is optimised for specific operations. With an Arduino, an appropriate driver module, and relatively simple code in your sketch, you will be able to use all three types in your robots, vehicles or automations.
The purpose of the tutorials in this segment is to provide with you a learning resource that can help you learn how to use DC, stepper and servo motors quickly.
Unipolar vs bipolar stepper motors
What is the difference between unipolar and bipolar stepper motors? It's in the coils.
Bipolar stepper motors are generally able to produce more torque than unipolar stepper motors, and are more efficient.
However, they are more complicated to drive (="operate"). The main difference between the two types of stepper motors has to do with the way that the wire winding is constructed.
How to drive a DC motor without a motor driver module
DC motors draw currents that can be beyond the ability of the Arduino to supply. Transistors can be used as very simple at fast on/off switches and are an excellent option for designing simple motor controllers.
Any DC motor can be driven with PWM simple signals that can be generated by the Arduino Uno and virtually any other microcontroller. Just like you can control the intensity of an LED, you can use PWM to control the rotational speed of a DC motor.
Stepper motors move in steps. The width of a step is determined by the physical characteristics of the motor's rotor. With a clever technique called "microstepping", your stepper motor can double, quintuple or even octuple its precision. Read this article to also learn new words.
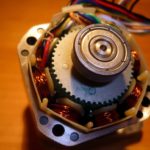
Stepper motors are capable of moving their rotor on specific positions along a 360° arc. The exact positions are defined by the positions of the toothed electromagnets positioned on the central rotor.
Direct current motor
Direct current motors represent the easiest way to add movement to your projects. A direct current or DC motor can be a very cost effective and flexible solution for all sorts of projects: robots, cars, boats, toy helicopters, home automation, and many more.
In this article, you will learn how to use a DC motor through a series of three projects.
To implement the projects, you will need two 5V DC motors and a L289N motor driver module.
Project 1: Control two DC motors with your Arduino and the L298N controller
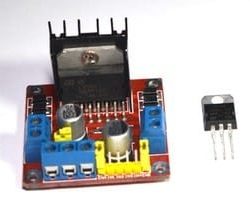
The L298N motor controller is a low cost and simple way to control two DC motors at the same time. It works well with the Arduino, and once you learn how to use it, you will be able to apply it on a wide range of DC motors.
In this article you will learn how to control two 5V DC motors with your Arduino.
To enable the Arduino to safely control the motors, you will use the L298N motor controller module.
Project 2: DC motor speed and direction control with a potentiometer
In this project, you will learn how to control the speed and direction of spin of the DC motor's rotor. You will use a potentiometer to provide input to the Arduino, and the map() and analogWrite() functions in your sketch to make this work.
In this experiment you will take the next step. You will learn how to control the speed and the direction of the two motors. In the role of the user interfaceyou will use a 10 kΩ potentiometer.
Project 3: DC motor speed control with a distance sensor
Let's try a variation of the Project 2 experiment: control the speed of the DC motor with an ultrasonic distance sensor. Of course, we'll use an Arduino and the L298N motor driver.
In this article, I will describe one last experiment that involves a DC motor. We will connect an ultrasonic distance sensor in the place of the potentiometer, and use that to control the rotational speed of the motors.
Project 1: Control a servo motor with a potentiometer
Servo motors are used in applications where precision movement is required, such as in robotics. It is very easy to control one or more servo motors with the Arduino. Learn how with this article.
The DC motor is a versatile, low-priced solution for providing motion to your projects. A “weakness” (or characteristic) of the plain vanilla DC motor is that when you apply voltage to its coil, it will spin as fast as its mechanics and load allows.
Project 2: Servo motor contol with VarSpeedServo
Well-crafted libraries allow us to improve the quality of our gadgets with very little additional effort. In this article, you will learn how to use a simple library to improve your servo motor controller sketches with minimal changes in your code.
The build in Servo library is good and very simple to use. However, there’s more we can do with the hardware than it allows us.
5
Arduino peripherals, I2C, PIR, temperature sensors, acceleromenter & tips
The Arduino can't do much on its own. There are countless peripherals that can perform virtually any operation you can think ok. We connect these peripherals to the Arduino using the Arduino's digital input/output pins. You will be able to achieve a lot by gaining a basic understanding of how some of the most common peripherals work.
The purpose of the tutorials in this segment is to provide with you a learning resource that can help you learn how to use common peripherals such as the PIR sensor, the MCP9808 thermometer and the MPU6050 motion sensor, as well as to understand the I2C protocol.
How do you find out the address of an I2C device that is poorly documented?
Getting useful motion data from the MPU-6050 device
Modern gadgets are mobile and can be "aware" of their motion with the use of motions sensors. There are integrated devices that combine (fuse) multiple motion sensors to produce accurate and reliable motion information for your gadget.
6
Arduino programming guide series
This is a collection of articles with programming tips, tricks, ideas and methods that will save you time and improve your sketches. Understand PWM and buffer overflow, learn how to use the map() function, save on RAM use, improve efficiency by avoiding delay(), and lots more.
We use the println() function to print a string to the serial monitor. The same function is overloaded with a second parameter that allows us to designate the type of data we want to display.
What is the "_t" in "uint8_t"
The Arduino language contains several easily recognizable variables, like "bool", "byte", "int" and "char". But, below the surface, the Arduino language is really a subset of the C language that works on microcontrollers. With it, you will find many specialized data types designed to ensure compatibility across devices that don't always treat a byte the same way.
What is the gibberish in your Telnet output?
When the Serial object in your sketch and the Arduino IDE serial monitor are set to the same speed, you would expect that clear, readable text would appear on your screen.
Sometimes it doesn't. What's going on? is it a glitch? what can explain the gibberish that appears?
How to deal with the millis rollover
The Arduino contains a 32-bit register that is actually a counter. It counts the number of milliseconds elapsed since the time you powered-up the Arduino. We use this counter to count time. But, what happens when the counter reaches its maximum value? Let's figure it out with the help of an example.
The ternary operator
As you become more skilled in programming, you will begin to notice that style matters almost as much as functionality. An element of style in programming is the ability to shrink code without altering its functionality. This results in smaller, more concise programs.
A closer look at line feeds and carriage returns
If you have an Arduino application that must parse an HTTP response, it helps to understand the difference between the two most common special characters: line feed and carriage return. Once you understand this, you will be able to reduce the complexity of your parser by half.
Understanding references and pointers
The topic of memory pointers in C and C++ is a known cause of intense headaches for many of us. It is the one topic that will most often scare people away from C/C++ and into "higher level" languages like Python and Ruby. But, with a bit of patience, you can understand it.
Concurrency with the Scheduler library on the Arduino Due and Zero
The Arduino Due and Arduino Zero are far more powerful than the Arduino Uno. They use microcontrollers based on 32-bit ARM technology. With the help of the Scheduler library, you can use them as potent multitasking machines.
Bitshift and bitwise OR operators
Programming a microcontroller entails much more bit-level manipulation than what is common in general computer programming. Bitwise operators like "<<", ">>" and "|" are essential. Let's look at two of the most common bitwise operators, bitshift right and bitwise OR.
Understanding the volatile modifier
Variables can be modified at different parts of a program. Often, it is not possible to predict when a particular variable may be accessed for a read or write operation. This is particularly true when a variable is tied to an interrupt service routine. So, how do we ensure that a variable always contains a correct value? This is where the volatile modifier comes in.
Optiboot, a free upgrade for your Arduino
Your Arduino's microcontroller contains special software, the bootloader, which makes it very easy to upload new sketches. It is possible to replace the default bootloader with a more efficient variation and hence implement a software upgrade to give your Arduino more space for your sketches and faster uploads.
A real-time OS for the Arduino
A real-time operating system is optimized so that processing is completed within tight time bounds, and execution is consistent and predictable. It is the preferred operating system for critical applications. And a version of it works on the Arduino Uno.
7
Arduino displays guide series

LCD screen - I2C wire wiring (soon)
We are working on this guide page, please check again soon.

TFT LCD screen (soon)
We are working on this guide page, please check again soon.

The Seven Segment Display (soon)
We are working on this guide page, please check again soon.

128x64 OLED (soon)
We are working on this guide page, please check again soon.
8
Arduino communications

Coming soon...
We are working on this guide page, please check again soon.
Other recommended articles about the Arduino
We publish new articles about the Arduino and related learning and creativity technologies regularly. Here are some of our most popular articles that aren't listed in the groups above:
Consider our Comprehensive Arduino and Electronics tutorial courses
Thousands of students have already taken our video courses to learn how to use the Arduino and understand how electronics work.
Video on demand
With our video courses, it's like having a tutor showing you how to create circuits and write programs, one step at a time.
Help is here
If you need help, you can use our Community spaces tool to ask your questions, available in each lecture.
Keep calm and learn
Learn in a calm, distraction-free environment. No advertisements, no cat and dog videos to break your concentration. Just learning.
Not sure where to start? We can help you.
Do you have very little or no prior experience in programming and electronics? If yes, we recommend this two-course bundle:
Arduino Step by Step Getting Started
Arduino Step by Step Getting Started will teach you how to program the Arduino and use many of the most popular and useful components through practical and fun experiments.
How to setup your electronics workbench
The Electronics Workbench: A Setup Guide, will help you setup a dedicate area in your home or school as an electronics workbench. There, you'll be able to learn and create your gadgets.

Let's make something together
Hi, I’m Peter.
I am an online educator and Maker, author of Maker Education Revolution, KiCad Like a Pro, and founder at Tech Explorations.
I create all the content on the Tech Explorations website.
Why? Because, as I already mentioned, I'm an educator and a Maker, and I have a Mission.
My mission is to help people learn electronics, programming, printed circuit board design, and lots more. Most importantly, I want to help as many people as possible to enjoy their technology education adventures.
After a 15 year career as a University Lecturer, I decided to become a Maker, again. Like most of us, as a child, I was curious, and I learned how things worked by experimenting with them (usually, this meant taking them apart and hoping to not loose any screws as I was putting things back together).
Growing up, I became an Engineer, only to loose my childish curiosity in the name of pursuing a career.
I became a child again once I got my first Arduino. With it, I started creating thing, tinkering with components, testing ideas. Even though I was a "career educator", it was only now that I realised how wrong my last 15 years of education had been. I was partly responsible for destroying the creativity of thousands of students, just like mine had been destroyed in the name of being a "proper adult".
At Tech Explorations, my job is to learn and to create. I learn what I am curious about, and I create educational content. This content is the record of my learning.
I don't create this content to teach "students". I create it to help learners learn things that they want to learn.
At the end of the day, we are all learners, and we learn from each other.
I sincerely hope that through the content I create at Tech Explorations, as many people as possible will be inspired to re-kindle their childhood curiosity, learn, and create amazing things.
Learning is social
The Internet has brought a revolution in publishing and learning. It is the biggest repository of knowledge that has ever existed, and it is getting exponentially bigger. For anything you want to learn, there's a good chance that someone has written a blog post or created a video about it.
Perfect! Well, not exactly. While there is a lot of great content out there, much of what is available on the Internet lacks quality, and most important, lacks the human connection.
The best learning is social. When you communicate with others that have been where you are now, you learn faster and better. You have someone to fall back when you need help, or discuss an idea when you are stuck.
At Tech Explorations, we support our students through our community tools because we know that this is the best way to learn and teach.
Helping is part of learning
Learning new skills and technologies is a journey into uncharted territory. It is much better if you have a map, and even better if you can "radio in" for help.
At Tech Explorations, we have made a big investment in our communication tools to make sure that no student is left behind. We have three levels of Support: Community Discussion Forums for each course, lecture-level Questions and Answers tool, and a Help Desk.
Our content is live and monitored by our team so that we can respond to student questions quickly. Speed is important because learning obstacles can have a devastating effect in our learning process, so we try our best to help our students smash through them.
Stay Calm And Keep Learning
The world and the Internet are extremely noisy places. Many "free" earning resources operate more like noisy open-air bazaars, with annoying distractions that aim to stop you from doing what you want to do (to learn something new) so that you can click on the next video (often about a cat doing a funny trick).
The loss of concentration alone accumulates to many hundreds of hours of lost learning productivity per learner per year.
Would you be able to learn how to program the Arduino in the food court of a shopping center? In a way, that's what many of us are doing.
At Tech Exploration, we have created a calm environment that is appropriate for immersive learning. Concentrate, turn off your mobile phone, start the lecture video, and follow on with the experiment.
That's all. Nothing else should compete for your attention.
The Path Forward
In this page we have given you lots of free and quality learning content, opportunities for hands on experimentation, and even larger projects that you can use to consolidate your learning. All that in a calm, learner-friendly environment.
A question I get a lot is "What should I do next?"
People that have just learned a new skill, like how to make an LED blink or spin a motor, are often overwhelmed. They have just grasp something new, but are having a hard time figuring out what is next.
It is totally understandable, and I have been there myself. In fact, I feel like that every time I learn a new thing, isolated from its possibilities.
Think about this: you just learned how to spin a motor. How can you build a robot out of that? What is the process of going from a single working component, to a system that brings together many components, into a working gadget?
The best answer I can give to this question is this simple process, plus a lot of perseverance (you need it when you decide to pursue something important):
- You need a project that excites you. This project gives you a goal, and even a path (although the path is not clear in the beginning). Think about what the project is about, and especially what it is supposed to do. This ("what is it supposed to do") is what gives you your project goal. You will need this for step 5 of this process.
- You need to analyse your project and break it down to its components. A robot is made of motors, motor controllers and microcontrollers, sensors, software, and a frame to hold everything together. Figure out what are main components in your project.
- Based on you analysis, figure out your level of knowledge in relation to the project components. You may have a good grasp of motors but lacking in sensor.
- Plan your prototyping process. This part of the process is critical, because you have to make several decision, that involve the hardware, software, and assembly of the gadget, but also the learning that you have to engage in in order to make this possible. You don't need to know everything before you begin, but you need to choose a place to begin. If you were to build a wheeled robot, for example, you could start with the wheel and motor assembly so that your robot can move, and leave the sensors for later. Why? Because you know how to use motors now. You can learn how to use sensors later. Like so many things in life, beginning is half of everything you do. The first iteration will give you the momentum and confidence you need to go for the second, third, until the last iteration.
- Repeat until the project is complete. The iterative process of prototyping is your guide. Each iteration solves problems and creates new ones. The new problems usually demand that you learn something new. Go on, learn it, and come back to continue with the current iteration. The project is complete when you have achieved the goal that you set in step 1. But here's the catch: In prototyping, like in life, everything is fluid. Your original goal was based on early assumptions of what you wanted to achieve, before you had actually done any work towards that goal. In the process of working towards your goal, the goal changes! Be mindful of that, and know that it is Ok. Enjoy the process, and the achievement of the result.
This is the process that I follow with my projects, including my books and my courses. Over time, you will become better at picking projects and especially analysing them so that what you eventually create is very close to your original goal.
The only way to build up your project management and gadget building skills is to do it.
And we are here to help you 🙂
Join the Tech Explorations Insiders
Want to make sure that you get notified when I release my next article or video? Then sign up below to join my list of Tech Explorations Insiders.
You'll receive email notifications whenever I release new content plus you'll get access to insiders-only updates that aren't published on the site!
We never spam, and you can unsubscribe at any time.
By submitting this form, you agree to receive educational and promotional announcements from Tech Explorations. Your personal details will not be shared with anyone outside of Tech Explorations, and you may unsubscribe at any time.
Last Updated 11 months ago.


