
In this post, I describe my first impressions after spending a few hours with the LabJack T4. I conducted five simple experiments, and recorded the process in a video.
You are probably familiar with test instruments like the multimeter or the oscilloscope, but did you know about the LabJack?
The LabJack is not a multimeter or an oscilloscope. It’s not a signal generator or some other kind of instrument that I can recognize. The LabJack seems to be defining a new category of tools for electronics engineers and Makers.
LabJack is a tool for electronics measurement and automation.
You can use it to do things like:
- take simple voltage measurements,
- check the state of an analog or digital output of a microcontroller,
- produce PWM signals,
- communicate with other devices or sensors using SPI, I2C, or other digital communication protocols,
- count the frequency of a square signal, and more.
You can access the LabJack directly via USB, or through your Wifi or Ethernet network. This means that you don’t need to connect it permanently to your computer. You can place it where you need it for your measurements.
The LabJack mixes functionality from various other instruments but offers the flexibility of an end-user programmable microcontroller and with support from a neat (=friendly and quick to learn) array of software applications.
I received the LabJack T4 model back in December, but only got around to play with it in the last few days. I had done some reading about this device and what it can do, so I wanted to try it out.
My first impression: Nice! For something with a high degree of sophistication and lots of capabilities, it is refreshing to experience trouble-free first steps.
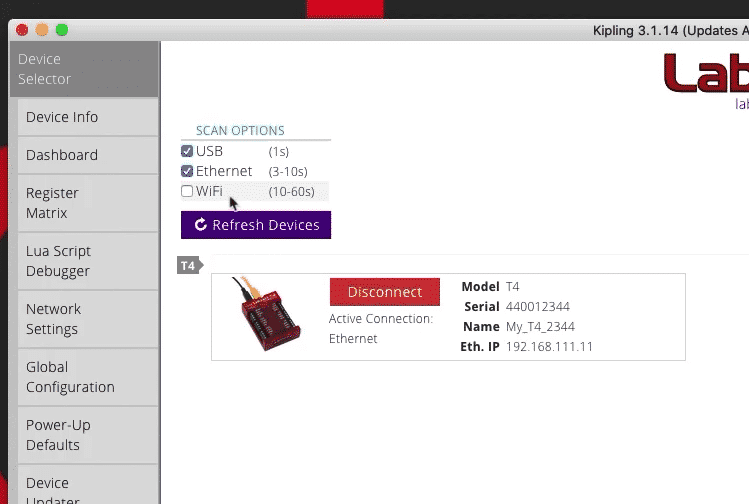
I plugged it into my Ethernet network, started Kipling, and detected it right away.
I was able to control an LED and read the state of a button in my first attempt. And this without having to read the documentation.
Well done to the people that designed the software. They succeeded in creating a powerful application that does not confuse and discourage beginners like me.
Within a couple of hours, I had completed 5 simple experiments and recorded a video to show you.
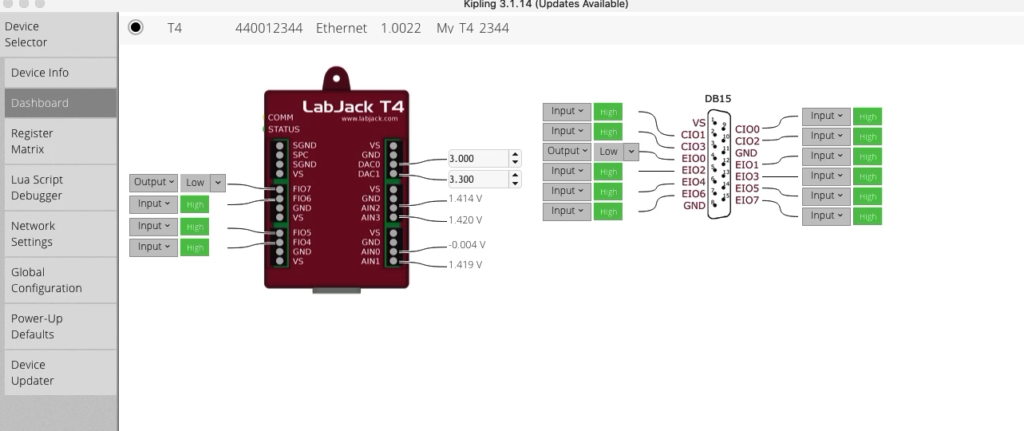
Here’s what I did (for the first 4 experiments I used the Dashboard graphical interface and wrote no code) :
- Control an LED using the Dashboard.
- Read the state of a button using the Dashboard.
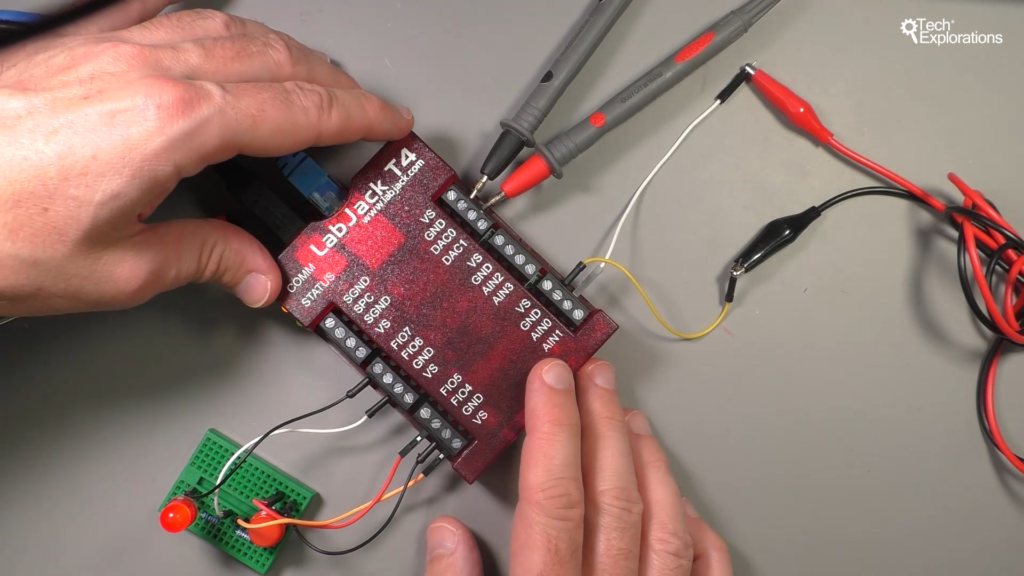
- Generated arbitrary voltage and measured it with my multimeter.
- Generated a 1Hz square signal and measured its frequency with my multimeter.
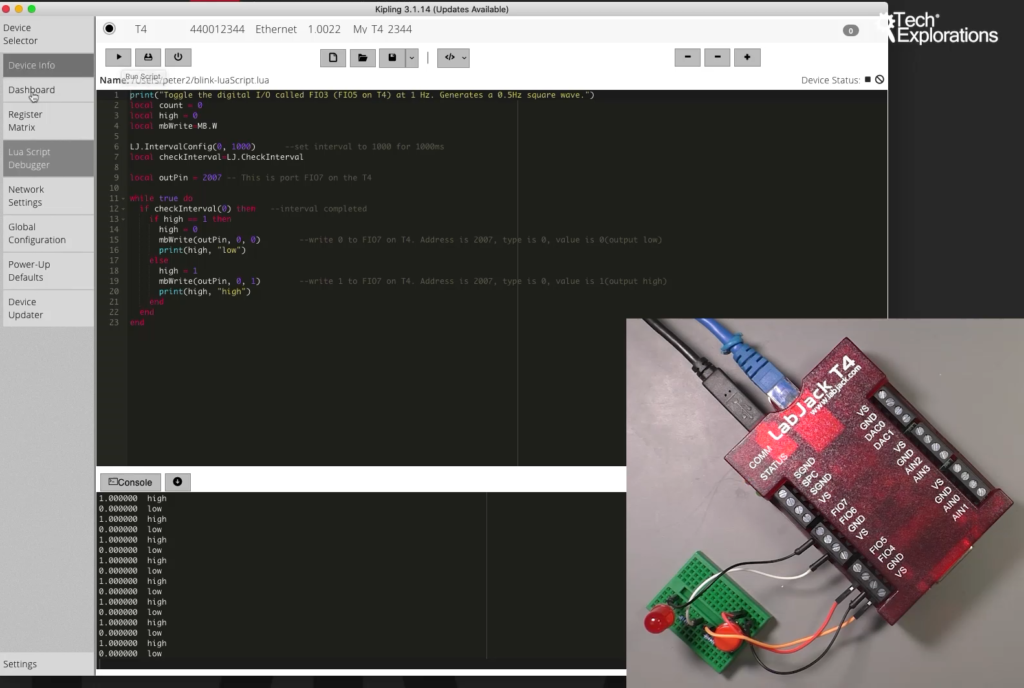
- Wrote a simple Lua script to make the LED blink.
As I worked my way through these experiments, I began to appreciate the capabilities of the LabJack. These simple experiments opened up my appetite for more, so I plan to design and conduct more learning experiments.
To unlock a seriously powerful tool:
- Get your head around the fundamentals of the LabJack system, such as the registers and line (more about this further down in this post),
- and learn a bit of Lua, which is not a problem if you have some experience with Python.
For example, LabJack’s pins (or “lines” as per the LabJack documentation) have an address. You can use this address in your Lua script to read and write its registers, and therefore enable functions.
Each pin exposes numerous functions controlled by registers. You can easily access those registers via the Kipling software. In most cases, it is a matter of changing a single value to enable or disable a function.
You can also access line and their functions through Lua scripts.
The LabJack has an onboard interpreter, and you can set it to run the script on power-up. This way, you can implement any measurement and data logging logic you can think of, and set LabJack to work independently of your computer and Kipling. Lua scripting in LabJack is something I want to explore more in the future.
I have documented my experiments in this video. Please watch and feel free to comment or ask questions. Is there any experiment you suggest I should try out? Have you played with a LabJack? What do you do with it?
Disclosure: In case you are wondering, LabJack has given me a LabJack T4 to play with, but they did not pay me or promised to pay for this blog post. I did not receive any “VIP” support to help me produce the video or this post. I didn’t have to ask for assistance as I was going through my experiments because everything just worked. I decided to write this post in addition to the video because I genuinely enjoyed playing with this device 🙂