Node-RED guide series
Introduction to Node-RED: examples and documentation
The Guides in this series are dedicated to Node-RED. Learn about Node-RED, understand what you can do with it with the help of examples, how to install it, and how to use some of the basic nodes that come with it.

Hi and welcome to the Node-RED guide series from Tech Explorations.
In this guide, you will learn about Node-RED through examples. Starting with this article, and continuing with the rest of the articles in this series, I'll show you how to install Node-RED on your Raspberry Pi, explain the use of some of its most important nodes and how they work inside simple flows.
What is Node-RED?
Node-RED is a programming tool.
Actually, a better term to describe it is as a "programming environment".
Node-RED uses graphical flows and nodes, which have individual components in a flow to essentially create a program. What I really like about Node-RED is that it is both graphical, so it gives you the visual capability of creating a program but, also, it allows you a lot of functional control through JavaScript. JavaScript is the programming language that is underlying Node-RED.
Node-RED is a programming environment that operates inside a browser.
You use Node-RED to create graphical programs, which are called flows.
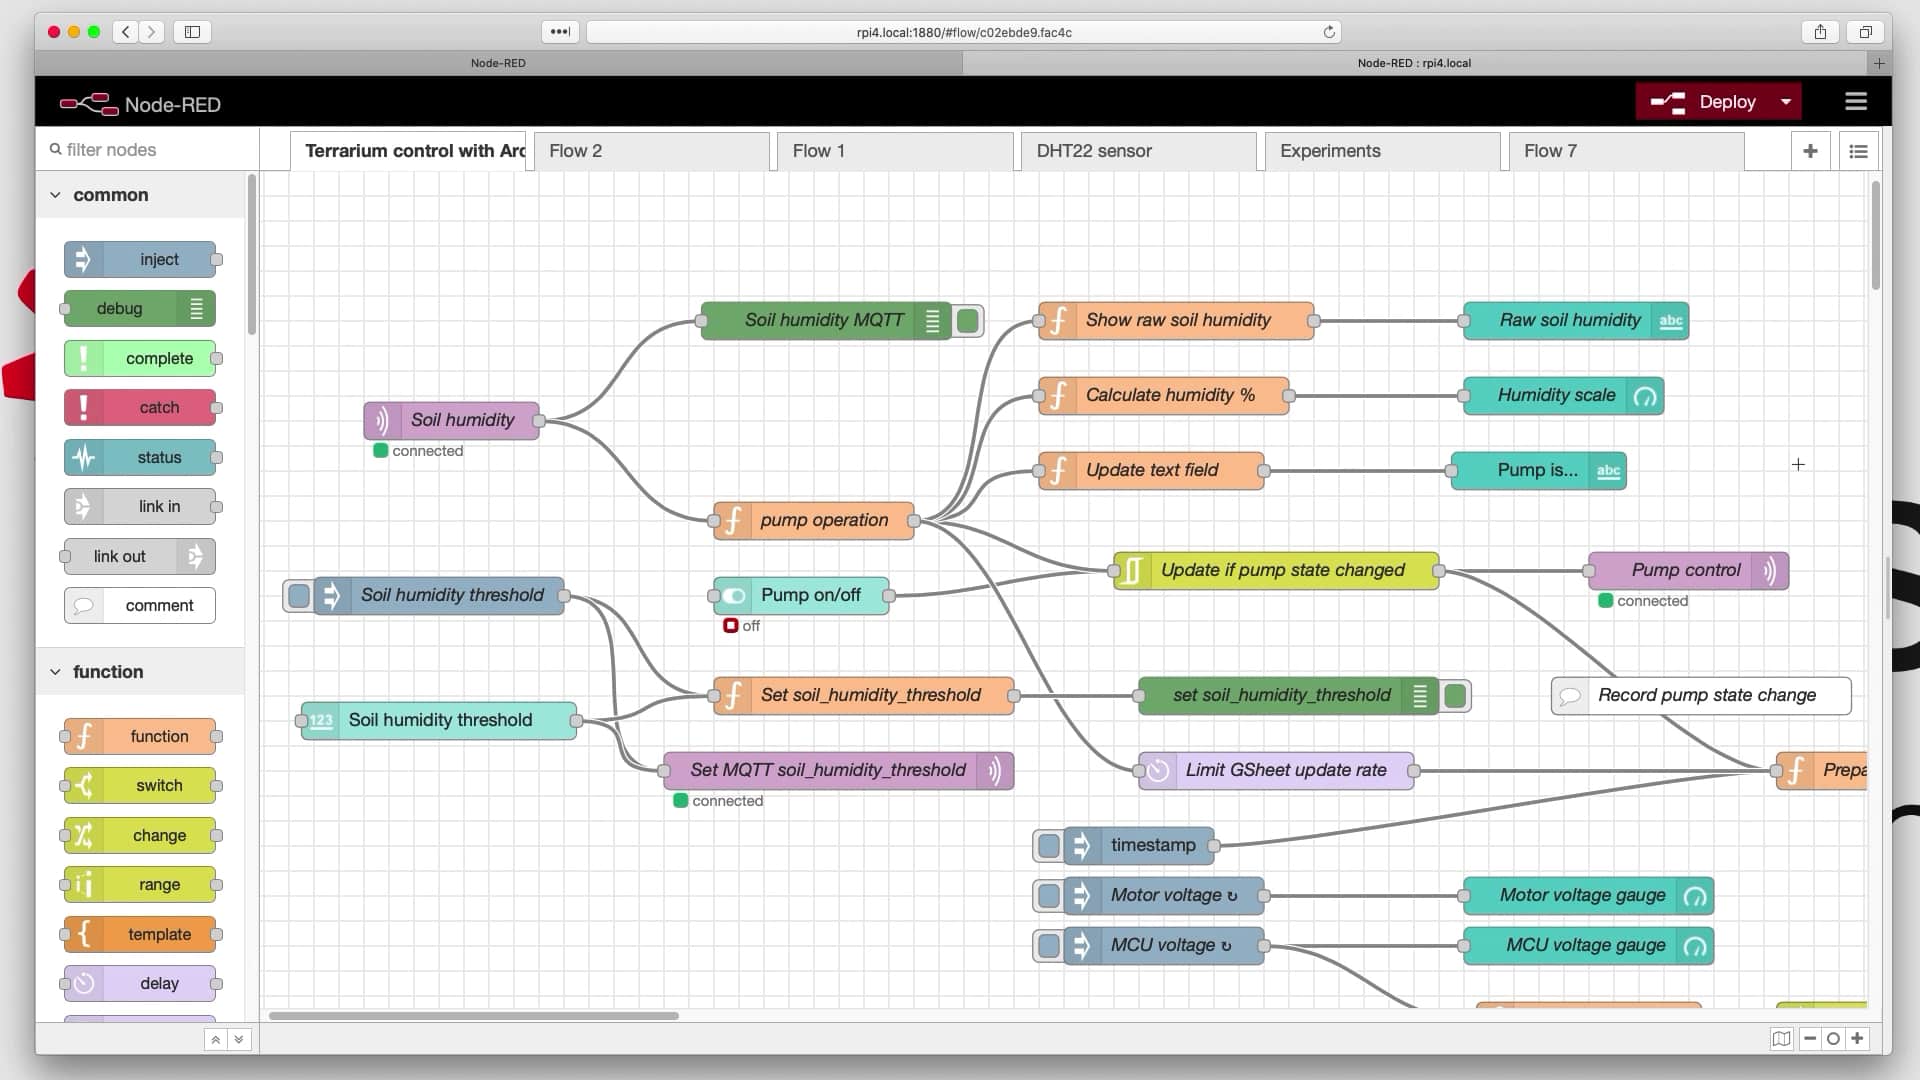
Flows are composed of nodes, which are rectangular objects that you see in the example below.

An example flow from the course.
To construct a flow we use a drag and drop interface. With this interface, it is easy to assemble nodes in configurations that result is a program that does something useful. Each node is pre-programmed to do something specific (similar to a function in a text language line Python or Ruby). You can create custom nodes that contain your choice of JavaScript, similar to custom functions in text languages.
Node-RED comes with several built-in nodes, but you can also install third-party nodes. Just like in the Arduino, you can install third-party libraries, and I'm going to show you more about this in a moment.
The name Node-RED comes from the underlying technology on which it is built, which is Node.js, which is a JavaScript framework. It's a very lightweight development environment and runtime environment, which makes it excellent for creating applications that are supposed to be very nimble and very fast in their execution, so they can run on low-cost hardware such as the Raspberry Pi.
Node-RED is open source. And as a result, there's a lot of people that are contributing to it. It's been around for a long time, and it's really stable and used by hobbyists and large corporations alike.
Node-RED home on the Web
The home of Node-RED on the web is nodered.org.
Take a few minutes to browse through the Node-RED website. You will find information about its features, "flows" (the term that means "Node-RED program"), and "nodes", which are the functional components of a flow. And just scrolling down this page, you will see its basic features.
Demonstration
In the video that I have included at the top of this page, you can watch a demonstration of the Node-RED. It starts around the third minute of the video.
I have done a fresh installation of Node-RED here installed on my Raspberry Pi 4. I am demonstrating one of the latest versions of the flow that makes up the brains of the terrarium controller from my video course.
In the demonstration I show:
- The Node-RED web-based flow editor.
- Use of tabs to run many flows at once.
- Dive into several nodes, such as the one for the DHT22 sensor, the MQTT-in node, the function node, the HTTP Post node, and more.
This flow implements a full automation control and IoT system, that works in tandem with an ESP32 to control a simple terrarium.
You can use specialized nodes to do things such as:
- inject timestamps if you want to keep track of time,
- manually trigger another node,
- inject text, numbers, JSON or other data-types in the flow,
- print out debug notifications during the flow execution,
- implement websocket functionality
I encourage you to watch the demonstration in the video for the details.
Documentation
Node-RED has got some amazing documentation.
If you're just starting now, I recommend you have a look at Getting Started, and then the User Guide.
In Getting Started you will find information on how to install the Node-RED on a variety of computers. This is the source that I also follow in the next article of this series, where I do a fresh install of Node-RED on my Raspberry Pi.
In the documentation you will find tutorials and a cookbook which are also very useful. The cookbook, for example, tells you exactly how to do specific things. So, a fairly comprehensive list here.
Let's move on to the next lecture now, where I'll show you how to install Node-RED on the Raspberry Pi. Just keep in mind that the Raspbian OS or Raspberry Pi OS does come with Node-RED already installed, but I prefer to just go for a fresh install, so we have total control of what is running on your Raspberry Pi.

Learn Node-RED and how to use it with the ESP32
This course will guide you through the construction of an automated control system. The deliverable is a Terrarium controller.
Along the way, you will learn a great deal about useful technologies such as the Node Red programming environment and MQTT.
Jump to another article
1. Introduction to Node-RED
2. Install Node-RED on the Raspberry Pi
3. Configuration
4. Nodes
5. Flows
6. Messages and Variables
7. The "complete" node
8. The "catch" node
9. The "link out" and "link in" nodes
10. The "switch" node
11. The "range" node
12. The "delay" node
13. The "trigger" node
14. The "RBE" (Report by Exception) node
Last Updated 2 years ago.
We publish fresh content each week. Read how-to's on Arduino, ESP32, KiCad, Node-RED, drones and more. Listen to interviews. Learn about new tech with our comprehensive reviews. Get discount offers for our courses and books. Interact with our community. One email per week, no spam; unsubscribe at any time