The "switch" node is like the "if" statement in a text programming language.
Like the "if" statement, you can use the "switch" node to define one or more logical rules. According to the truthfulness (or falseness") of those rules, the "switch" node can be configured to trigger one or more paths of execution.
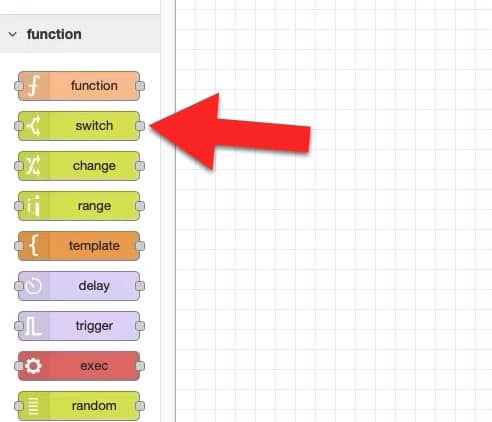
You can find the "switch" node in the "function" group of the left tool bar.
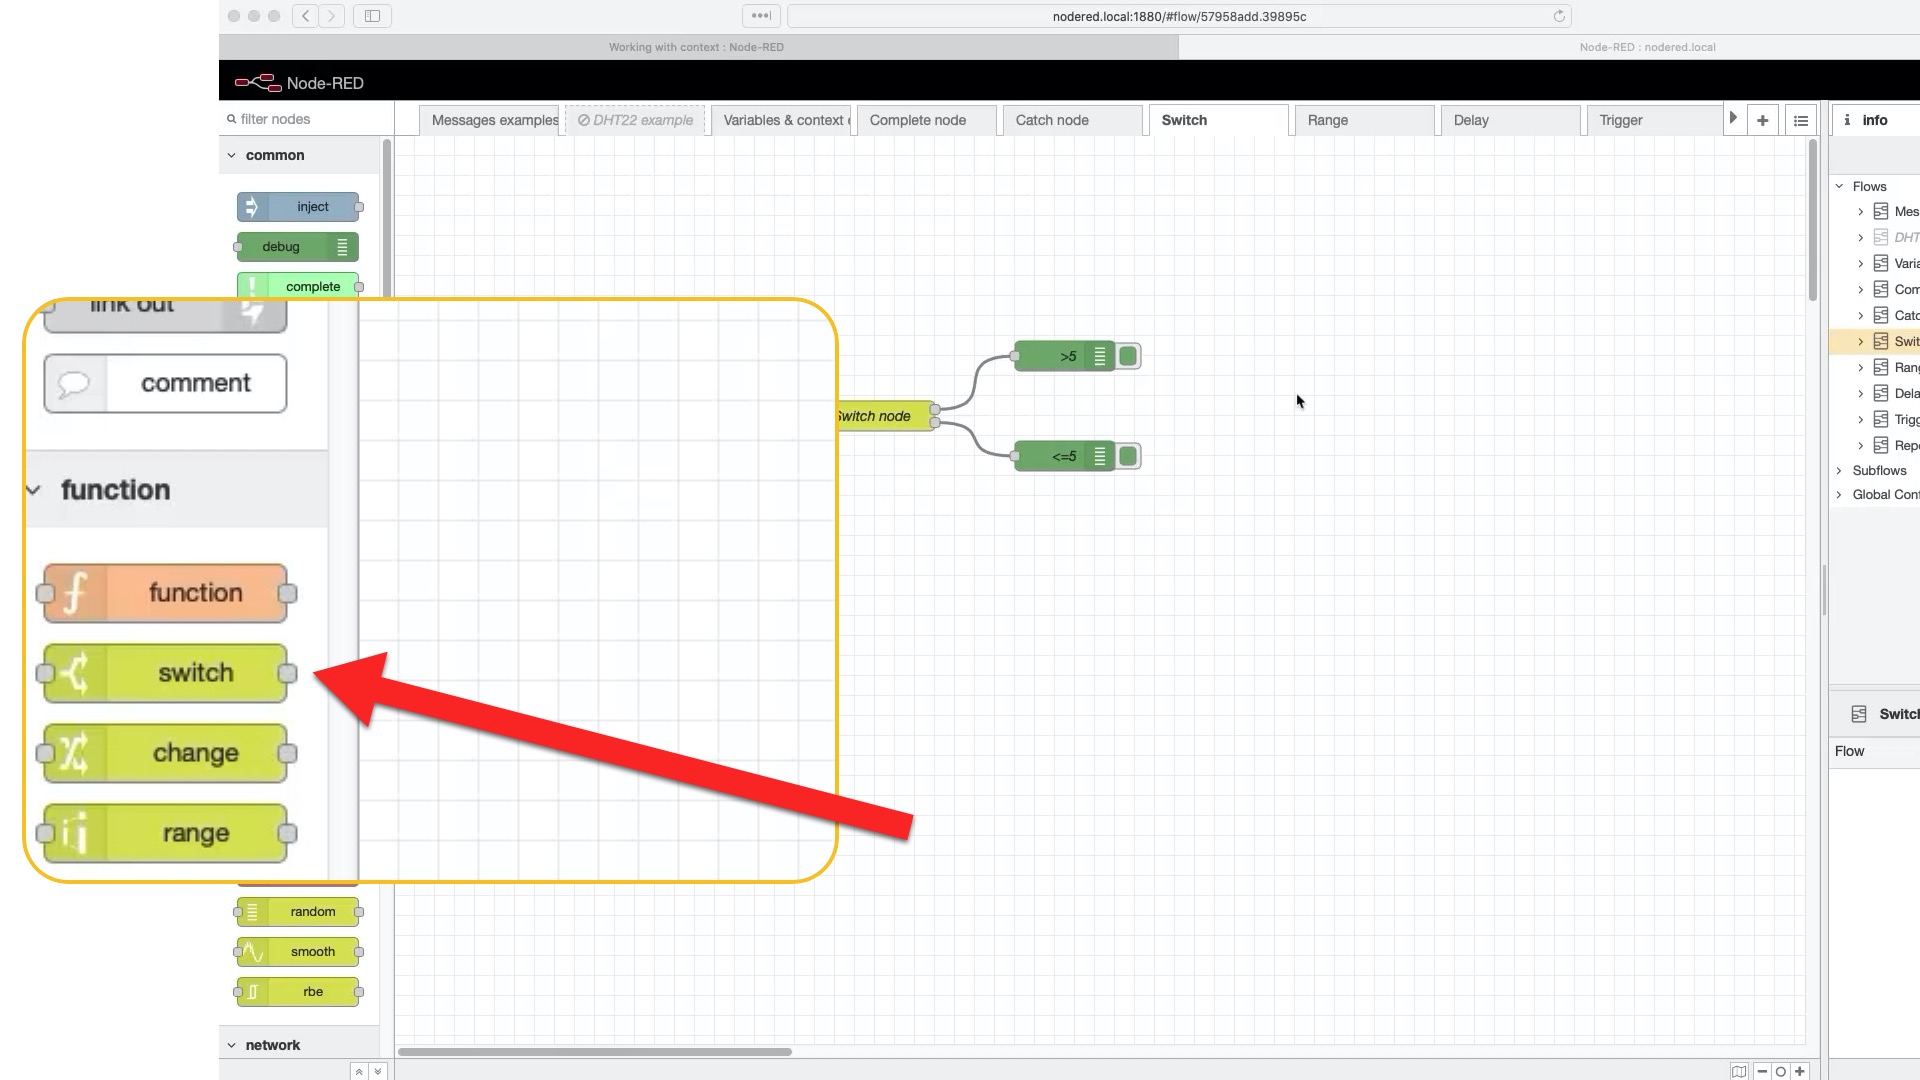
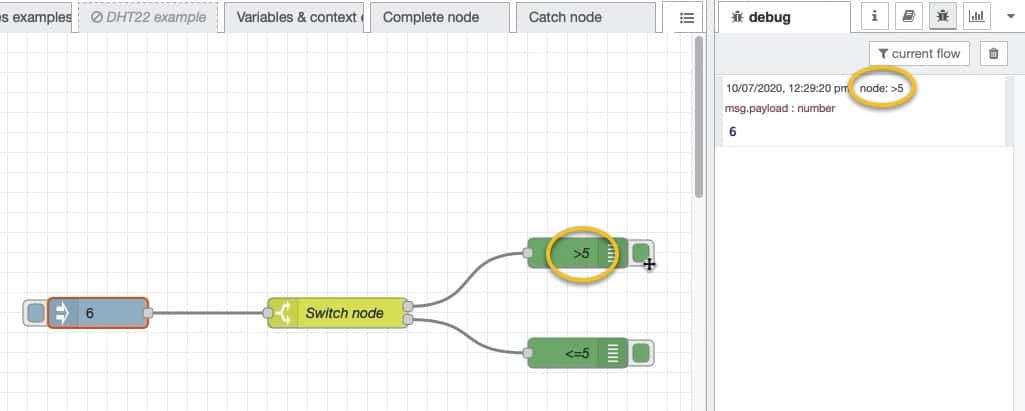
To explain how to use the "switch" node, I have create this simple flow:
The flow begins with an "inject" node which will emit a numerical "6" when you click on the button.
The payload will go into the switch node, which will evaluate it. If the payload is larger than 5, then the top output will be triggered. If the payload is equal or less than 5, then the bottom output will be triggered.
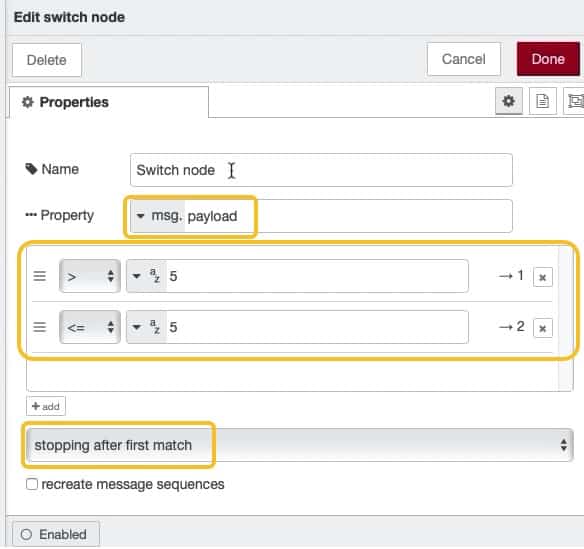
Take a look inside the "switch" node:
I have marked the important fields of the edit pane with a box.
First, you must set the property to evaluate. In this case, I have configure the node to get the value from the message payload.
Next, you must define at least one rule to be evaluated. The rule is defined by a boolean comparator, a value, and the output that will be triggered if the rule is evaluated to be true.
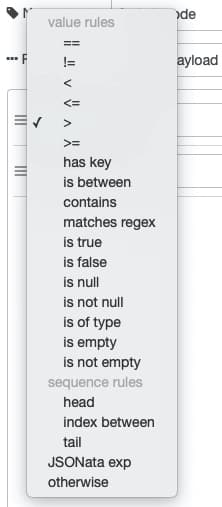
The available comparators are comprehensive:
The last field in the edit menu allows you to set the evaluation mode. You can set the node to stop when it finds a true rule, or to evaluate all rules.
Go ahead and try out this example. Deploy the flow, and then click on the "inject" node's button. The output will be "6" from node ">5", as expected:
The "switch" node will evaluate numerical "6" and continue flow execution from the top output.
