
Last week, I wrote about the Arduino Student Kit, an excellent choice for students of Arduino Step by Step Getting Started and anyone new to the Arduino.
This week I write about the Arduino Explore IoT Kit, designed by Arduino for intermediate-level Makers interested in the Internet of Things.
This is a high-quality kit with genuine Arduino-designed components that you will not find anywhere else. In this post, you’ll find information about the contents of the kit and project ideas.
The core component is the Arduino MKR Wifi 1010 prototyping board. The Arduino MKR 1010 is supported by the MKR IoT Carrier, which is a round PCB with sensors, a battery connector, capacitive buttons and a colour display. The kit also contains a capacitive soil moisture sensor and a PIR sensor. This hardware opens up numerous project possibilities, that I will discuss later.
But first, the unpacking video.
Unpacking the Arduino IoT Explore Kit
Here’s me unpacking the Arduino IoT Explore Kit:
Let’s take a closer look…
The brain: Arduino MKR Wifi 1010
The Kit contains the Arduino MKR Wifi 1010. This is a premium board that uses the modern Arduino MKR form factor, and contains a SAMD21 ARM microcontroller, a crypto-chip (used for secure Internet communications), and a NINA-W102 radio module for Wifi (802.11b/g/n) and Bluetooth (Bluetooth BR/EDR and Bluetooth low energy) communications.
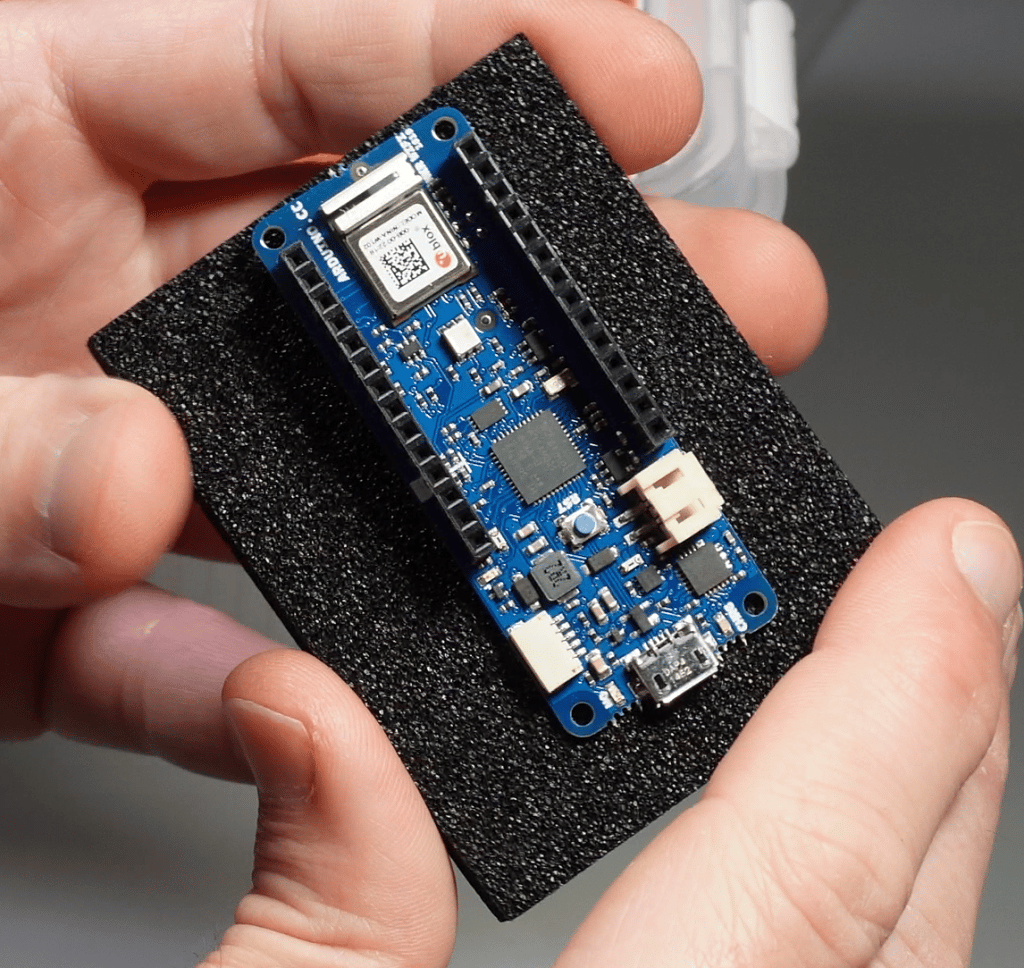
The Arduino MKR Wifi 1010 also includes a battery socket and charging circuit (this works with LiPo, single cell batteries) and boasts 13 PWM pins, 8 digital pins, 7 analog pins, 1 DAC, UART, SPI, I2C, 10 external interrupts, a build-in LED, and a full-speed USB with an embedded host (so you can connect a full keyboard and mouse for use with your Arduino projects).
I use the Arduino MKR Wifi 1010 in a few of my courses, including Arduino Step by Step Getting Started (where I give a quick overview), Arduino IoT for Busy People and Arduino Mobile Development with Blynk (where I use it on entire projects).
The body: Arduino MKR IoT Carrier
The Arduino MKR IoT Carrier is a round PCB with several integrated sensors and actuators.
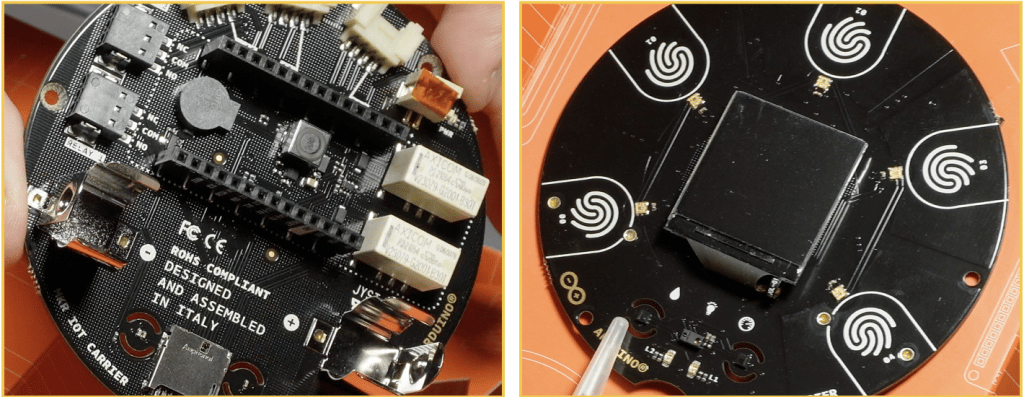
The Carrier contains a socket for the Arduino MKR Wifi 1010 and a battery socket on its back, a 240×240 colour TFT display on the front, and various other sensors and actuators distributed on both sides. You can see all the details in the Carrier datasheet, but here is a summary:
-
Sensors:
- Movement: 6-axis IMU Sensor (ST LSM6DS3), with a 3-axis accelerometer and a 3-axis gyroscope. It communicates with the Arduino MKR via the I2C interface.
- Environment: ST HTS221, a capacitive sensor for humidity and temperature. It communicates with the Arduino MKR via the I2C interface.
- Gesture and RGB colour: Broadcom APDS-9660, is able to sense ambient light and RGB colour, proximity, and gestures. It communicates with the Arduino MKR via the I2C interface.
- Pressure: ST LPS22HBTR, is able to measure pressure from 0.25 to 1.24 atmospheres. It communicates with the Arduino MKR via the I2C interface.
-
Actuators:
- Relays x 2: 5V coil voltage, 2A current, non-latching, with LED status indicator.
- Buttons x 5 (qTouch), capacitive, arranged along the outer edge of the board. These buttons can detect a finger approaching the surface of the PCB even when the Carrier case is installed. The sensitivity of the buttons is configurable.
- Buzzer, for beeps.
- RGB LEDs x 5.
- OLED 1.3″ display, colour.
- Connectors:
- Grove: 2 x analog and 1 x I2C.
- Relays: 2 x connectors.
- Battery holder and cable connector to the MKR 1010.
- Other features:
- Micro SD card holder.
- Screw openings for securely attaching a translucent plastic case.
The Carrier board is, essentially, an integrated lab for your projects. All the components are wired and ready to use by writing the appropriate Arduino sketch. Arduino provides sketch examples for all of these peripherals so that you can learn their basic use and integrate them into your own projects.
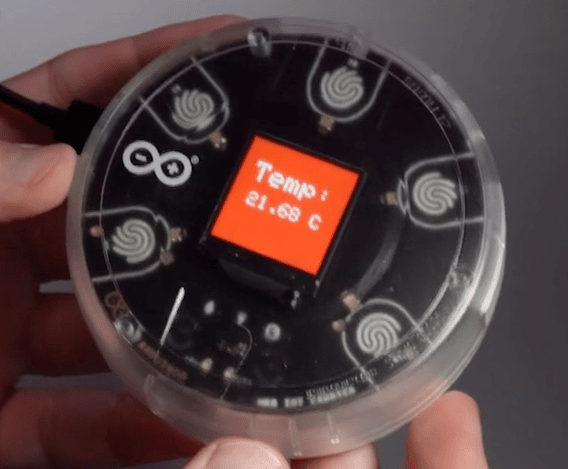
Here’s the Carrier display showing a temperature reading from the integrated sensor:
Other kit components
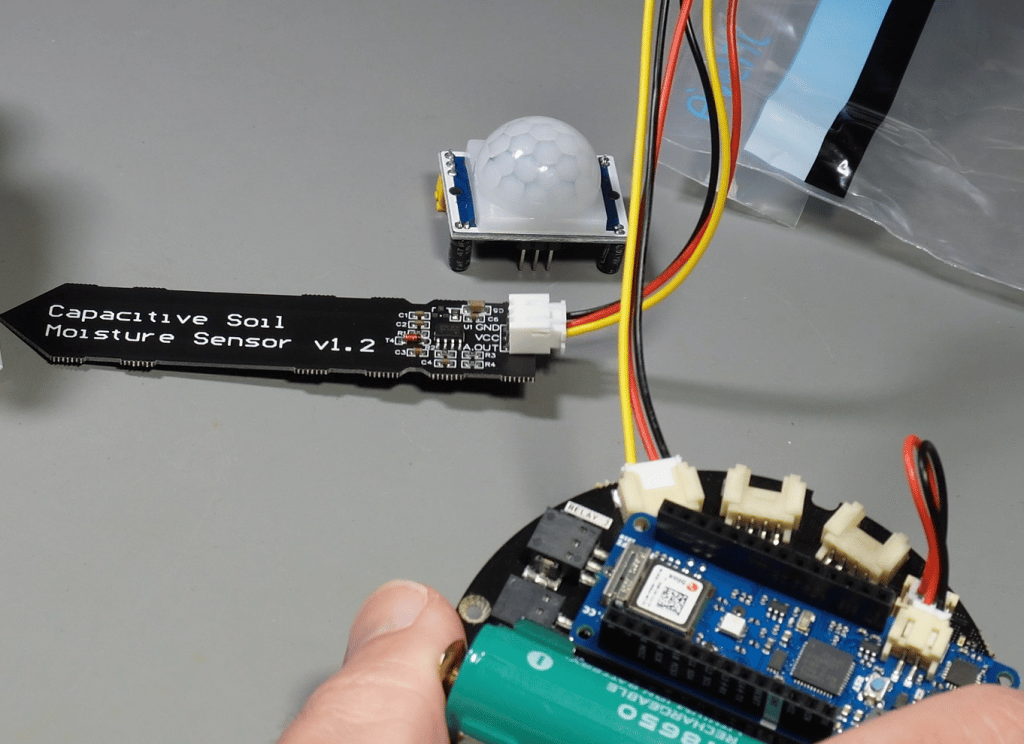
The Arduino IoT Explore kit also contains these hardware components:
- Micro USB cable
- Moisture sensor
- PIR sensor
- Plug-and-play Grove cables for all the sensors
Other kit perks (and projects)
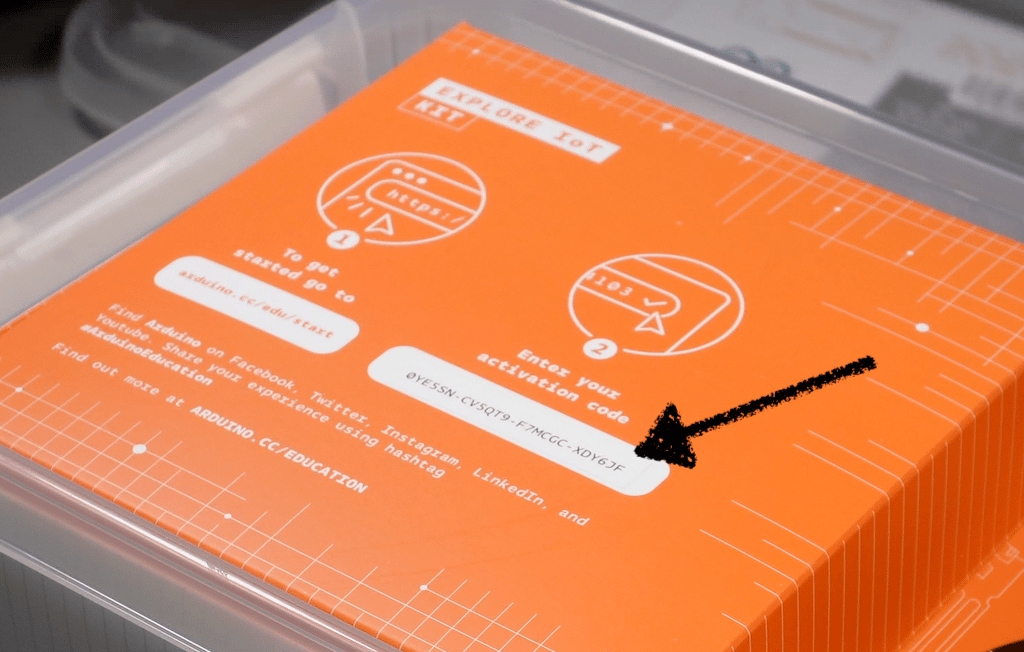
As with other Arduino kits, the Arduino IoT Explore Kit also comes with free online educational content. You will find a unique code that gives you access to this content in the kit cover card.
The online course that comes with the kit contains a teacher guide with detailed information on how to use the hardware and educational content in a classroom setting, including a course syllabus.
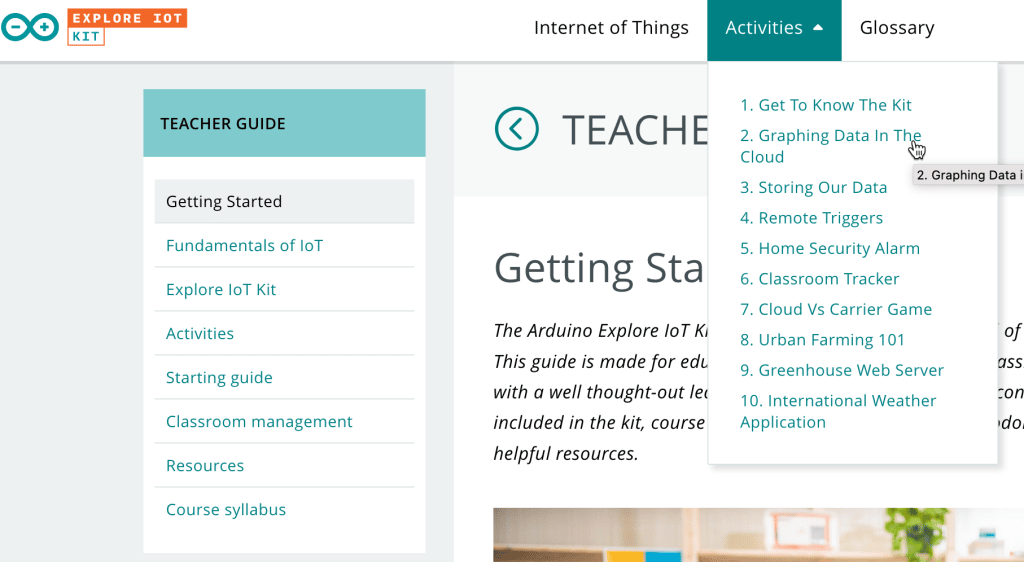
The course contains 10 mini-projects that can teach students the fundamental concepts of IoT, including data logging, graphing data, creating triggers, and consuming cloud data through APIs. You can see these mini-projects in the image above (listed under “Activities”).
Final thoughts
Who is the Arduino IoT Explore Kit for?
Well, this is not a kit for beginners.
You will need a good understanding of Arduino electronics and programming before tackling the hardware in this kit.
You can use the hardware of this kit either locally (i.e. using the desktop version of the Arduino IDE) or in the Cloud (i.e. using the Arduino Cloud IDE).
My advice, in fact, is to do just that: start local, and then fly to the Cloud.
Learn how to use each of the sensors and other components using the simple example sketches on the desktop Arduino IDE, and then attempt a Cloud project (a simple environment monitor with emailed notifications comes to mind).
The relays included in the Carrier board make it possible to connect your IoT applications to light loads, like an LED desk light or a fan. The projects included in the free educational resources are great for education and inspiration.
Here’s a few things to explore next:
- Arduino Explore IoT Kit on the Arduino website.
- Arduino MKR Wifi 1010 on the Arduino website.
- Arduino MKR IoT Carrier on the Arduino website.
- Arduino Cloud, and Arduino Cloud service.
- Arduino IoT Cloud for Busy People, a Tech Explorations course.
- Arduino Mobile Development with Blynk, a Tech Explorations course.