I’d like to show you one of the things that you can do really quick in Kicad. One of the features that can take your work with circuits and your workmanship to the next level.
It is one of the recipes in my book, in which you will learn how to quickly create the connections (routes) in a circuit board. When I write “quickly”, I mean it. By using an open source component that implements this feature in Kicad, you can automatically wire the components on a typical Arduino 2 or 4 layer board in a few seconds.
To achieve the same result manually you would need an hour or more.
(But don’t worry if you have gaps in knowledge that make you feel a bit lost; in the book, I explain all the concepts you need to make this recipe easy to understand and implement).
The autorouter that was included in Kicad 4 has been removed in Kicad 5. It is likely that a new autorouter will be added in the future. Until then, you can use an external autorouter.
In this recipe, you will learn how to use FreeRouting, an open-source autorouter.
The online project home for FreeRouting is at freerouting.org. There, you will find information on how to install it on your computer and usage documentation. FreeRouting is a stand-alone program with many capabilities. If you are planning to design a large PCB, it may be worth spending some time and studying the FreeRouting documentation. In this Recipe, you will learn how to use FreeRouting to autoroute a simple PCB that you are working on in Pcbnew.
In my experience, the easiest way to install FreeRouting is by installing yet another application, LayoutEditor. LayoutEditor is a general editor that is used in micro and nanoelectronics. It happens to include a binary version of FreeRouting and installers for a huge variety of operating systems. This means that you will not have to worry about downloading the source code of FreeRouting and compiling it for your operating system. For this reason alone, it is worth downloading it and installing it.
Start by going to the LayoutEditor download page, and download the version for your operating system. Once you have it on your computer, install it. When the installation is complete, go to the installation directory of the LayoutEditor. On my Ubuntu computer, this directory is /opt/layout. Navigate to the bin folder and find a file named “freeRouting.jar”. This file contains the FreeRouting application. You can copy the file to a location that is convenient for you to access, or create a shortcut.
This is a Java application, so if you don’t have the Java Runtime Environment, you should install it now. On Ubuntu, you can install the JRE through a terminal window by typing:
$ sudo apt install default-jre
Now that you have access to FreeRouting, let’s use it.
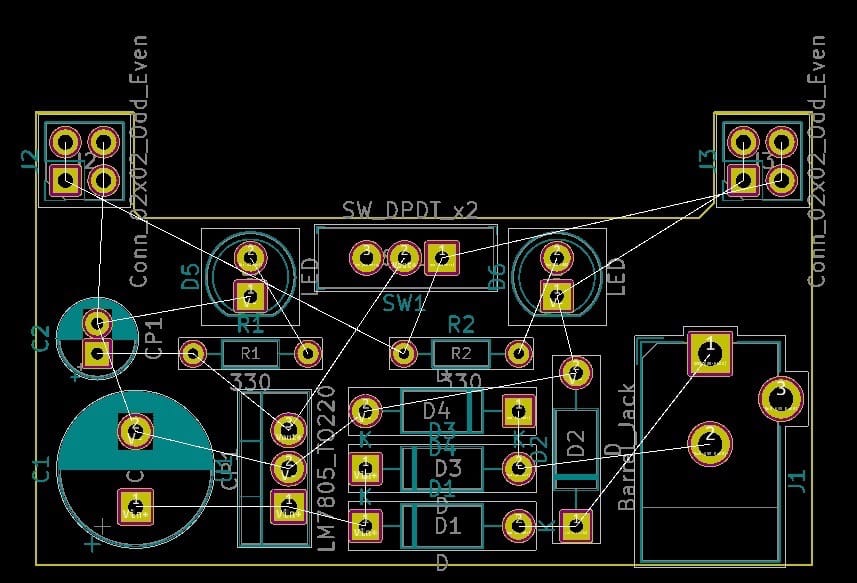
Open an unrouted project in Pcbnew. You can see my example in Figure 1.
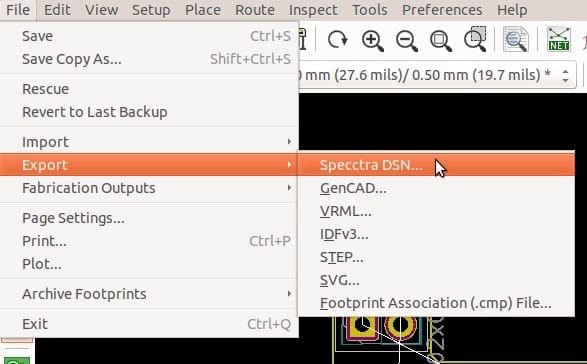
You must export a Specctra DSN file that contains the information that FreeRouting needs in order to do the routing. Create the DSN file by clicking on File, Export, “Specctra DSN…” (Figure 2). A dialog box will ask for a location and file name for this file.
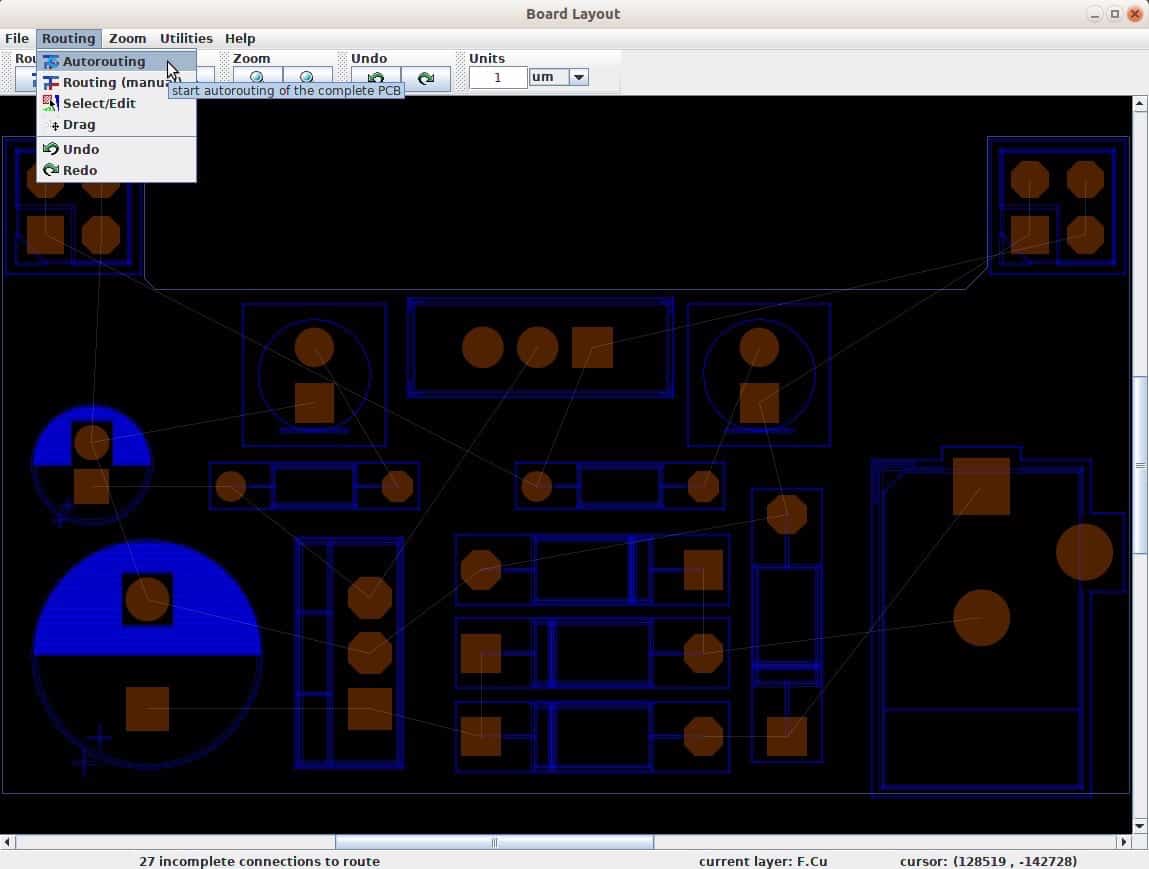
Proceed with FreeRouting. Run freeRouting by double-clicking on the .jar file. The Java Runtime Environment should execute the program assuming it is installed correctly. FreeRouting will ask you to load the DSN file, so locate it and load it. Eventually, FreeRouting will display your board with the various footprints and its layout exactly as you see it in Pcbnew. To run the autorouter, click on Routing, followed by Autorouting (Figure 3).
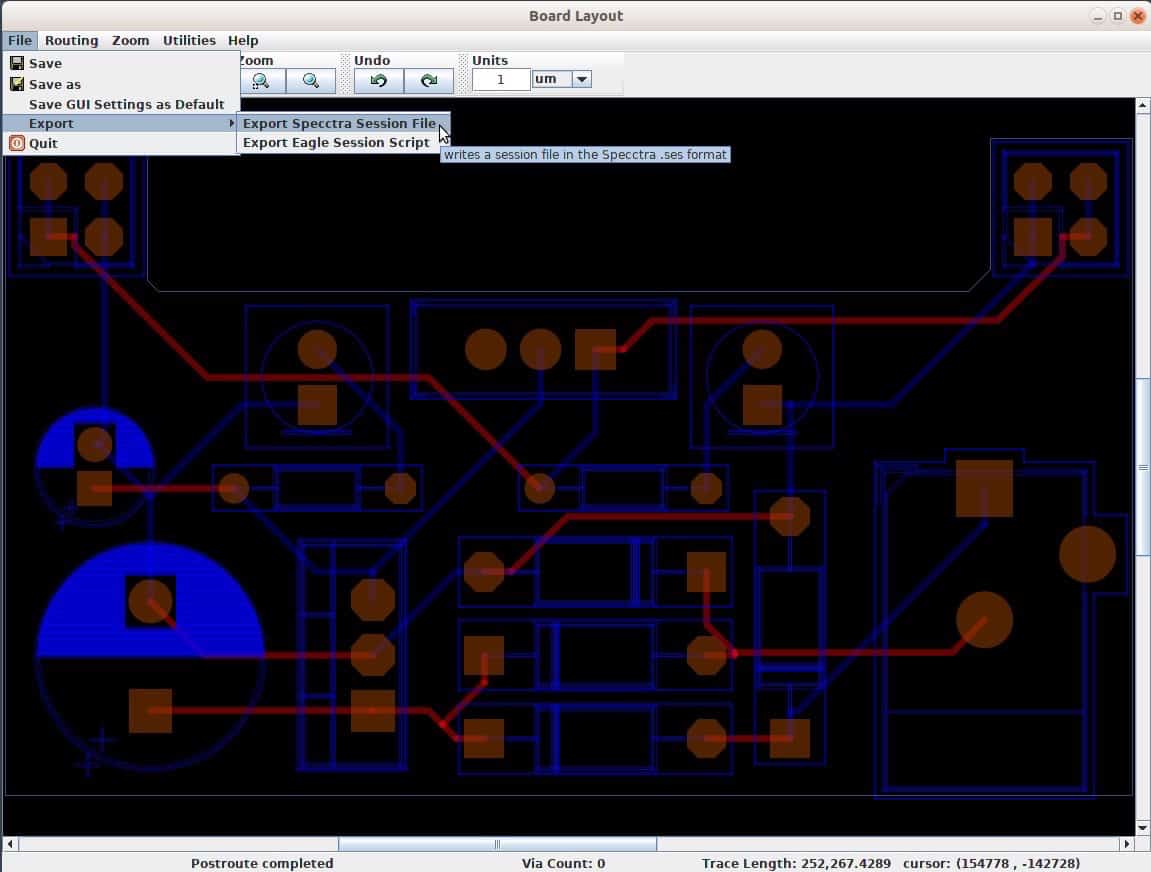
After a few seconds, FreeRouting will create the routes and show them in red and blue color, depending on the layer that the route exists in. You will need to import this version of the board back to Pcbnew to continue with the work there. To export from FreeRouting, click on File, Export, Export Specctra Session File. You can close FreeRouting and return to Pcbnew.
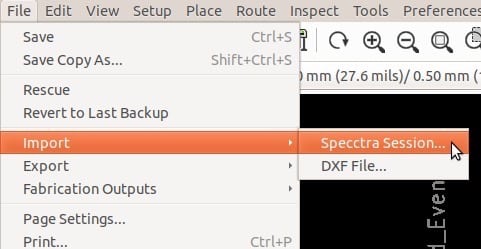
In Pcbnew, go to File, Import, “Specctra Session…“ and select the file with the .ses extension that FreeRouting created (Figure 5).
Pcbnew will display the fully routed board, as you can see in Figure 6.
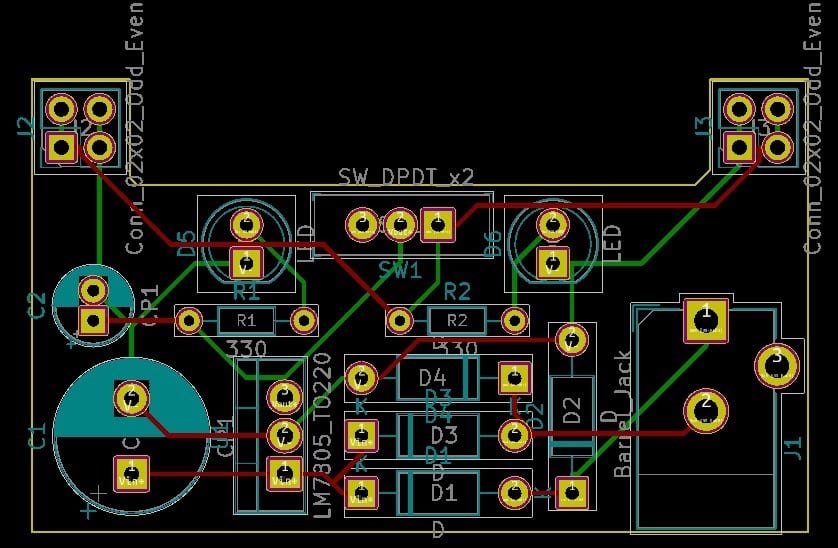
While the autorouter did its job, there is still work to do. For example, you will need to pay attention to power traces and confirm or edit their widths. You must also run the Design Rules Check to ensure that none of the design rules are violated.
Should you use an autorouter, or route everything manually? It depends. There does not seem to be a consensus on this topic. Many people opt to use it; others prefer manual routing. The newer versions of Kicad, starting with Kicad 4, introduced powerful interactive routing tools which make manual routing fast. I prefer to use the autorouter for larger boards because of its speed, and then use interactive routing to make any changes necessary.
Check out Kicad Like a Pro, 2nd edition, ebook, available on the Tech Explorations bookstore