
I am eager to tell you about my course Raspberry Pi Full Stack and the latest update & extension that we just published.
I will give you the specifics (i.e. what is this update, and the extension all about?) further down in this email.
But in case you are not familiar with the Raspberry Pi or Raspberry Pi Full Stack, I want to take the next few lines to explain…
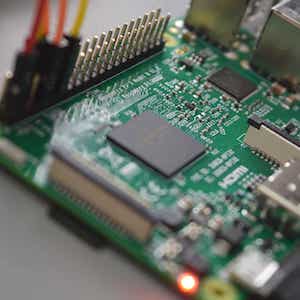
I’m sure you know what the Raspberry Pi is.
Like the Arduino, this small computer is an essential tool for any Maker.
In my mind, the Arduino and the Raspberry Pi are perfect as a complement to each other.
The Arduino is a micro-controller: robust, small, low cost, simple, reliable.
The Raspberry Pi is a computer: powerful, small, complex.
You can use each one on its own and build some amazing things, but they shine most when you integrate them.
You may be familiar of my course Raspberry Pi Full Stack. In its original format, this project course shows how to build a web application on the Raspberry Pi, from the ground up.
Because the Raspberry Pi is a Linux computer but is also capable of connecting to sensors and actuators, it is possible to build full-stack applications that combine web software engineering with technologies that we are familiar from the Arduino, such as sensors.
In Raspberry Pi Full Stack I show how to do this.
The course shows you how to install an operating system (the Arduino doesn’t have one!), setup Python (the world’s most popular programming language, and a staple of web development), how to backup and restore your work, how to work with its pins so you can control LEDs, buttons and sensors (not as simple as with the Arduino).
And then, the real fun begins: you dive into the software development of the application, with Python, HTML, JavaScript, CSS, the web server and the web application development framework, the database, system services, and so much more.
The Raspberry Pi has onboard networking, which we use to connect our application to the Internet. The course shows you how to use Cloud services like Google Graphs and Plotly to enhance its features.
Learning all these technologies individually is intimidating, but make them part of a project, and it all makes sense.
The project drives your learning, and manages the overwhelm that is inevitable otherwise.
I published Raspberry Pi Full Stack for the first time in 2014. In 2018, I published a major update that included support for Raspbian Stretch and Python 3.
This week, at the end of February 2020, we published another major update + and extension to the course.
The update ensured that all the code (Python and the various libraries, HTML, CSS, JavaScript) work with the Raspberry Pi 4 and Python 3.8.1.
Of course, it did. Not only that, but everything in Raspberry Pi Full Stack works with any Raspberry Pi model, even the original one.
In fact, the Raspberry Pi Model A that I used in Raspberry Pi Full Stack from 2014 is still working, and has logged almost a hundred thousand temperature and humidity records in its database.
As I mentioned, the new version of Raspberry Pi Full Stack includes an extension.
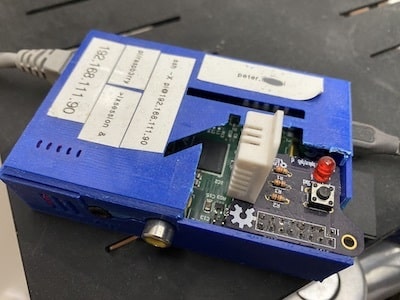
In this extension, I show you how to setup an Arduino remote sensor node that can communicate with the Raspberry Pi. I am particularly excited about this capability, because it opens up a variety of scenarios in which you can further extend this application.
At its simplest version, the Arduino remote node reads data from its sensor and sends it to the Raspberry Pi. The Raspberry Pi then stores the data in its on-board database, but also sends a copy to a Google Sheet for further analysis (Google Sheet support is also an addition to the course).
But because of the way I have implemented it, you can add any number of such nodes, and not only send data to the Raspberry Pi, but also receive data from the Raspberry Pi. For the wireless connection, I have used the very low-cost but very capable nRF24 transceiver, in networking mode. The transceiver runs smoothly on the Raspberry Pi and the Arduino, and provides a high-quality data link.
With two-way communications, you can implement interesting home automation scenarios, like environment monitoring, control, and notification functions.
But that’s not all 🙂
Wouldn’t it be cool if you could implement notifications? For example, if it gets a bit too hot, how about get the Raspberry Pi to send you an email?
Done! Another extension to the course is using If This That That (IFTTT.com) to do just that. A small Python script will trigger a notification, and IFTTT will deliver it.
This may seem trivial, but knowing how to do it means you can implements any number of other capabilities offered by IFTTT. This is just the beginning.
I have documented the new and updated comment of this course in a recent blog post. Please check it out.