Introduction to the Arduino Guide series
Common Arduino boards, problems and opportunities
In this article, we take a look at some of the many kinds of Arduino boards that you can find in the market today.
In the first lesson, you learned about the early days of the Arduino prototyping platform. I’d like to take this story a bit further and have a look at some of the many kinds of Arduino boards that you can find in the market today.
First: projects, problems, and opportunities
Before looking at the Arduino boards that make up the core of the Arduino ecosystem, I’d like to suggest that you look at the Arduino as a problem-solving tool, not only a learning or electronics tool.
The Arduino is truly a blank canvas on which you can design solutions to problems.
We often call these problems “projects.” Some are big, some are small, but each problem is a project.
And each project (or problem) is an opportunity.
- An opportunity to learn something new
- An opportunity to re-examine our assumptions
- An opportunity to try a different way
- An opportunity to create something new
These opportunities come in many contexts. Education, technology, business, social, personal.
With the Arduino, you can capture these opportunities.
When you find a problem, in your mind, see “opportunity.”
Then, ask the question: “What kind of opportunity is this problem presenting me?”
Identify the opportunity. Consider its value. And if you decide that it is valuable, start the journey of capturing the hidden value.
This is the journey of solving a problem.
As you learn how to use the Arduino, you will encounter many problems. A sketch will not work as you expect it. A motor might spin in the opposite direction you thought it would. A sensor might give weird readings. It’s part of building stuff.
In reality, these are opportunities after opportunities, to learn things you didn’t know, to make things you haven’t made before, to think in a new way.
Often, you will become tired of this. You will be inclined to give up.
That’s when the word “opportunity” must light up your mind. The hardest things are more valuable, and capturing this value only comes at an expense: perseverance.
You can’t capture the value without experiencing the hardships of the journey. You will have many such journeys with the Arduino, and each one will make you a little richer.
So, where were we?
Aha, the Arduino boards...
Wiring
Before Arduino became… Arduino, there was the Wiring Board.
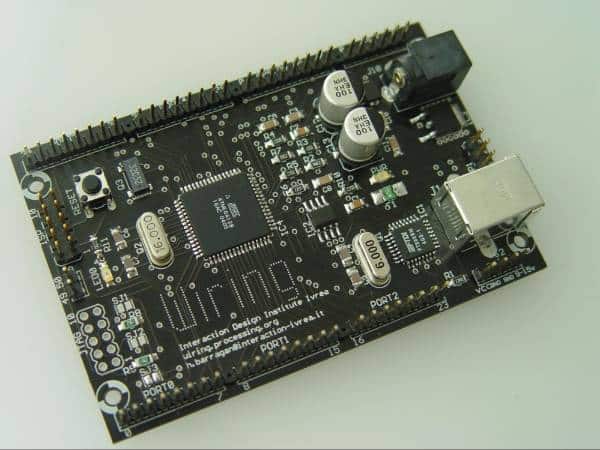
The Wiring Board was designed by Hernando Barragán, then a student at Interaction Design Institute Ivrea (IDII). This board looked a bit like what a modern Arduino looks like. Massimo Banzi and Casey Reas were Hernando’s thesis supervisors. You can learn more about this phase of the Arduino history in Hernando’s Untold Story article.

Hernando Barragán’s Wiring Board, the Arduino’s predecessor (original image available at https://arduinohistory.github.io/)
The Wiring Board contains the basic features so common in modern Arduino boards: a USB connection for uploading programs and for communications, an Atmega microcontroller, pins arranged along the edges, an onboard LED that you can control programmatically, and LED that light up when a program is transferred via the USB port.
This was in 2004.
Arduino
A year later, Massimo Banzi and David Mellis forked (a programming term that describes a copy of an original work) Wiring, and created the Arduino. The created the first Arduino prototype, pictured below:

Allegedly, the first Arduino prototype (original image available at https://arduinohistory.github.io/)
And shortly after, the second prototype:

The second Arduino prototype (original image available at https://arduinohistory.github.io/)
The second Arduino prototype is what we recognize today as the Arduino Uno, with several improvements as a faster microcontroller and better positioning of components, like the reset button.
Fast forward to 2019
Fast-forward to today, and in 2019 there are around 15 active and many more retired official Arduinos.
Because Arduino is open-source hardware, there are many more Arduino compatible boards, made by countless manufacturers. You can make your own, if you wish.
With so many Arduino boards out there, this is a topic that often confuses beginners.
In the remainder of this article, I’d like to help clear the confusion.
As I mentioned already, there are dozens of boards designed by Arduino and various manufacturers. Some, but not all of these manufacturers, design their boards with care and attention to the official specifications to ensure that the boards they produce are fully compatible with the official Arduino boards.
The boards produced by these manufacturers are often labeled “100% compatible.” They are not official Arduinos (that means, they are not made by Arduino, the company), but they work exactly like an official Arduino.
There are also boards that are not fully Arduino compatible because their designer decided to make hardware changes that affect the way such board works. These boards are often called “clones,” and are usually much cheaper than an official Arduino. A common example is such boards that replace the USB components of the official board with a more affordable version. To use such Arduino on your computer requires you to install additional USB drivers, making this a wrong choice for beginners. The design of these boards is driven by price, so cheaper components are used all around; cheaper headers (where you connect the jumper wires), cheaper USB connectors, cheaper passive components (like capacitors and the voltage regulator). These Arduino clones cost a fraction of the cost of an official Arduino.
It is worth investing in official Arduino boards even if they are slightly more expensive because they will work better so that you will not have to spend hours figuring out problems with the board instead of building your gadget.
Arduino Uno
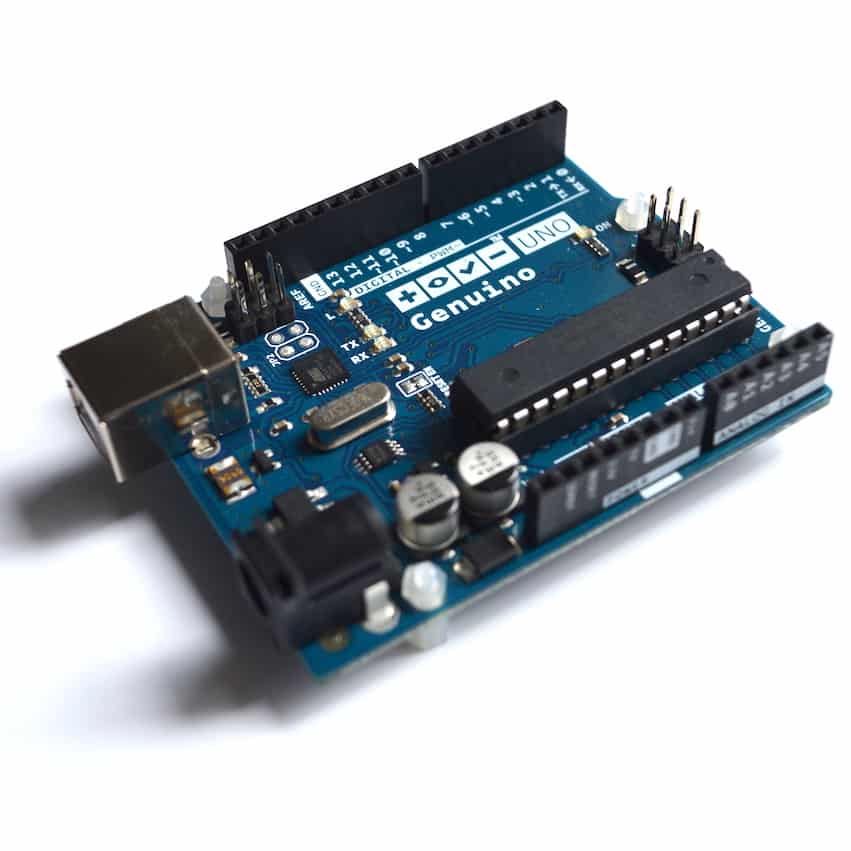
If you are a beginner in Arduino and electronics, I recommend getting the Arduino Uno R3; this is the classic Arduino board. It is hard to destroy by miswiring (I have tried!), has tons of high-quality documentation, example sketches, and libraries while still surprisingly capable. It is relatively easy to expand as your projects grow.

This is the official Arduino Uno. The best board for the beginner and beyond (image taken from arduino.cc).
Arduino Pro Mini
If you are looking to build a project that requires a small size, you can go for one of the small footprint Arduinos, like the Pro Mini or the Micro (designed by SparkFun). These boards contain the bare-essential hardware. The Pro Mini is a personal favorite. You can find it on eBay for around $5 (a bit more than the price of a single ATmega328P microcontroller), and it contains all of the functionality of the Uno except for the USB. It fits in the smallest project box, and I often attach it to custom-designed motherboards.

The tiny Arduino Pro Mini (image taken from arduino.cc)
The two example boards, the Uno and the Pro Mini, share the same basic architecture and are powered by the same microcontroller. This means that your circuits and sketches work the same way on these boards.
Arduino Mega
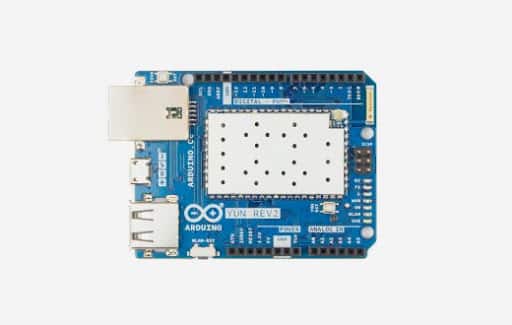
There are also Arduinos based on more capable microcontrollers, like the Mega, or even microprocessors running Linux, like the Arduino Yún rev 2.
The Arduino Mega 2560 is a super-sized Arduino Uno with a faster microcontroller (the ATmega2560) and many more input/output pins. This board is perfect for projects with a lot of buttons, motors, sensors, and, really, a lot of everything.

The Arduino Mega 2560 (image taken from arduino.cc)
Arduino Yún
The Arduino Yún rev 2, is essentially a computer combined with an Arduino. It runs a version of Linux, has built-in Wifi capability, and is made for Internet-of-Things applications.

The Arduino Yún, geared for the Internet-of-Things applications (image taken from arduino.cc)
Arduino Gemma and LilyPad
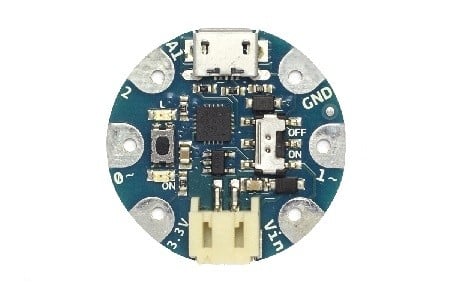
Worth mentioning are also the various wearable Arduinos. If you are interested in making electronics that you can embed in clothing, then you can look at something like the super-tiny Arduinos Gemma or LilyPad (designed and sold by Adafruit). These are small, battery-ready, low power Arduinos, and circular so that they don’t catch onto fabrics.

The super-tiny Arduino Gemma
So, which Arduino do I recommend for someone starting now?
Arduino is open-source, which means that its specifications are published so that anyone can create their own compatible and custom design.
It is easy to get lost in this variety of alternatives, but my advice is to start with the classic Arduino Uno.
In the next lesson, you will learn about the important hardware features of the Arduino Uno and the kinds of hardware that you can connect to it.
New to the Arduino?
Arduino Step by Step Getting Started is our most popular course for beginners.
This course is packed with high-quality video, mini-projects, and everything you need to learn Arduino from the ground up. We'll help you get started and at every step with top-notch instruction and our super-helpful course discussion space.
Jump to another article
1. What is the Arduino?
2. Common Arduino boards
3. Types of hardware that you can connect to an Arduino board
4. The Arduino programming environment
5. Arduino libraries and how to install them
6. The basics of Arduino programming: program structure, functions, variables, operators
7. The basics of Arduino programming: Loops, conditions, objects, inputs & outputs
We publish fresh content each week. Read how-to's on Arduino, ESP32, KiCad, Node-RED, drones and more. Listen to interviews. Learn about new tech with our comprehensive reviews. Get discount offers for our courses and books. Interact with our community. One email per week, no spam; unsubscribe at any time

