In a previous post, I wrote about my latest ESP32 project: a terrarium controller with it’s “brain” implemented as a Node-RED flow.
Node-RED has been in my “to-learn” list for a few years now. As it comes with the Raspberry Pi operating system, it was easy to try out with small flows and get a feel of how it works. However, I never devoted enough time to learn it well enough to build something with it.
I’ve been working with Node-RED for the last three months and created a new course: Node-RED and ESP32 Project: Make a Terrarium Controller.
I have extracted a 14-page guide series from this course and published it on our web site for anyone interested in Node-RED.
Go ahead and check it out.
Are you interested in the background? Read on.
As with all my past projects (example: see this, this and this) I never consider my knowledge good enough unless I have created something that proves it. The proof must have a reasonable level of complexity and must bring together at least two distinct technologies. Such project shows me that I have a sufficient grasp of the technologies involved to be able to shape them into whatever it is that I am building.
With Node-RED, the moment when I thought “I’ve got this” came early. Within an hour of fiddling around with it, trying various nodes in simple flows, and looking at the documentation, I felt that I understood enough to be able to create a system that uses it.
So, I started thinking about a project.
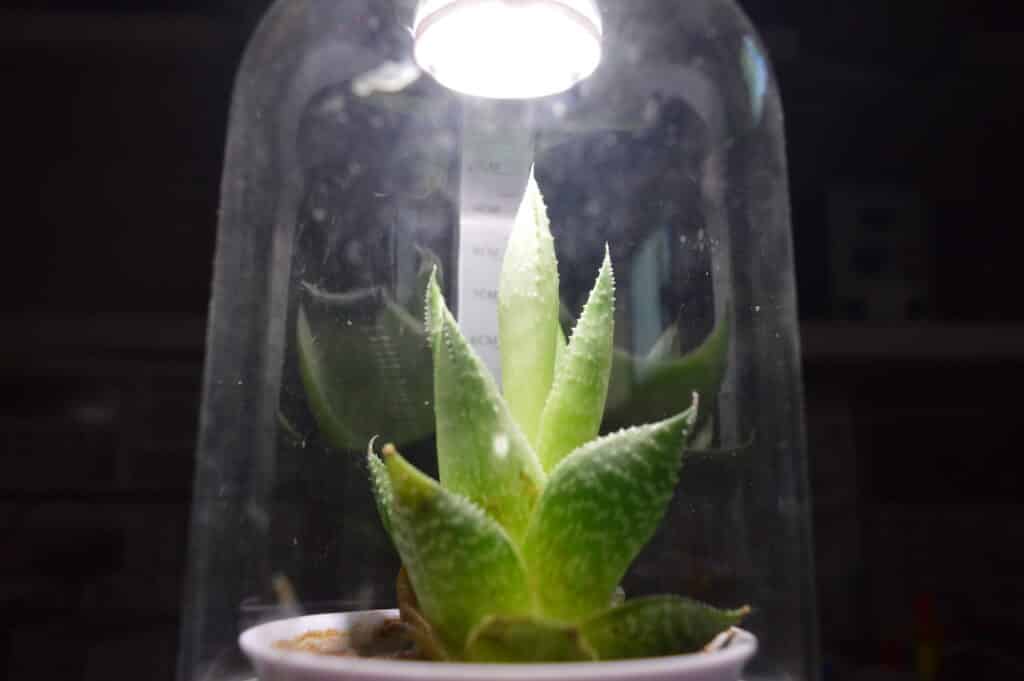
Ari, my younger son, has a small terrarium in which he has grown several generations of succulent plants. His terrarium consists of a little glass cover, and a growth light mounted on the top of the cover. During the day, the growth light is off. During the night, the growth turns on for a few hours to accelerate growth.
I thought that a terrarium project is interesting because of the control opportunities it presents. I can also involve my kids as a fun project that can count towards their homeschooling curriculum, an significant bonus.
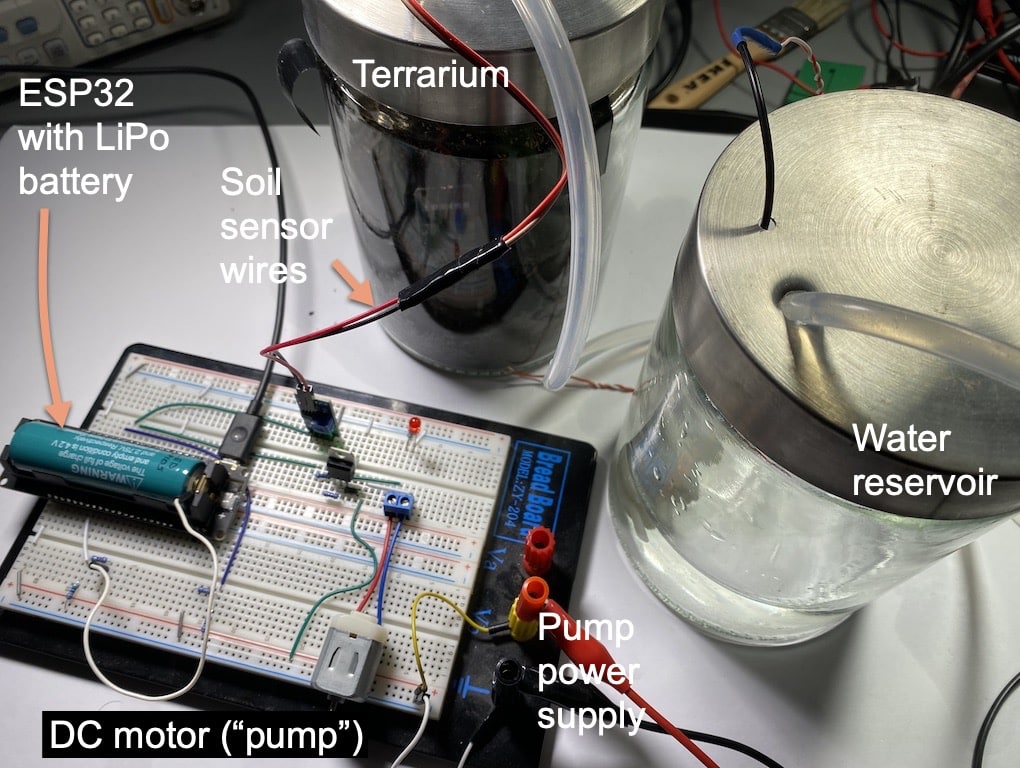
Such a project would integrate Node-RED, the Raspberry Pi, a microcontroller (I chose the ESP32 because it’s awesome and has WiFi), sensors, motors, and power sources.
Software-wise, the system would require Node-RED flows, JavaScript (embedded in Node-RED function nodes), C (for the ESP32), a bit of work on the command line (to work with MQTT), and various other software configurations for IoT services like IFTTT and Google Sheet.
This project checked all my criteria for driving my learning to an acceptable level of competency.
Let’s continue…
Another discovery when learning a new technology is its boundaries.
Every technology has boundaries.
A boundary is a limit of the application of technology.
In most cases, boundaries are fuzzy. Once you know enough about the technology, you can hack your way past a boundary.
Boundaries are the limits of technology and typically are made evident through its documentation. What is easily and readily achievable is within a technology’s boundary. What is hard or impossible to do is usually not documented.
An aside:
I recently watched a documentary about Atari, called “Easy to Learn, Hard to Master: The Fate of Atari“. Atari’s VCS (Video Computer System) was based on an MOS Technology 6507 @ 1.19 MHz, and has 128
KBbytes RAM.In the documentary, I learned that the Atari programmers would routinely smash through the understood boundaries of the hardware to implement new game graphics features. The hardware designers acknowledge that they did not expect that the 6507 could do what the programmers made it do.
These programmers were like the rock-stars of the day, at the top of their game, making the hardware do things it was not expected to be able to do.
The cost, of course, was high.
As a programmer, I am not a rock-star like Atari’s David Crane and Bob Whitehead. More important, I have the constraint of time.
I want to achieve the maximum amount of progress in the amount of time I have available. As breaking through the constraints is expensive in time, I prefer to work within them.
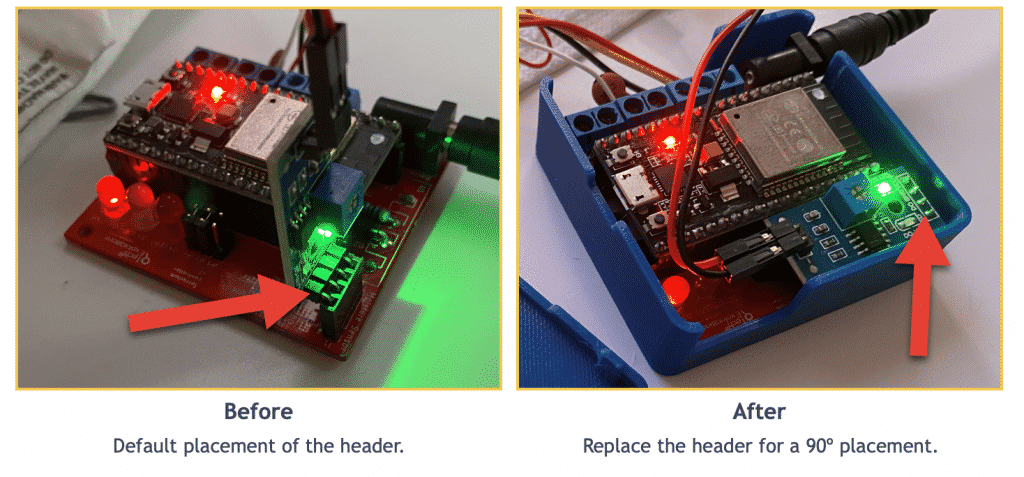
With Node-RED, my original idea was to use the ESP32 and a Bluetooth connection for communication. It turns out that this is hard to do.
Node-RED does not need to worry about wireless communications because it is optimized to use MQTT as the transport layer.
If you can get a message to MQTT, Node-RED will be able to access it.
The ESP32 has high-quality libraries for working with MQTT brokers over WiFi, but not Bluetooth.
Is it possible to use MQTT over Bluetooth between the Raspberry Pi and the ESP32? I don’t see why not.
Here’s a simple way to do it: write a Python script that can receive data from a Bluetooth connection and forward it to an MQTT topic, as well as the opposite (subscribe to an MQTT topic and deliver data to the ESP32 via a Bluetooth connection).
On the ESP32, I could write a sketch that uses Bluetooth to connect to the Raspberry Pi, and then send serial data to my Python script. The ESP32 would not be “talking” directly to the MQTT broker but would use the Python script as an intermediary.
This setup would make possible something (at that point) I had marked as tricky because it was not documented anywhere. This is something I can attempt now (after having completed the project staying within the boundaries of the technologies), but not back then.
This is just an example of a choice that a learner can make when they are planning their learning strategy. In almost every case, it is better to take the conservative approach and stay within the boundaries of the technologies you are learning. Once you gain expertise (and fame), you can then consider breaking those boundaries.
Come to think of it; it is not technology that has boundaries.
Boundaries are personal.
And the great thing about personal boundaries is that they can be changed.
You can change your boundaries with disciplined and strategic thinking about what to learn next, and how.
If you are interested in learning about Node-RED, and even using it in your next project, check out my new Node-RED guides series.
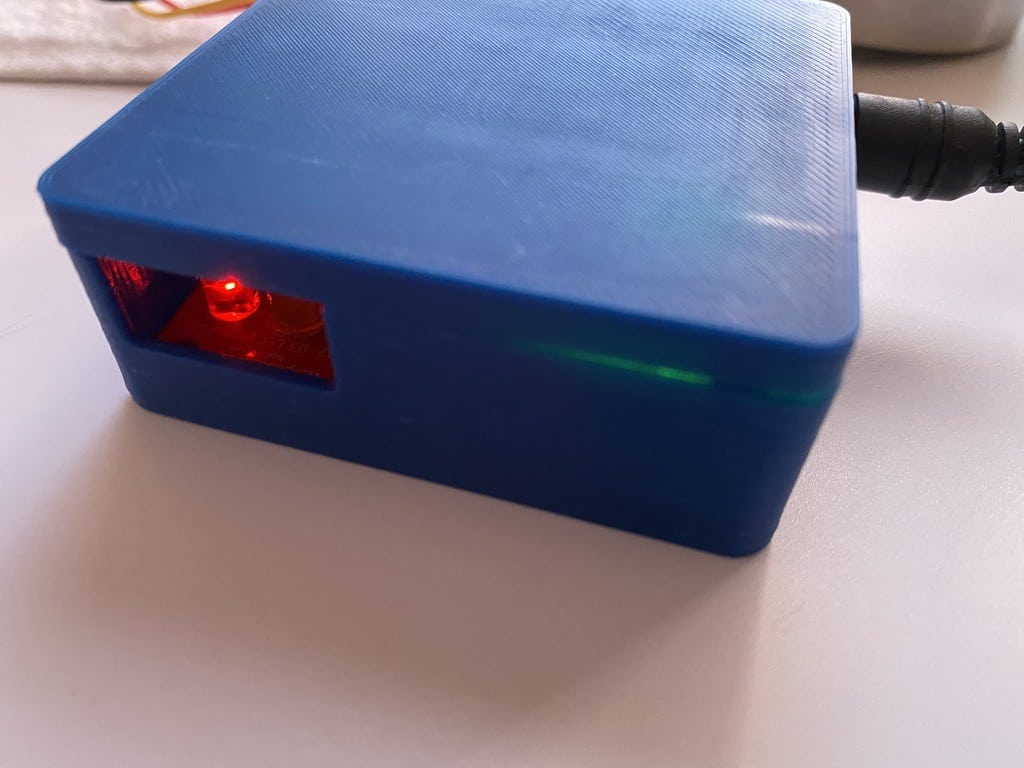
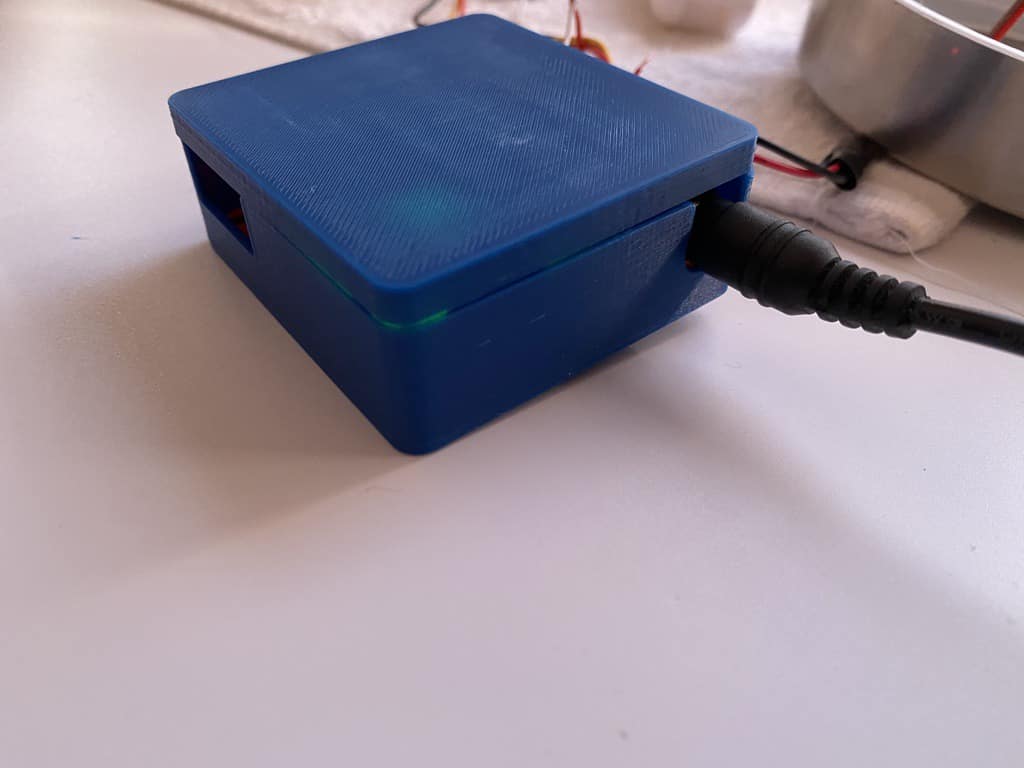
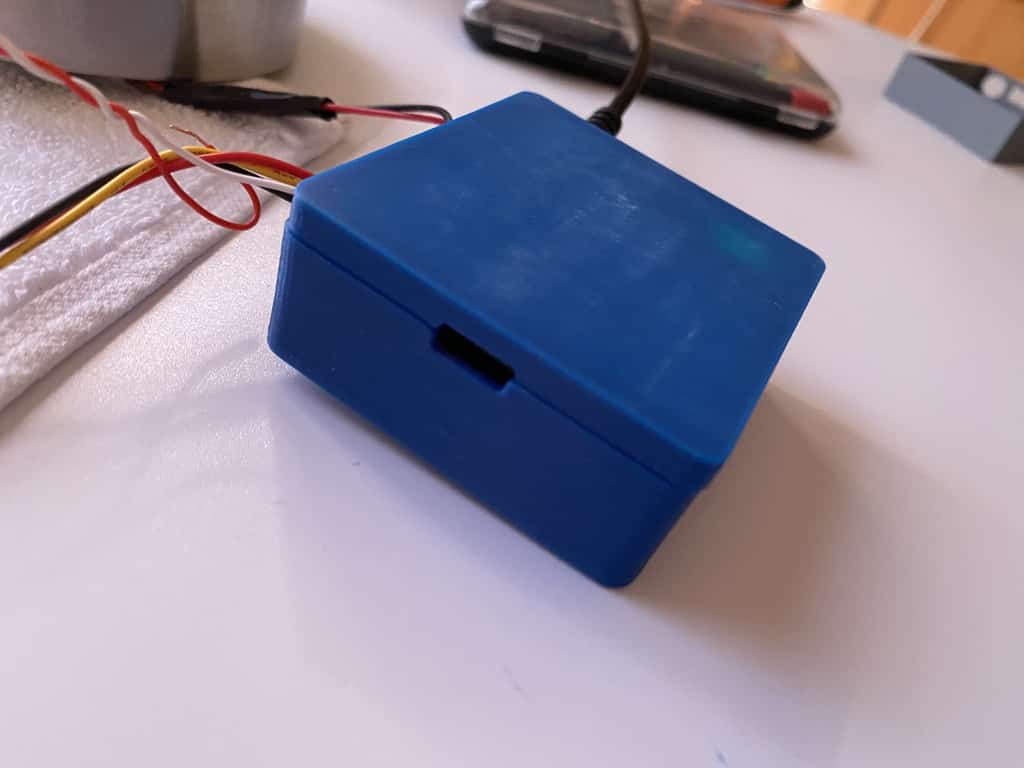
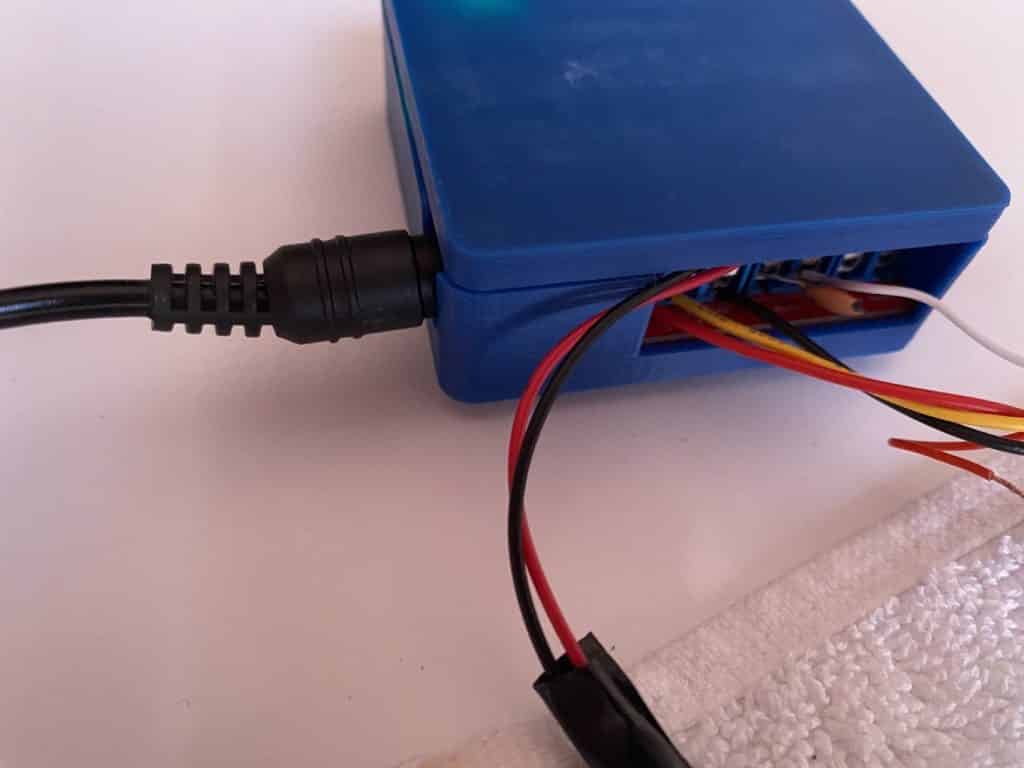
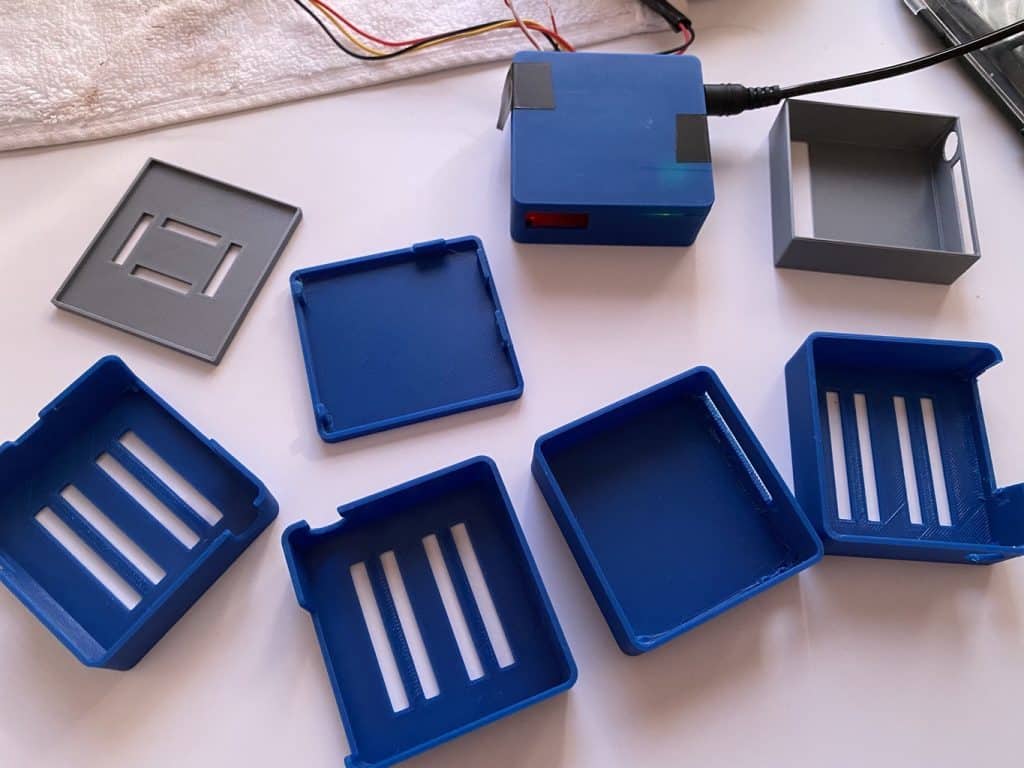
Update: Node-RED controller PCB, new enclosure
I finally got around to finish the design of an enclosure for my Terrarium controller PCB.
Here it is:
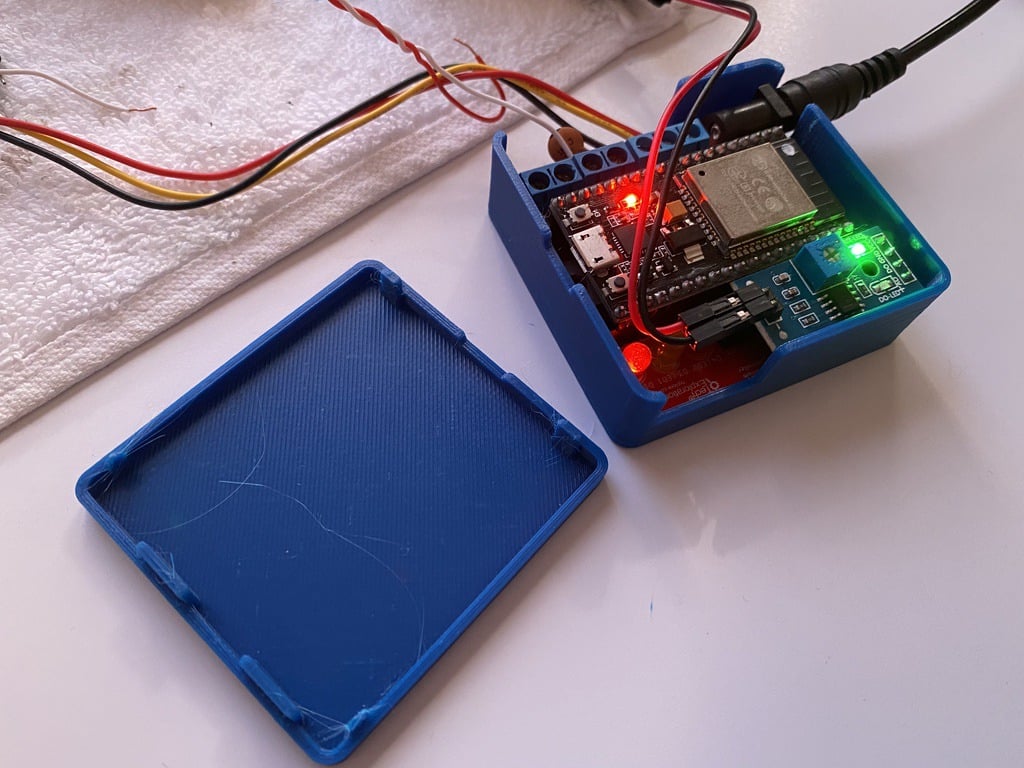
I have added the details in a new lecture, 2.35.
There, you will also find the Fusion 360 design file (F3D, good for editing) and an STL file (just import to your slicer software and print).
There’s also a link to my Fusion 360 project.