INTRODUCTION TO THE ESP32 GUIDE SERIES
My first ESP32 project experience: What was it like?
In this article, I am writing about my experience in using the ESP32 in one of my pet projects.

I’m very excited 🙂
In the last two articles (first and second), I wrote about the ESP32 and how it opened up new learning and project possibilities for me.
In the first article, I wrote about why I am impressed by the ESP32 hardware and its integration with the Arduino ecosystem. I also showed you an example of how easy it is to do secure web communications with the ESP32, something impossible to do with the Arduino Uno without expensive external hardware.
And in the second article, I compared the Arduino with the ESP32 and gave you another example of ESP32 awesomeness: Digital to Analog Conversion, and how easy it is to generate an arbitrary true analog signal.
My work with the ESP32 begun in January 2019, after playing around with the ESP8266 for a few years before this. I never committed to the ESP8266 because I felt it wasn’t ready. Software integration with the Arduino ecosystem was clunky, and the hardware was unreliable.
All this has changed with the ESP32. It works very well with the Arduino ecosystem, and in my long-running experiments, it has been rock-solid.
In this article, I am writing about my experience in using the ESP32 in one of my pet projects.
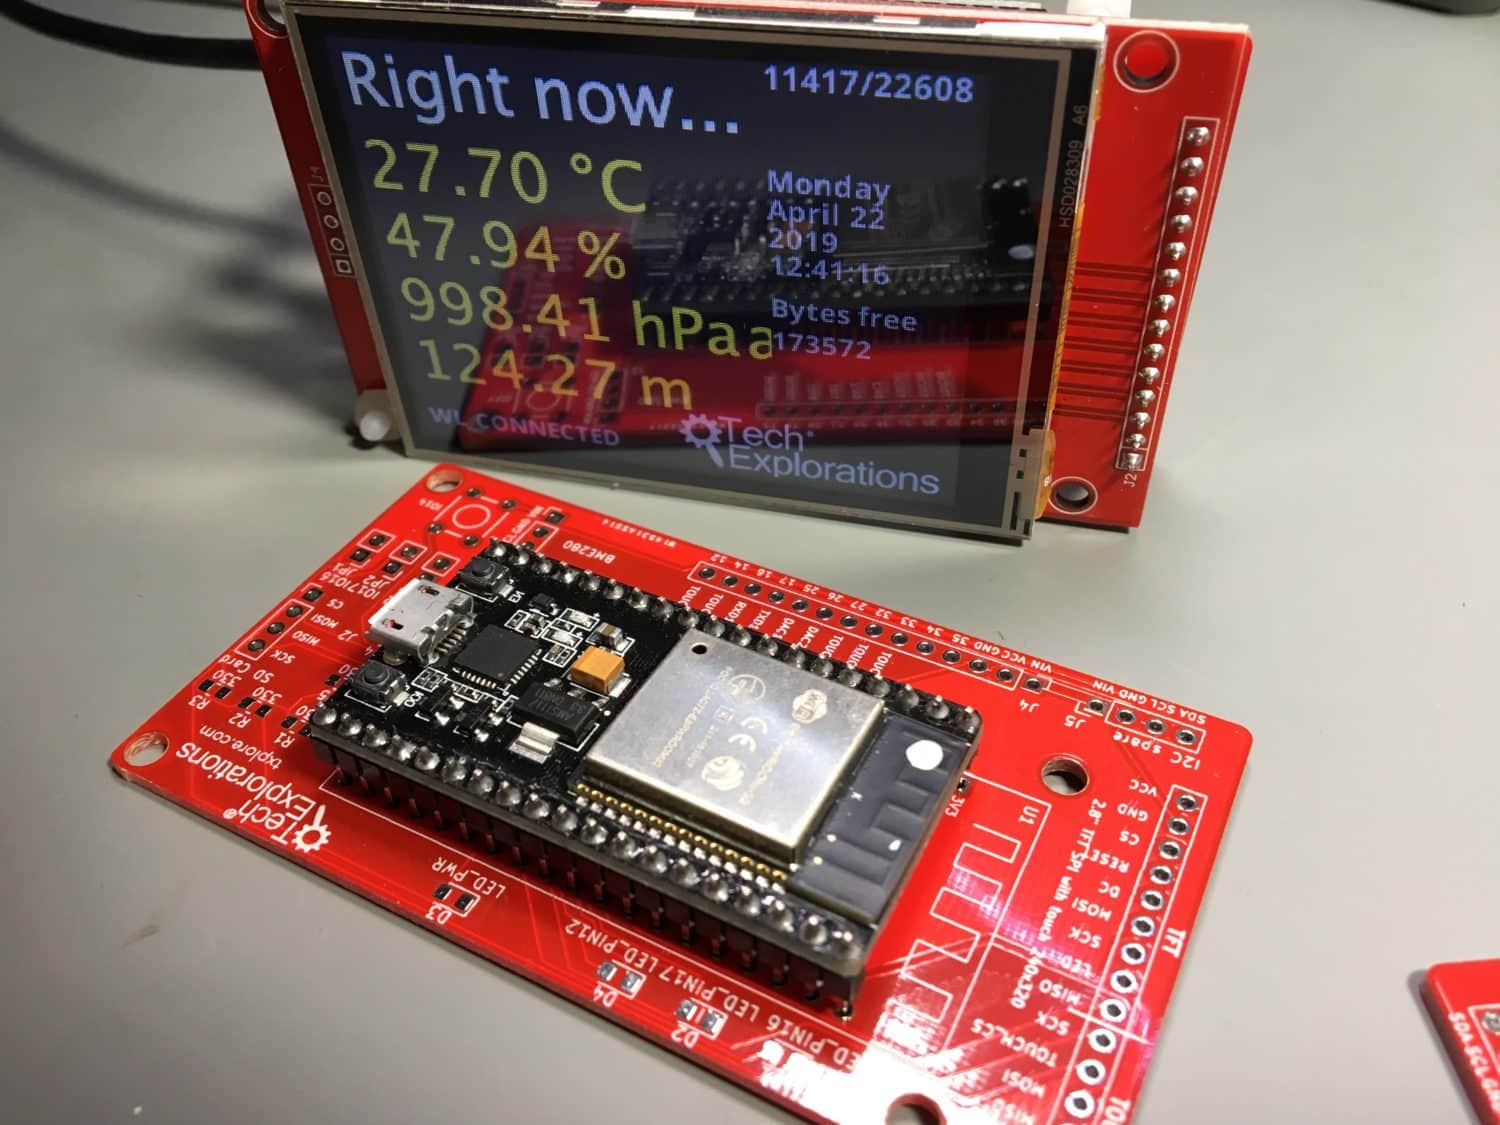
It’s this one:

Something I made to help me learn the ESP32.
I started work on this gadget because I wanted to learn the ESP32. I believe in project-based learning, so there you go 🙂
This project helped me learn how to build a system around the ESP32 that integrates environment sensing, an Internet clock, appliance voice control via IFTTT and Google Assistant, a touch TFT display for the user interface, and the use of many of the ESP32 features such as the SPI File System, Wifi, timers, and more, with an efficient program design.
Right off the bat, I can say that this is something not possible to do on the Arduino Uno. Just the storage footprint of the sketch is more than what the Arduino can hold. I would need to expand the Arduino’s flash memory with an external flash module.
Speaking of storage, in my ESP32 project, I used the integrated SPI File System it provides an efficient way to store files (flat text files, images, HTML files, or anything else you like) in the ESP32 flash memory. The basic file operations are possible via simple functions. In the Arduino Uno, I would need to use an external SD card module, adding to the complexity of the hardware.
Supporting the large TFT screen is possible on the Arduino Uno via the SPI interface; however, the refresh rates would be low. Adding the touch capability would make the user interface slow and unresponsive.
You can read more details about this project on my blog (here, here, and here).
I want to focus on the experience.
Rapid
Prototyping
Fun
As a Maker, subconsciously, I operate in a fine balance between reaching a goal (getting my gadget to a state where it works reliably) and dealing with the constraints of my hardware, software, and my knowledge and skills.
With the Arduino, those constraints are particularly tight.
You know: memory, processing, communications, pins, etc.
I’ve been working with the Arduino for many years, and I know that when I run out of hardware resources, there are things I can do to make it go further. I can optimize memory use. I can multiplex pins and communications. I can remove libraries and replace them with optimized, custom code.
But as a hobbyist, this kind of work conflicts with my psychological need to achieve my goal. Unless these optimizations are the goal, they impact the enjoyment that comes out of making something new and achieving the goal.
Does this “sound” familiar?
Velocity in making, learning,and progress is important.
With the ESP32, I didn’t have to make such compromises.
Except for trying to use HTTPS REST communications (I learned first hand that MQTT is a much better protocol for IoT applications), I was able to reach every single milestone that I set in this project.
And it was fun.
🙂
The ESP32 is the perfect higher-end microcontroller for the Arduino Maker.
But, in my experience, it isn’t a zero-effort proposition. You will still need to do some learning.
I have good news and good news 🙂
First “good news”: As an Arduino Maker, you already know the bulk of what you need to start using the ESP32 in your projects.
Second “good news”: For the rest, I can help you. I have completed work on a new course, that I named “ESP32 for Busy People”. In this course, I show you how to use the ESP32 in your projects. I assume that you are already familiar with the Arduino, and help you reach a skill level where the ESP32 is the primary microcontroller for your projects.
If you are familiar with my course, Arduino Step by Step Getting Started, and Arduino Step by Step Getting Serious, then you know what “ESP32 For Busy People” is like; it is a comprehensive course and recipe resource for Makers.
If you want to learn more about ESP32 For Busy People, click here.
Peter
PS. Do you have any questions about the ESP32 or the course that you’d like to ask me? If you post your question in the next few hours, I will try to respond within 24h.
Just post your question below.
Ready for some serious learning?
Enrol to
ESP32 for Busy People
This is our comprehensive ESP32 course for Arduino Makers.
It's packed with high-quality video, mini-projects, and everything you need to learn Arduino from the ground up.
Just click on the big red button to learn more.
Jump to another article
Lessons
1: The ESP32 module
2: The ESP32 Devkit
3: The ESP32 vs Arduino
4: The ESP32 GPIOs
5: The ESP32 communications
6: The ESP32 devkit power supply
7: Setting up ESP32 in the Arduino IDE on Mac OS
8: Setting up ESP32 in the Arduino IDE on Windows 10
9: Install the drivers CP2102 for the USB bridge chip
10: Digital output LED
11: Digital output PWM
Last Updated 1 year ago.
We publish fresh content each week. Read how-to's on Arduino, ESP32, KiCad, Node-RED, drones and more. Listen to interviews. Learn about new tech with our comprehensive reviews. Get discount offers for our courses and books. Interact with our community. One email per week, no spam; unsubscribe at any time
