Programming Arduino with Altair Embed
The sampleHold block
In this lesson, I demonstrate how to use the "samplehold" block. This is one out of hundreds of blocks that are available in Altair Embed. It is also a fundamental block, that you will use in most projects.
What is the "samplehold" block?
The Sample Hold block is a block that allows us to store the value of an input if the boolean value of the block is 1 or "true". Therefore it's not zero.
This is the sampleHold (S&H) block symbol:
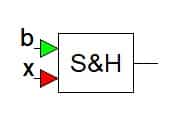
The sampleHold block
And here is the definition from the documentation:
The sampleHold block latches an input value under the control of a clock signal, which is represented as a Boolean pulse (b). At the occurrence of the pulse, the input signal (x) is sampled and held until the next Boolean pulse is applied. Boolean pulses can be regularly or irregularly spaced
What is the function of the sampleHold block?
The documentation define the function of the S&H block with this formula:

The function of the S&M block
Think of the S&M block as a memory. Its output is the same as the "x" input while the "b" input is "1" (i.e. the block is "on").
When the block is off (the "b" input is "0"), then the output of the S&H block will continue to be the last value that was written when the block was active.
Hence, the S&H block will remember the last value written to it when it was active.
Setup the example
Let's start from scratch.
First, find the block by name using the block search tool (1) or your can find it in the sidebar, inside the Nonlinear" category (2).
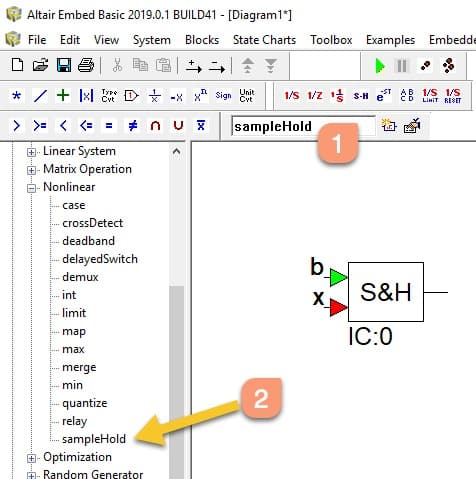
Find the block using the search tool (1) or through the sidebar (2)
Drop the block in the sheet.
Then, double-click on the block to open its properties window. There, you can specify its initial condition. The initial condition can be an integer, a real, complex, or fixed-point scalars, or vectors or matrices.
Let's enter the value "0" in the Initial Condition field.
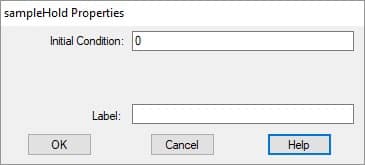
Set the block initial condition to "0".
Next, conned the inputs. The green triangle on the left side of the block is the first input. The label "b" signifies a boolean, or a number that can be either "1" or "0".
Select and drop a constant block from the top toolbar to the sheet. Double click on the constant block to edit its value to "1", and connect the constant output to the "b" input of the S&H block.
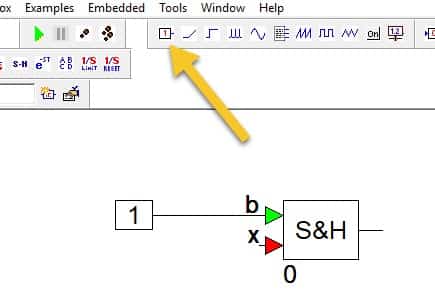
Pick the constant block from the toolbar, and connect it to the S&H block
Do the same for the x (variable) input, so that the constant "1" is the input value to "x".
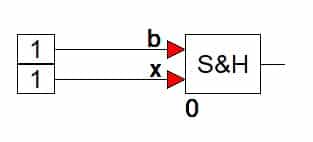
Set constant "1" as the input to "x"
Last, select the monitor block from the top toolbar and drop it on the right side of the S&M block. Connect the output of the S&M block to the input of the monitor.
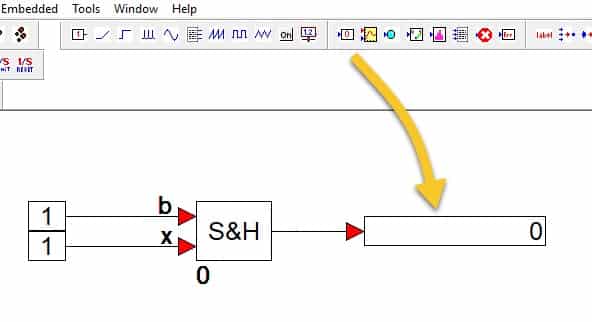
Connect the output of the S&M block to the monitor
We can now go ahead with the simulation.
Simulation
We will do a step simulation so that we can see the values in the monitor changing as the values in the "x" and "b" inputs of the S&M block change.
Bring up the simulator window. You can do this via the View menu, then click on Control Panel.
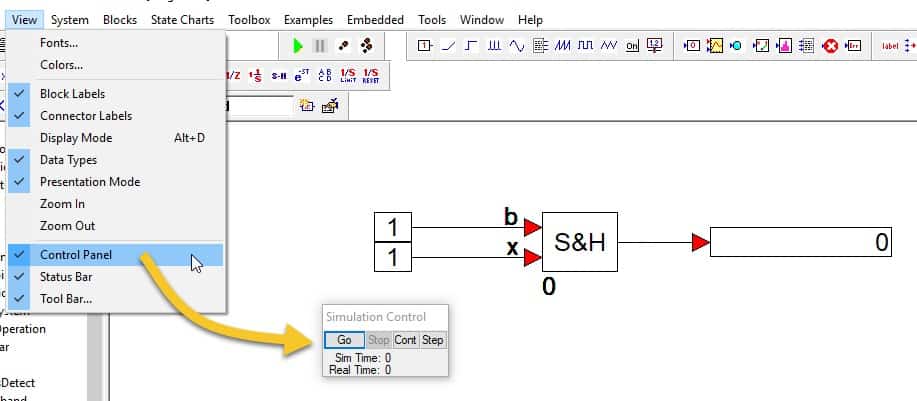
The simulator control panel.
Use the "Step" button to drive the simulator one step at a time.
Click on the Step button once, and notice how the monitor displays "1". This is the value we wrote to the "x" input. The Sim Time value in the simulator window should be "0.01".
Change the "x" input constant to "2", and click on "Step". The monitor nows show "2". The Sim Time is "0.02".
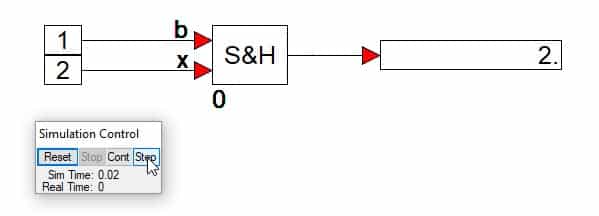
The output copies the "x" input while "b" is "1".
Now, change the "b" input to "0" and "x" to "3". Click on "Step". Did the output change?
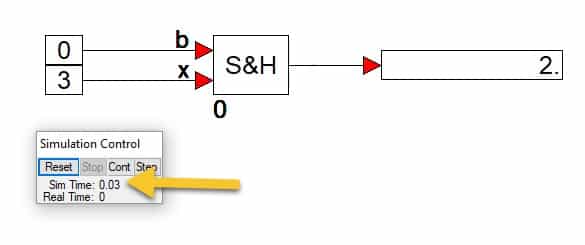
When "b" is "0", the output does not change.
No! While "b" is "0", the output is "stuck" to the last value that was written in the "x" input of the S&M block when "b" was "1".
In effect, the S&H block provides us with a way to fetch new data and remember it by using a single boolean input.
Last Updated 4 years ago.
We publish fresh content each week. Read how-to's on Arduino, ESP32, KiCad, Node-RED, drones and more. Listen to interviews. Learn about new tech with our comprehensive reviews. Get discount offers for our courses and books. Interact with our community. One email per week, no spam; unsubscribe at any time
