Node-RED guide series
Install Node-RED on the Raspberry Pi
Node-RED comes already installed in the Raspberry Pi operating system. Nevertheless, installing a fresh copy is easy, and you get the benefit of working with the latest and greatest version of the tool.
In this article I will show you how.
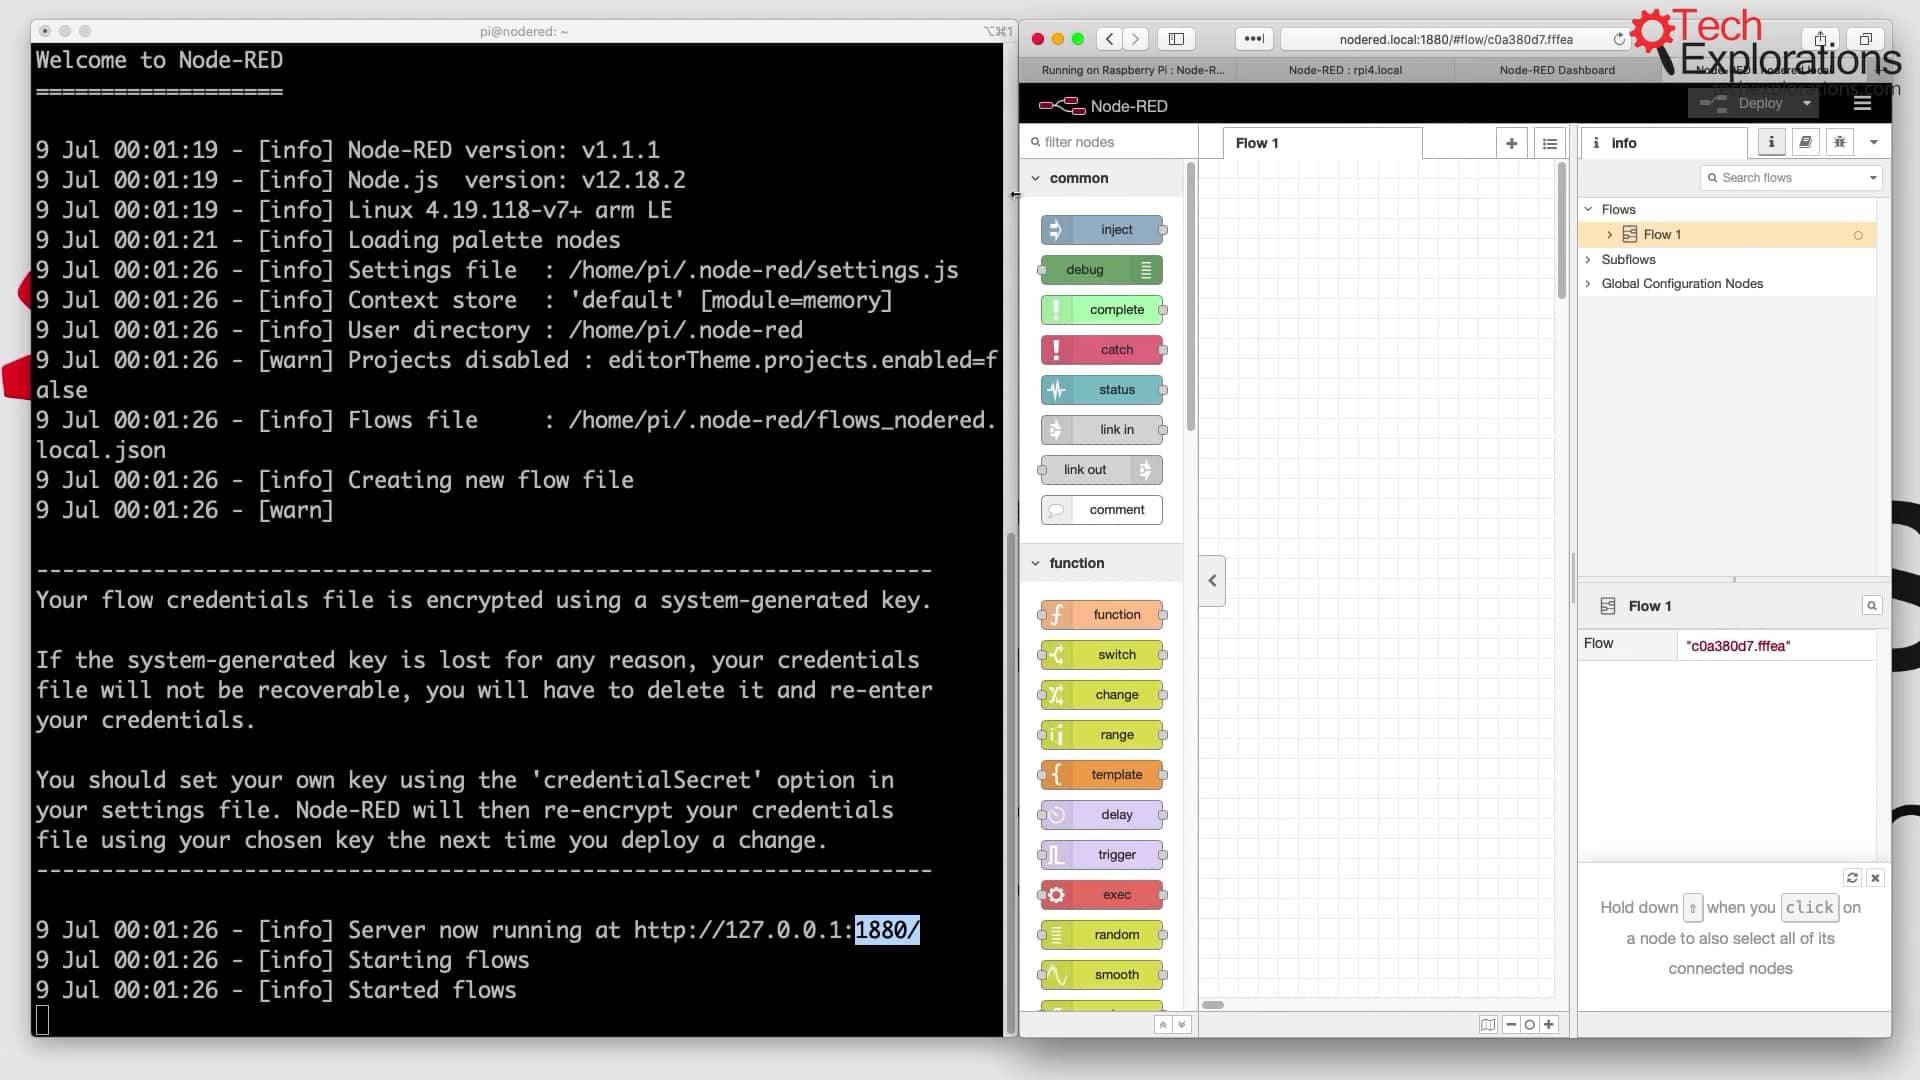
In this article, I'll show you how to install Node-RED on your Raspberry Pi.
To do that, I'll be following the instructions provided in the Node-RED documentation.
Update npm
Login to your Raspberry Pi, as "pi". The default password for the "pi" user is "raspberry".
Start by installing the "git" repository tools, as well as the essential build tools that will be needed in the next step.
Here is the command:
~$ sudo apt install build-essential git
It looks like this:
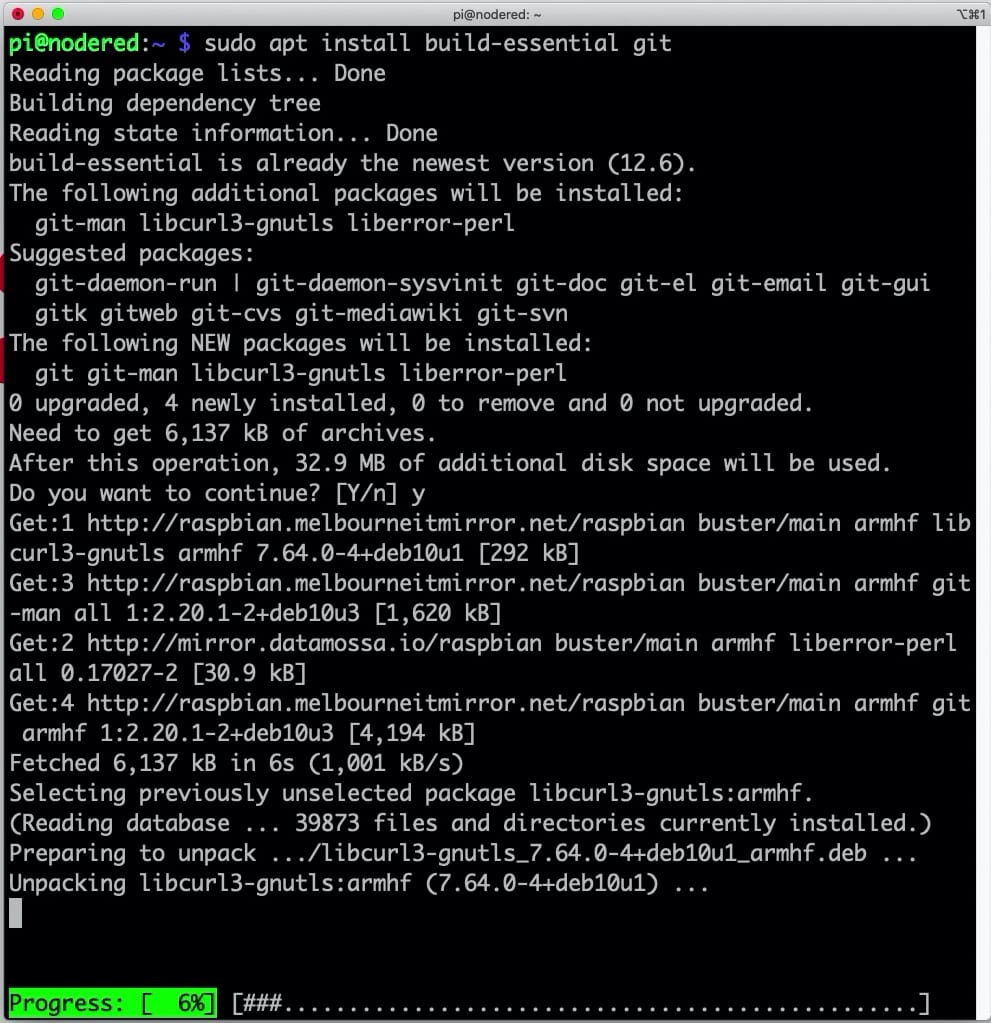
Install the "git" and "build-essential" tools.
Install Node-RED
Next, run this bash command to install a fresh copy of Node-RED:
~$ bash <(curl -sL https://raw.githubusercontent.com/node-red/linux-installers/master/deb/update-nodejs-and-nodered)
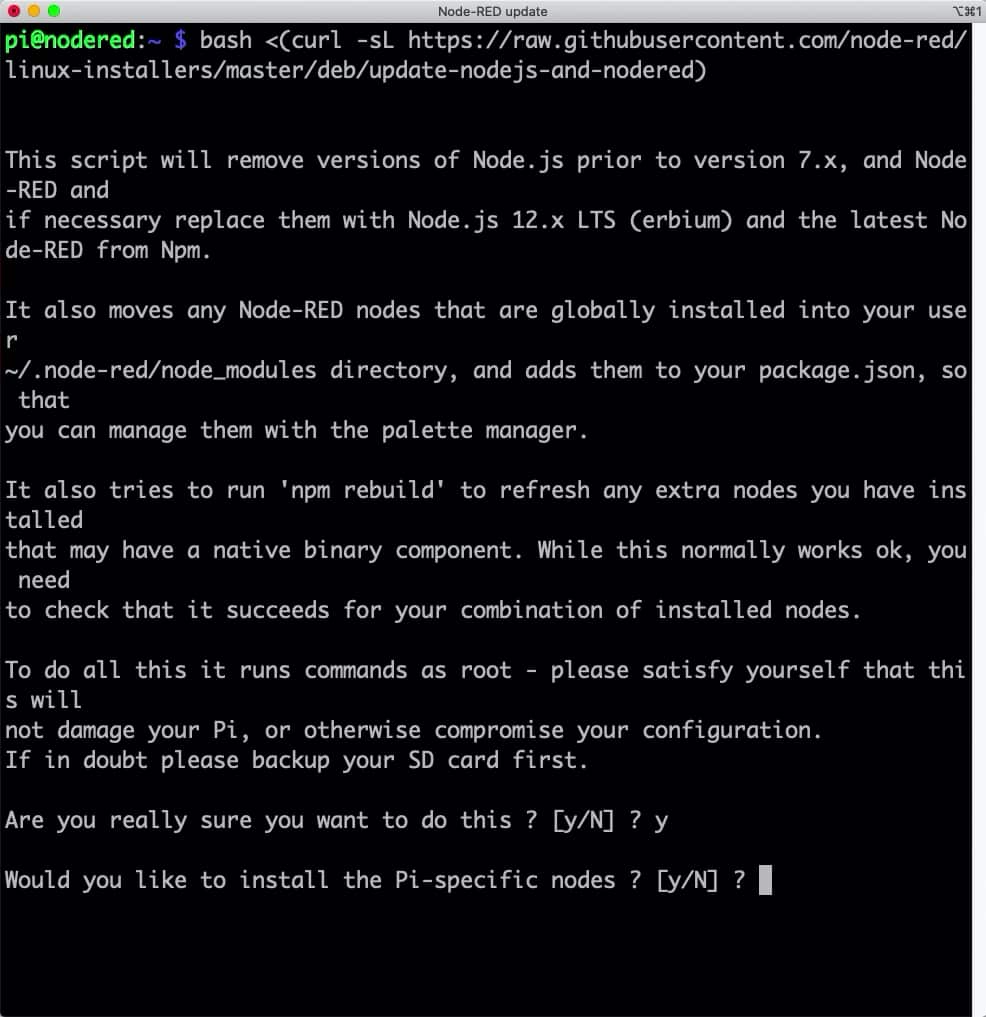
Type "y" in the two installer questions.
The installer will ask two questions before it begins the installation, to which you should respond with "Y".
Around 20 minutes later, the installation will complete, and you will see information about your new Node-RED setup in the console.
Success looks like this:
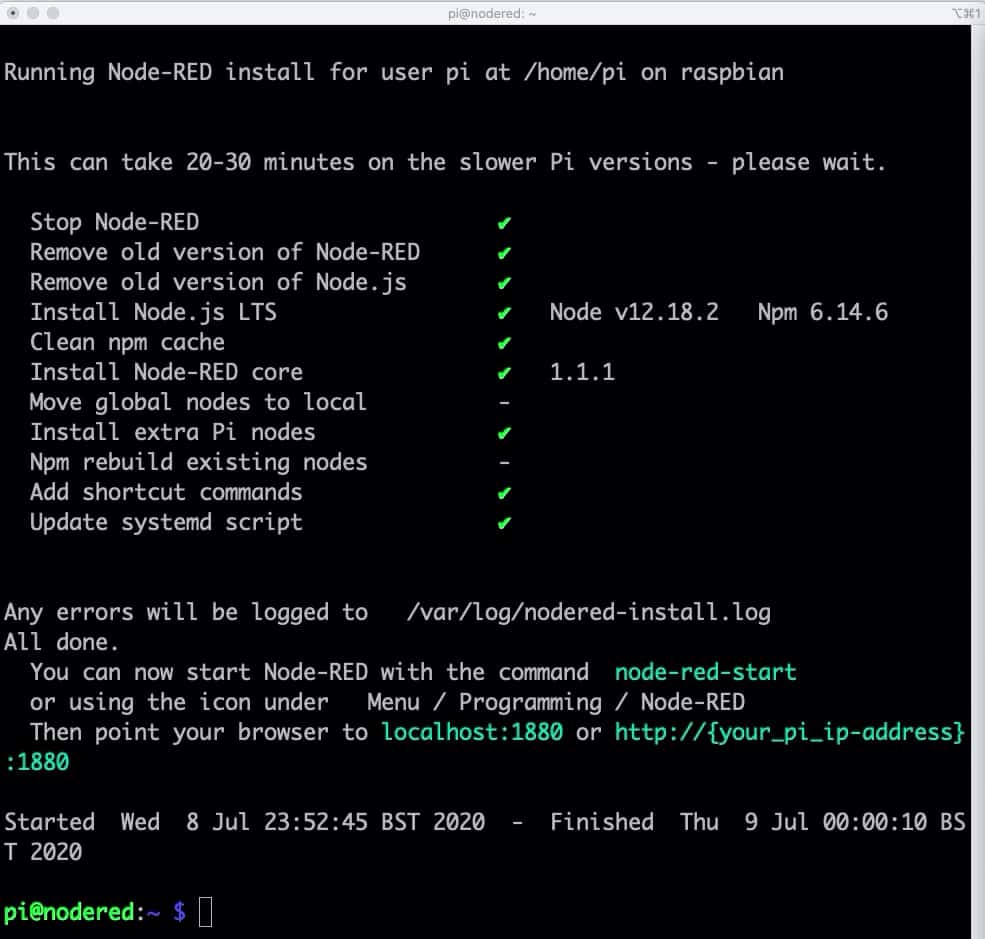
Node-RED is now installed on your Raspberry Pi.
But wait a sec...
How to start Node-RED
There are a few different ways to start the Node-RED service.
The easiest is to follow the prompt of the installed, and just type:
~$ node-red-start
This will work fine, especially on a Raspberry Pi 4 with more than 2 GB of RAM.
For earlier Raspberry Pi's, or computers with limited RAM, it's better to specify the amount of RAM available like this:
~$ node-red-pi --max-old-space-size=256
This will instruct the Node-RED service to quickly free up any unused memory so that other services of the operating system can use them.
Regardless of which method you choose, the Node-RED service will begin within a few seconds, and indicate that it is running on localhost, default port 1880.
You can point your browser to this URL:
http://nodered.local:1880
The URL "nodered.local" is the hostname of my Raspberry Pi. You can use your RPi IP address instead of the hostname.
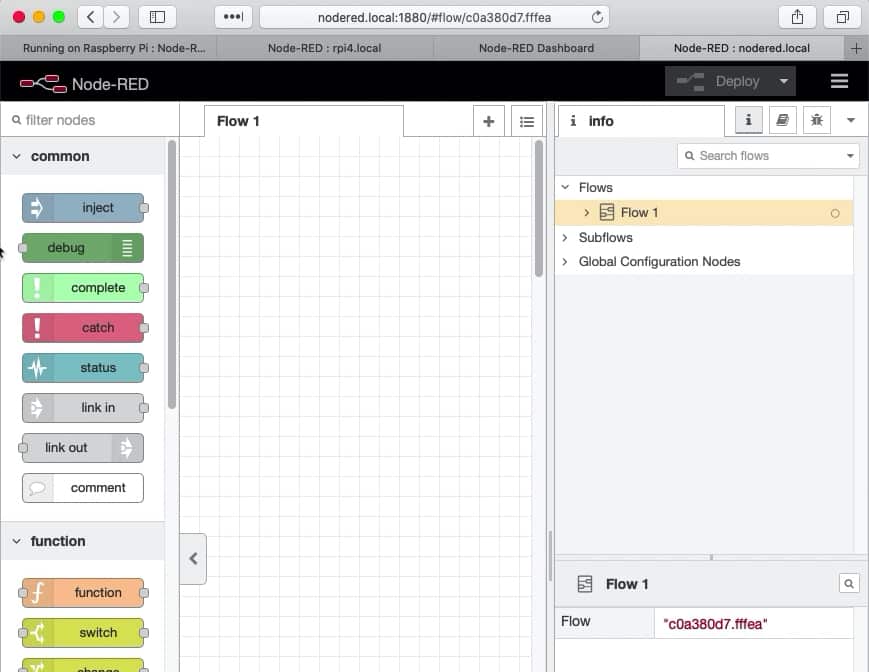
Node-RED running in my browser for the first time.
If you use one of the above methods to start Node-RED, you can stop the service by typing Ctr-C.
Run Node-RED as a service
Node-RED can run as a background service. The benefit of this is that you can set it to autostart when the operating system boots, instead of having to start it manually.
You can manually start the Node-RED service using the "node-red-start" command. This will produce this output:
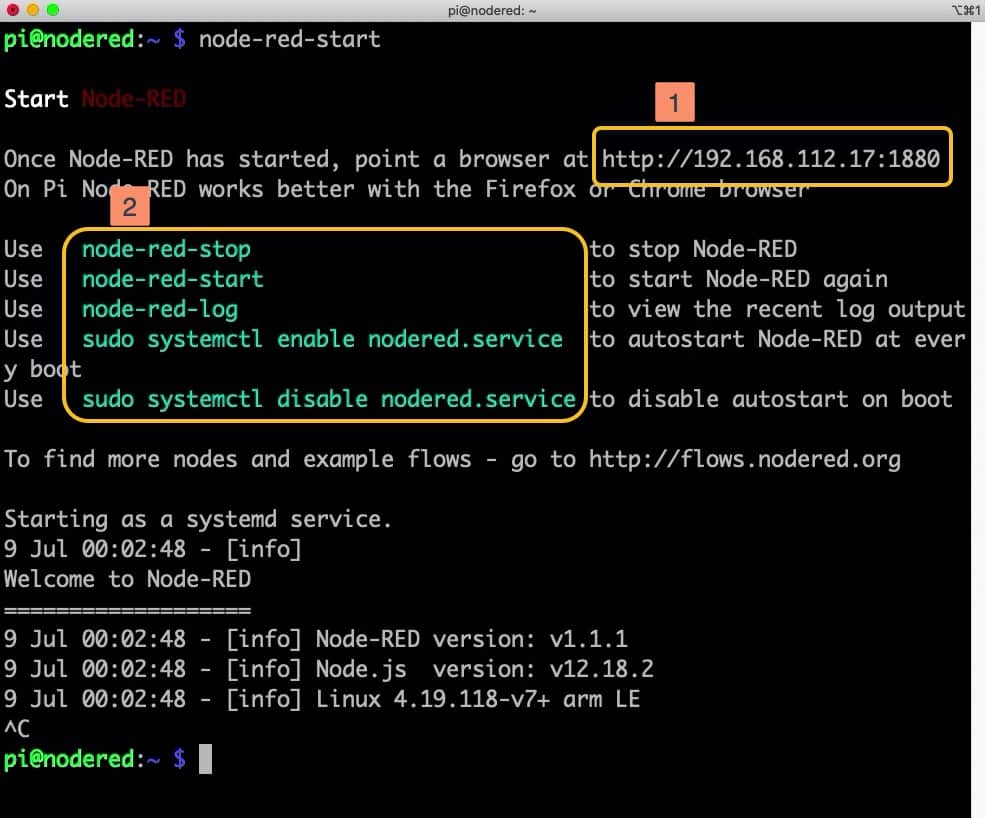
Node-RED is installed, and already running on your Raspberry Pi.
This output contains the IP address and port number for the new Node-RED service (1), as well as the systemd commands for starting and stopping the service (2).
Node-RED is now running as a service. You can point your browser to the URL that is indicated in (1).
Autostart the Node-RED service on boot
To automatically start the Node-RED service on boot, use this command:
~$ sudo systemctl enable nodered.service
Now, when your Raspberry Pi starts, the Node-RED service with begin automatically.
Try this:
- Type "sudo reboot", to reboot the Raspberry Pi
- Wait for a couple of minutes for the reboot to complete
- Use your browser to access Node-RED
Node-RED should load in your browser, and operate normally.
Node-RED offers many configuration options. I will review some of them in the next article.
Learn Node-RED and how to use it with the ESP32
This course will guide you through the construction of an automated control system. The deliverable is a Terrarium controller.
Along the way, you will learn a great deal about useful technologies such as the Node Red programming environment and MQTT.
Jump to another article
1. Introduction to Node-RED
2. Install Node-RED on the Raspberry Pi
3. Configuration
4. Nodes
5. Flows
6. Messages and Variables
7. The "complete" node
8. The "catch" node
9. The "link out" and "link in" nodes
10. The "switch" node
11. The "range" node
12. The "delay" node
13. The "trigger" node
14. The "RBE" (Report by Exception) node
Last Updated 2 years ago.
We publish fresh content each week. Read how-to's on Arduino, ESP32, KiCad, Node-RED, drones and more. Listen to interviews. Learn about new tech with our comprehensive reviews. Get discount offers for our courses and books. Interact with our community. One email per week, no spam; unsubscribe at any time

