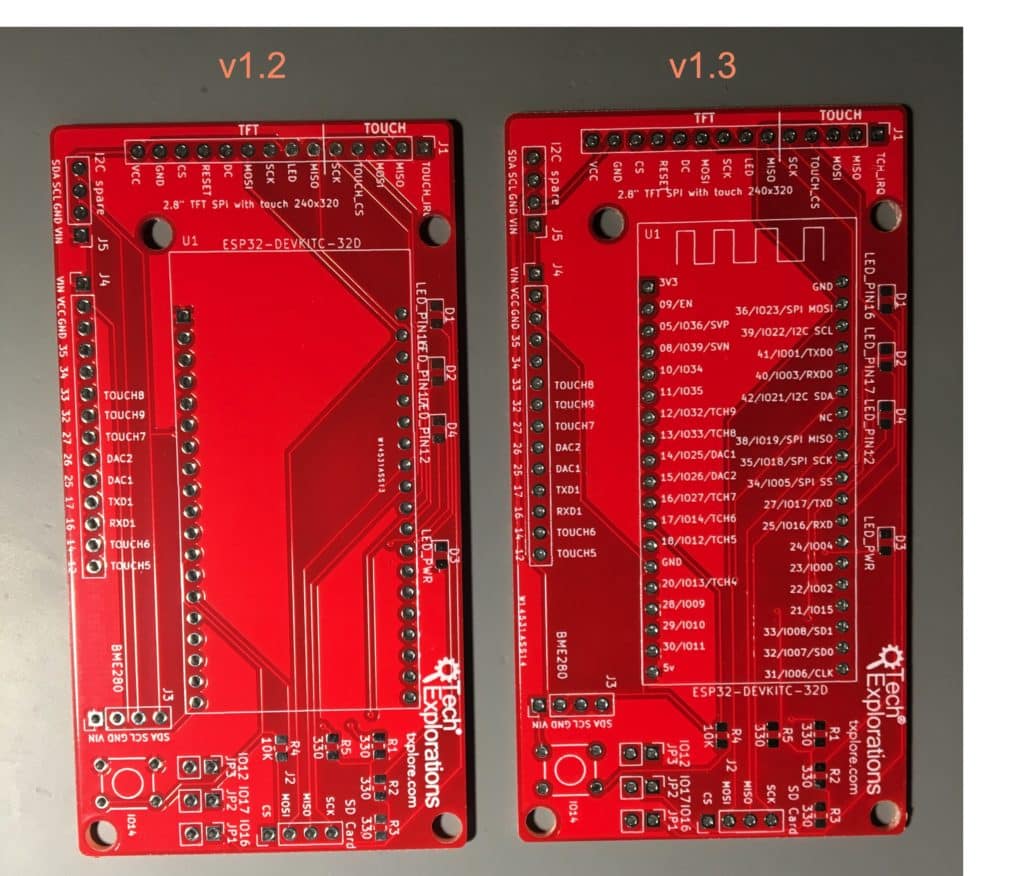
After publishing ESP32 For Busy People, I was finally able to spent a bit of time on my IoT gadget project.
I started this project in February.
It’s how I learned how to use the ESP32 in “real life”. Much of the content in ESP32 For Busy People came from my work on this project.
Let’s see, what’s new since the last update.
A new PCB!
The previous PCB, v1.1, worked well “out of the box”. But I wanted to include more information about the various pins and their roles by adding text in the silkscreen. This PCB, version 1.3, features:
- A power LED and 3 programmable LEDs, all SMD. The programmable LED can be disabled via jumpers.
- A momentary button.
- Two I2C headers.
- Two headers for connecting a 2.8″ TFT display with touch interface and SD card.
- A header that breaks out available GPIOs.

This PCB helped me develop the software much faster. I did not have to worry about loose wires, loose connections, and worrying about damaging the gadget just by moving it across my bench.
Platform IO
Apart from getting to know the ESP32 really well, my 2nd objective was to learn the basics (and beyond) of PlatformIO. I felt that the ESP32 provides the opportunity for more ambitious projects compared to the Arduino Uno.
This meant that the sketches would look more like applications in terms of complexity and size. While the Arduino IDE is excellent for learning the basics (and a little beyond the basics), it isn’t the best choice for larger projects.
That’s where PlatformIO comes in. To be sure, PlatformIO is NOT an IDE. It is a development platform for building applications for a great range of targets, including the Arduino. To use PlatformIO, you must choose an editor. Two are recommended: Atom and MS Visual Studio Code. I played with both (and I have been using Atom as my text editor for the last few years).
I decided to go with MS Code because of how well it integrates with PlatformIO. This combination reminded me of how it was when I was using Visual Studio many years ago, to write C# applications.
Syntax highlighting, code folding, drilling into source code just by double-clicking (which helped me a lot as I was troubleshooting the migration from Arduino IDE to PlatformIO).
PlatformIO and MS Code both have a steep learning curve, especially for people coming from the Arduino IDE. But this is rewarded, especially if your objective is to program for a device like the ESP32, which can hold larger and more complicated programs.
I’ll be putting everything I learned about the ESP32, PlatformIO and MS Code in a new course. In this course, I will document my ESP32 IoT gadget, in detail. I will show you how to migrate an Arduino IDE project to PlatformIO. Along the way, I have to touch on C++ programming issues that constitute a big stumbling wall for people attempting to do this.
Is there something specific you’d like me to cover? Leave a comment below.
