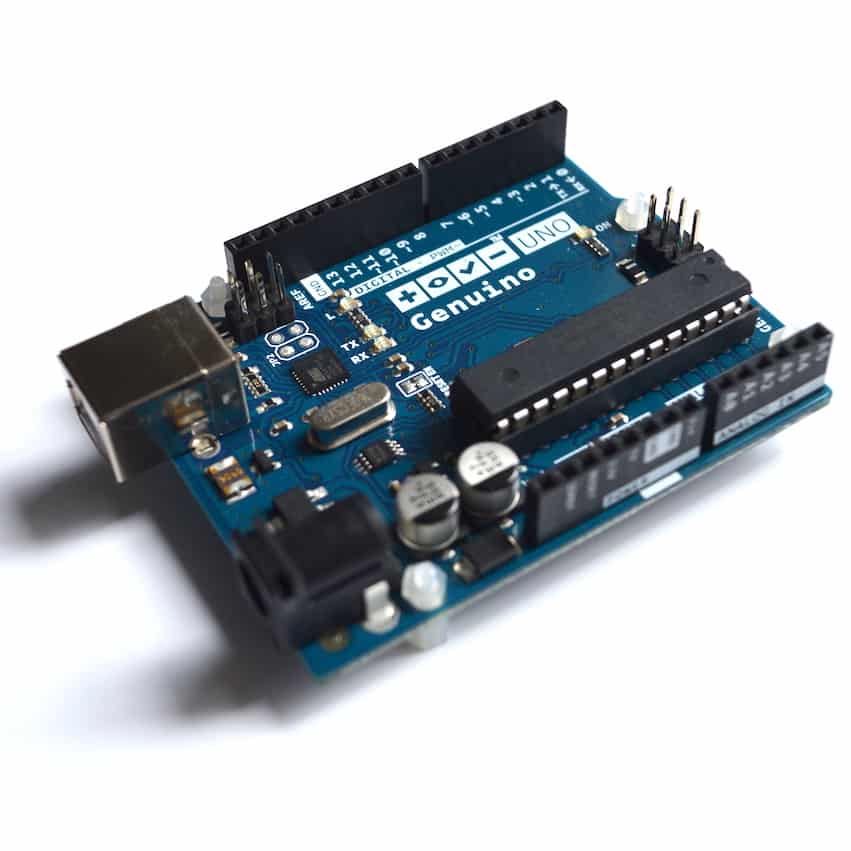
Introduction to the Arduino guide series
The Arduino programming environment
In Lesson 4 of our introductory course on the Arduino, you will learn about what it is like to program the Arduino. You will install the Arduino IDE, and use it for the very first time to upload your first example sketch.
In Lesson 4 of our introductory course on the Arduino, you will learn about what it is like to program the Arduino. You will install the Arduino IDE, and use it for the very first time to upload your first example sketch.
You will need your Arduino Uno and a USB cable.
I recommend that you clear the next 15 minutes in your schedule so that you can concentrate on the activities of this lesson. Switch your mobile and computer to “do not disturb” mode.
You don’t need any prior knowledge or skill in electronics. You don’t need any prior knowledge or skill in programming.
By the time you finish this lesson, you will have a programming environment installed on your computer, and an Arduino with a blinking LED.
And that’s your first practical step in learning the Arduino.
Right now.
Let’s do it!
The Arduino quick setup guide
To program the Arduino, you need to install the Arduino Integrated Development Environment (IDE) on your computer.
To install the IDE on your computer, you must first download it from arduino.cc. Then, you will follow the installation process that depends on the operating system that is running on your computer.
The only requirement is that you have a Java runtime environment already installed. This is usually not a problem on Windows and Mac computers.
Download the software
To download the IDE for your operating system, go to https://www.arduino.cc/en/Main/Software.
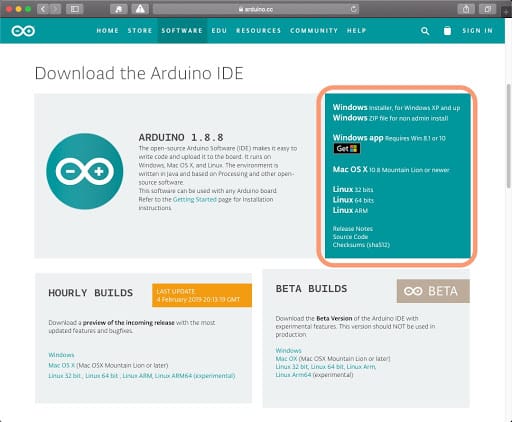
The Arduino IDE download page. Pick the installer to match your computer operating system (download links are in the orange rectangle).
In the download page, scroll down to find the latest available version, and click on the download file link that matches your operating system. For Windows, I prefer the ZIP file option.
Allow some time for the download to complete. Then, look for the installation file in your download folder, “~/Downloads” for the Mac and “Downloads” on Windows.
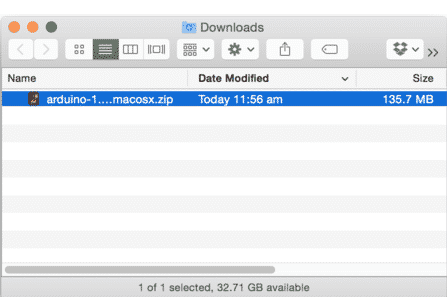
The IDE installer on the Mac
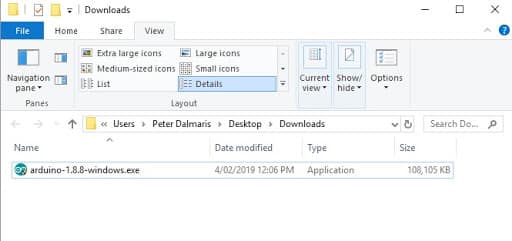
The IDE installer on Windows 10
In the remainder of this lesson, I show you the installation process for Mac OS and Windows 10.
How to install the Arduino IDE on Mac OS X
To do the installation on the Mac, double-click on the installation archive file to have it extracted. The picture below may be different from what you will see, depending on which program you use for extracting ZIP files.
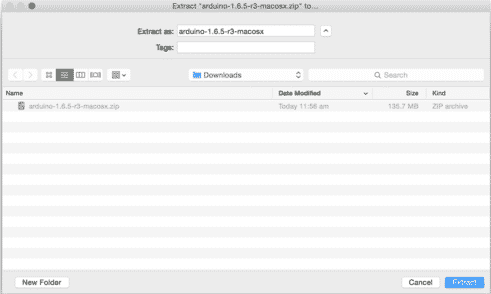
Extracting the IDE installer on the Mac. The software version in this image is 1.6.5, but the process is exactly the same for newer versions.
When the extraction completes, you will have a new file, which is the actual IDE. All you have to do then is to move it into your Applications folder.
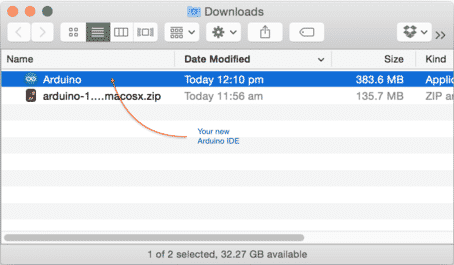
The IDE application is now in my Downloads folder.
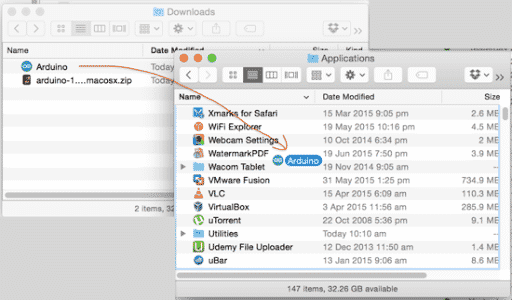
… And finish the process by copying the file into your Applications folder.
To start the IDE, double-click on the Arduino icon inside the Applications folder.
How to install the Arduino IDE on Windows
On Windows, start by double-clicking on the installation file. Be ready for a long series of confirmation dialogue boxes. In all of them, it is safe to accept the defaults.
A pop-up will ask you for permission to run the program, click on Yes to continue:
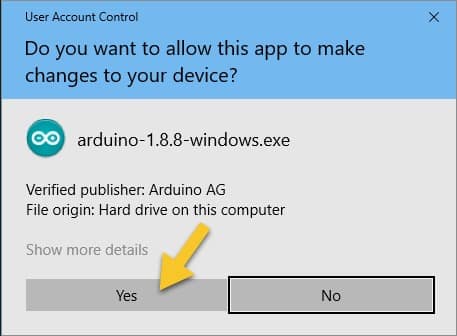
Yes! It is safe to continue!
Agree to the license agreement:
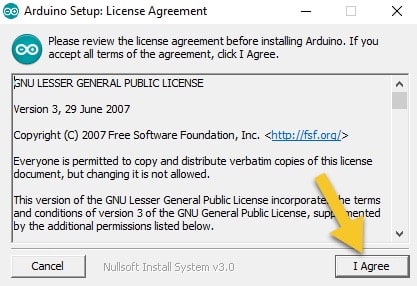
Yes! I agree...
Accept the checked components:
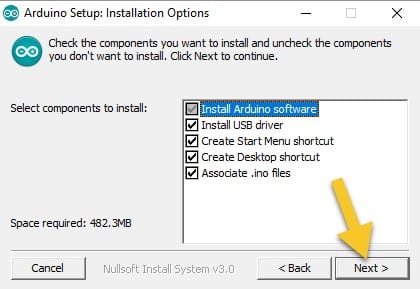
Yes! All these components are used.
Accept the default installation location, and the file copy will begin:
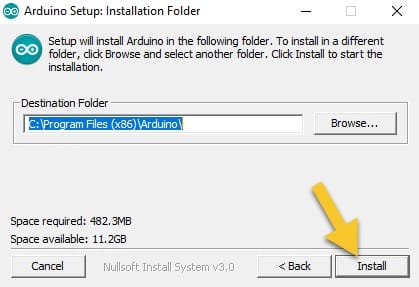
Yes! This location looks fine.
The installer will start copying files to the installation location:
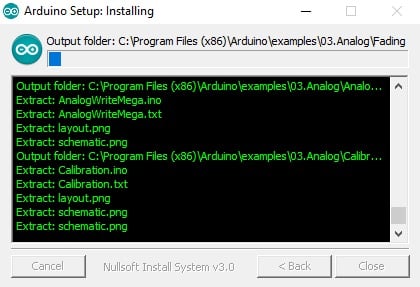
Copying files to the destination.
You may be asked to install device drivers a couple of times. Click on “Install” to accept the installation.
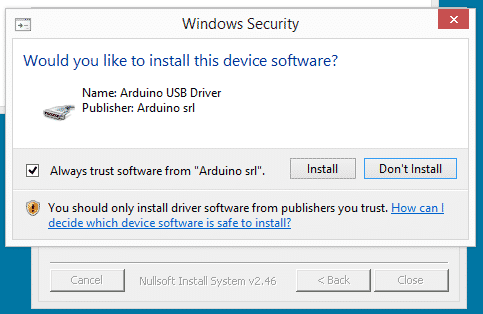
Yes, these USB device drivers are also useful.
When the file copy process finishes, click “Close” to close the installer:
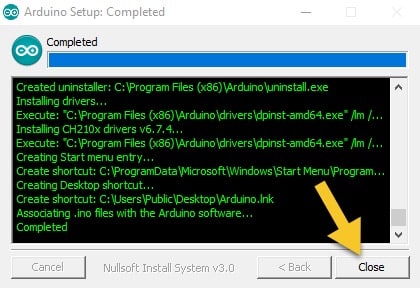
When the file copy process finishes, click “Close” to close the installer:
You can start the Arduino IDE, just like any other Windows program. If you accepted the default installation options, then you should be able to find the Arduino shortcut on the desktop (see screenshot example below).
Double-click on the shortcut to start the IDE.
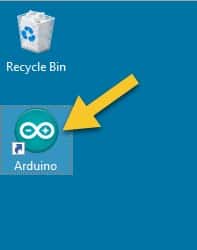
The Arduino IDE shortcut on the desktop
An alternative way to start the IDE is to search for it. In Windows 10, you will find the search field in the bottom left corner of the desktop. Type “Arduino” in the field, and you will see the “Arduino” application appearing at the top of the search results (see the example screenshot below. Just click on the application name to start the IDE.
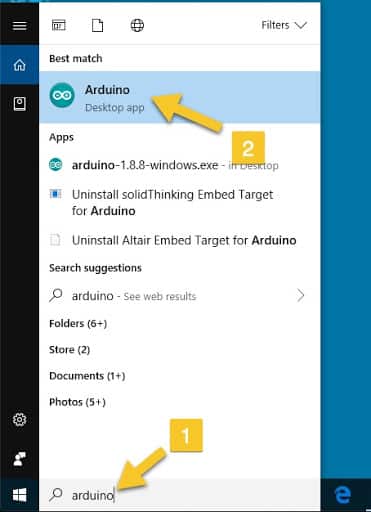
You can start the Arduino IDE by searching for it.
Awesome. Now that you have installed the Arduino IDE, you can use it to upload your first sketch.
Let’s try it out.
Upload your first sketch
Start the Arduino IDE. A few seconds later, you should see a new IDE window with a blank sketch. It will look like the example below (Windows 10 and Mac OS):
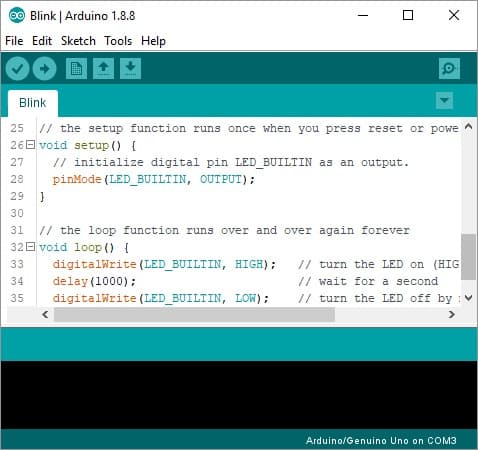
A blank Arduino sketch (Windows 10)
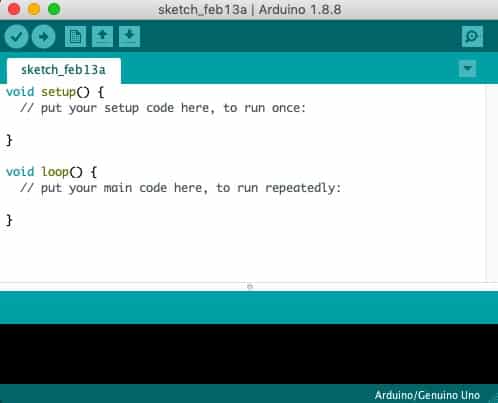
A blank Arduino sketch (Mac OS)
Continue to connect your Arduino to your computer via the USB cable. When connected, the power LED on the Arduino should light up.
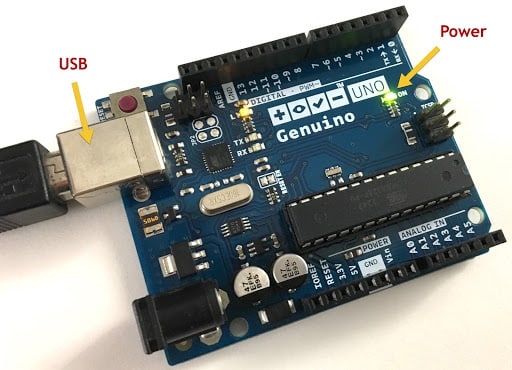
The Arduino is connected to your computer via a USB cable, and the power LED is lit
Go back to the Arduino IDE and load one of the examples. On both Windows 10 and Mac OS, you can do this by clicking on File, Examples, 01.Basics, Blink.
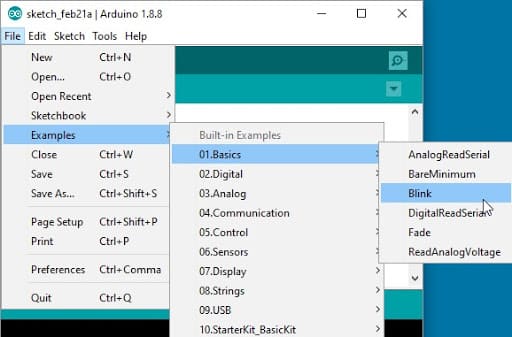
Load the Blink sketch on Windows 10
The Blink sketch will appear. Don’t worry about what is in it, since you will learn about programming (sketching) in the next two lessons. For now, it’s enough to know that this little program will make the LED marked “L” on the Arduino Uno to blink once every second. This LED is right next to the pin marked 13.

The Blink sketch
Before you can upload this sketch to your Arduino, there are two things you should check and set. The Arduino board model, and the port to which it is connected. Both are usually automatically and correctly set by the Arduino IDE, but I have a habit of checking before I upload the sketches, that has saved me a huge amount of time over the years.
To check for the correct board model, click on Tools, Board, and Arduino/Genuino Uno.
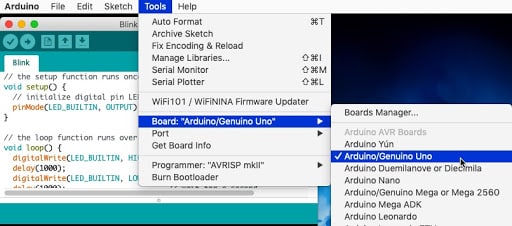
Select the Arduino Uno Board (Mac OS)
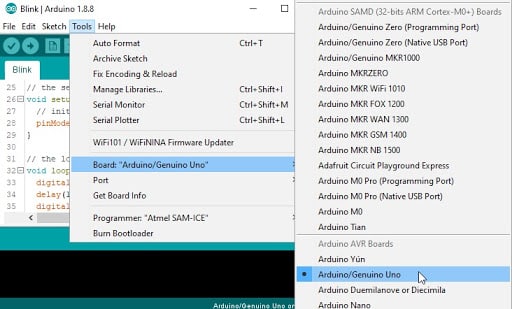
Select the Arduino Uno Board (Windows 10)
Next, check the port. Click on Tools, Port, /dev/cu/usbmodem7101 (Arduino/Genuino Uno) or COM3. The port names may vary, but the name of the board should also appear on the menu to help you identify the correct one.
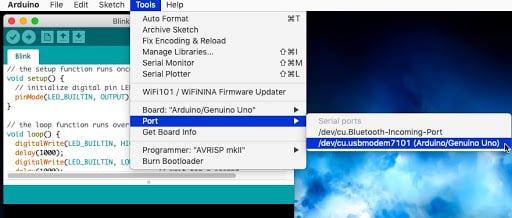
Select the correct port (Mac OS)
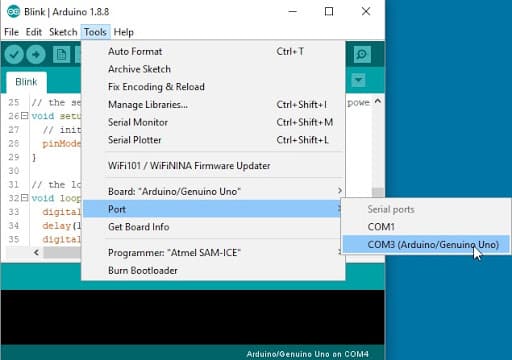
Select the correct port (Windows 10)
With the settings verified, go ahead to upload. Click on the icon with the right arrow to start the upload. When you click on this button, the button will turn yellow, and the IDE will first compile and then upload the sketch to your connected Arduino. This process takes around 10 seconds.
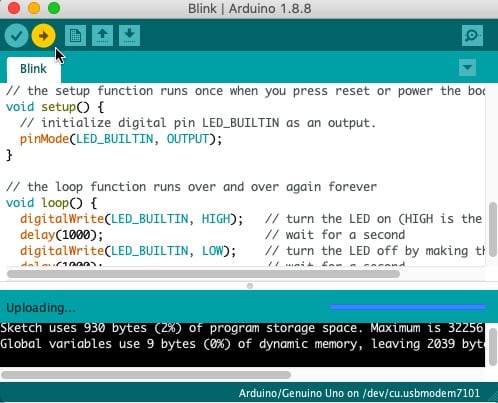
Uploading a sketch (Mac OS)
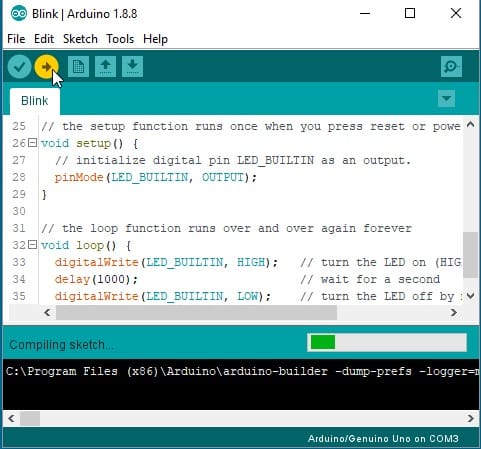
Uploading a sketch (Windows 10)
When the process finishes, have a look at the LED marked “L,” next to pin 13. Can you verify that it is blinking once per second? It’s the sketch you just uploaded that made this happen.
And this is how easy it is. But it’s only the start.
In the next lesson, you’ll take an in-depth look at Arduino libraries, which help make programming a breeze.
When you are ready, continue with the next lesson. There, you will learn about one of Arduino’s superpowers: libraries.
New to the Arduino?
Arduino Step by Step Getting Started is our most popular course for beginners.
This course is packed with high-quality video, mini-projects, and everything you need to learn Arduino from the ground up. We'll help you get started and at every step with top-notch instruction and our super-helpful course discussion space.
Jump to another article
1. What is the Arduino?
2. Common Arduino boards
3. Types of hardware that you can connect to an Arduino board
4. The Arduino programming environment
5. Arduino libraries and how to install them
6. The basics of Arduino programming: program structure, functions, variables, operators
7. The basics of Arduino programming: Loops, conditions, objects, inputs & outputs
Last Updated 1 year ago.
We publish fresh content each week. Read how-to's on Arduino, ESP32, KiCad, Node-RED, drones and more. Listen to interviews. Learn about new tech with our comprehensive reviews. Get discount offers for our courses and books. Interact with our community. One email per week, no spam; unsubscribe at any time

