Communications
ESP-01S Wi-Fi module – Configuration AT commands
This guide discusses the configuration process for the ESP-01S Wi-Fi module using AT commands. It covers basic commands such as AT, AT+RST, AT+GMR, and AT+CWMODE_DEF, which configures the module for SoftAP+Station mode. The AT+UART command is also used to configure the serial communication parameters.

Introduction to the Configuration Process
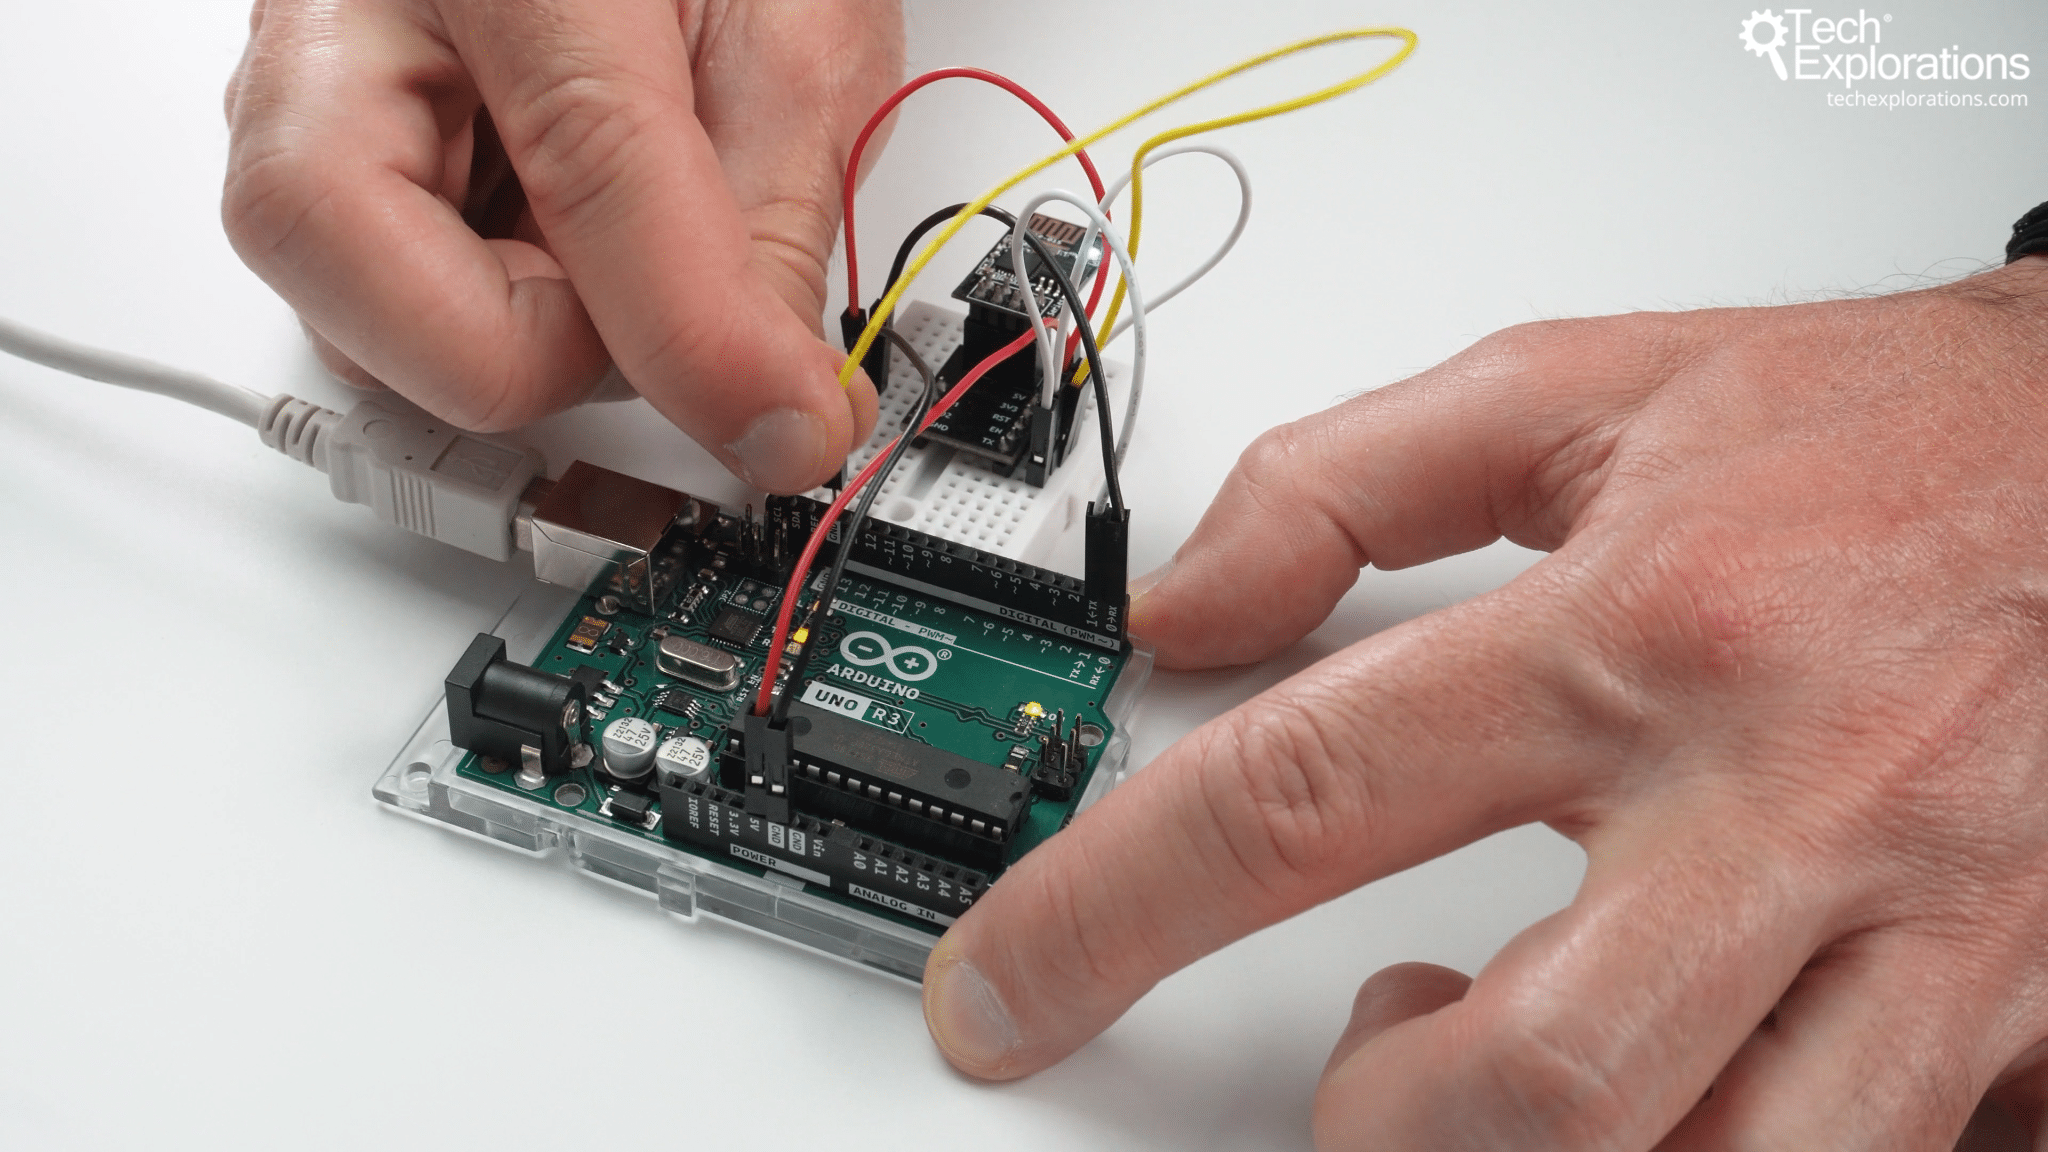
In the previous article, we discussed the wiring and the placement of the various jumper wires. We have connected the Wi-Fi module to the Arduino Uno via its hardware serial interface. However, we have not yet provided power. Instead of using a 9-volt battery, as shown in the schematic below, we will power the circuit using a USB cable.
In the previous article, we completed the wiring. Now, we will move on to the configuration process. For this, we will use a blank Arduino IDE sketch. The sketch shown below is essentially empty. Since we will not be using programming for configuration, we will use AT commands instead.
I will plug the USB cable of my Arduino Uno into my computer.
You can ignore the first two lines in the serial monitor as they pertain to previous work I have done with the module.
To confirm that the Wi-Fi module is properly wired and responding to my commands, I will type AT and receive an OK response.
Before proceeding, if you are using the default factory configuration of your Wi-Fi module, set the speed to 115200 bauds, which is the default baud rate. In my case, I have modified the configuration and changed the baud rate to 9600, which is why I used that speed above to issue the AT command.
To ensure that hitting the enter key in the message box in the Arduino IDE produces the desired result, select Both NL & CR (which stands for New Line and Carriage Return) in the appropriate setting.
To reiterate, if you're using a brand-new Wi-Fi module, make sure you've selected the baud rate of 115200 bauds. Don't be confused because I will continue using 9600 bauds in my case and in this guide.
AT Command Documentation
If you want to learn about the commands I'll be typing, you can refer to the Espressif documentation. The Wi-Fi AT Commands page provides descriptions of the various commands I'll use. We'll only use a small subset of those commands for our purposes.
You can also refer to the documentation for the ESP8266 AT Instruction Set. The Version 3.0.5 documentation states that this module is not recommended for new designs. However, many of these modules are still being produced and circulating in the market, and will likely continue to be used for a long time. Even newer versions of the module use the same AT command set, so there is no need to worry about it becoming obsolete. This module is expected to remain relevant for many years to come. For more information on the various AT commands, please refer to the documentation.
Another place to find information is the SunFounder documentation. The website includes details on the ESP8266 module, wiring, adapters, and other relevant information about this device.
Establishing Communication
Returning to the Arduino IDE, the first step is to establish communication. To do so, type the AT command and ensure that you receive an OK response. If you do not receive this response, you can reset your device by following these steps:
- Locate the yellow wire that comes out of the reset pin.
- Attach or connect the wire to the ground pin of the Arduino Uno for just a second, and then remove it.
- You will see a blue LED momentarily flash, and the Wi-Fi module will reset.
- You should then receive a "ready" response.
If all of your other settings are correct, you can then type AT and hopefully see OK back, indicating that the device is ready.
Basic AT Commands
Alright, let's continue. I have a few examples of simple commands to get you started, listed in my notes.
So, you are already familiar with the AT command and the expected response of OK, which indicates that the module is ready to receive instructions.
The AT+RST command resets the device, similar to using the RST jumper wire and connecting it to the ground level to reset the module. However, the AT+RST command performs the same reset in software, without requiring physical intervention
There are a few additional commands that are useful to know. The first is AT+GMR, which returns the firmware and SDK version. Another useful command is AT+RESTORE, which restores the settings to their factory defaults, but we won't be using that one. Finally, we will focus on the commands that are necessary for the upcoming project.
The first command is AT+CWMODE_DEF. There are a few options available on the Wi-Fi AT Commands page, which I will show you. This command is the one I will be demonstrating. When the command has _DEF added to it, the setting will be saved to flash memory. When the device is reset and restarted, it will remember the setting you applied. Even if you omit the trailer _DEF, a simple AT+CWMODE command followed by either 1, 2, or 3 as a parameter will have the same effect and the device will remember the setting.
To configure the module for use in SoftAP+Station mode, set the CW Mode to 3 by typing in AT+CWMODE=3. This will enable you to connect the module to your local Wi-Fi network. You should receive an OK response, which indicates that the device is now configured to communicate in SoftAP+Station mode.
There is one more important command: AT+UART. This command allows you to configure the serial communication parameters used by the module to communicate with the Arduino. Refer to the documentation for further details.
In our case, we need to configure the connection to use a baud rate of 9600, 8 data bits, 1 stop bit, no parity, and no flow control. To achieve this, we will use the command AT+UART and set the configuration string to 9600,8,1,0,0.
AT+UART=9600,8,1,0,0
And that returns OK.
Alright, that's it. We have completed the necessary configuration.
If your module was set to factory settings, its communication speed was 115200 baud. However, it is now set to 9600 baud. To ensure that communication is still functioning properly, switch your Arduino serial monitor speed to 9600 baud and type AT to confirm that communication is good. You should receive an OK response.
If everything is good and you've received an OK response, you may proceed to set up a Blynk account and create a small example Blynk project.
New to the Arduino?
Arduino Step by Step Getting Started is our most popular course for beginners.
This course is packed with high-quality video, mini-projects, and everything you need to learn Arduino from the ground up. We'll help you get started and at every step with top-notch instruction and our super-helpful course discussion space.
Jump to another article

Done with the basics? Looking for more advanced topics?
Arduino Step by Step Getting Serious is our comprehensive Arduino course for people ready to go to the next level.
Learn about Wi-Fi, BLE and radio, motors (servo, DC and stepper motors with various controllers), LCD, OLED and TFT screens with buttons and touch interfaces, control large loads like relays and lights, and much much MUCH more.
Last Updated 2 years ago.
We publish fresh content each week. Read how-to's on Arduino, ESP32, KiCad, Node-RED, drones and more. Listen to interviews. Learn about new tech with our comprehensive reviews. Get discount offers for our courses and books. Interact with our community. One email per week, no spam; unsubscribe at any time

