About the author
The articles in this series are written by
Blaz Loncarek
In this tutorial you will learn how to display the distance in mm using VL53L0X Time-of-Flight sensor and OLED Display.
Here is the video demonstration:
Step 1: What You Will Need
- Arduino UNO (or any other Arduino)
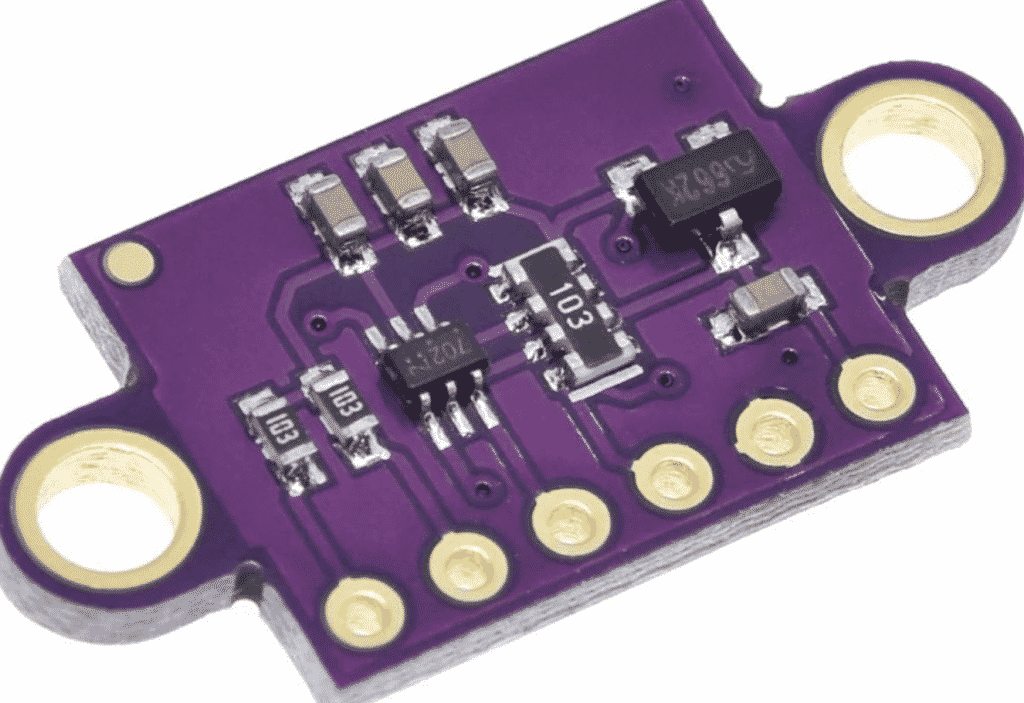
- VL53L0X Laser Ranging Sensor Time-of-Flight Sensor
- Jumper wires
- OLED Display
- Visuino programming environment: Download Visuino
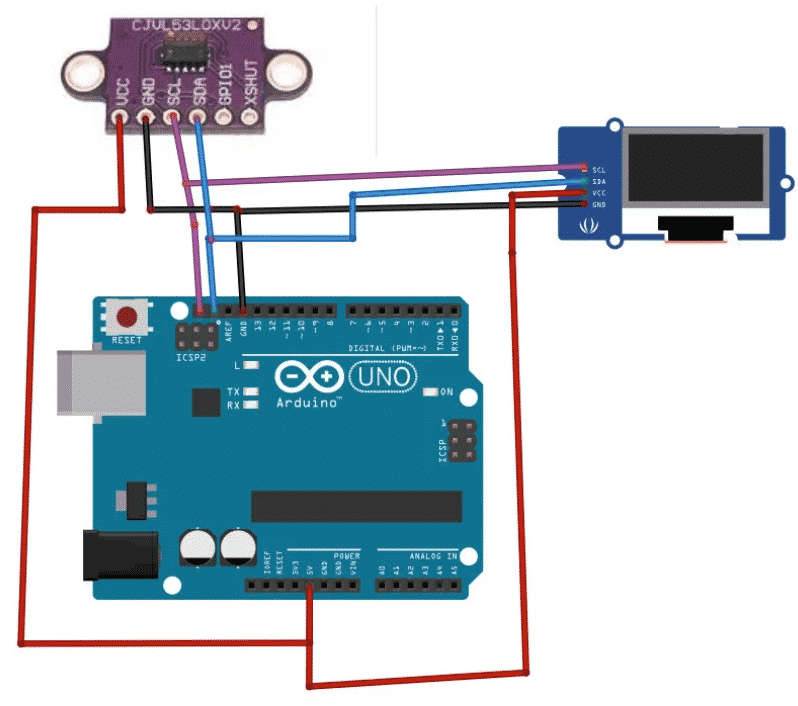
Step 2: The Circuit
- Connect OLED Display pin (GND) to Arduino pin (GND)
- Connect OLED Display pin (VCC) to Arduino pin (5V)
- Connect OLED Display pin (SCL) to Arduino pin (SCL)
- Connect OLED Display pin (SDA) to Arduino pin (SDA)
- Connect VL53L0X sensor pin (GND) to Arduino pin (GND)
- Connect VL53L0X sensor pin (VCC) to Arduino pin (5V)
- Connect VL53L0X sensor pin (SCL) to Arduino pin (SCL)
- Connect VL53L0X sensor pin (SDA) to Arduino pin (SDA)
Step 3: Start Visuino, and Select the Arduino UNO Board Type
To start programming the Arduino, you will need to have the Arduino IDE installed from here: http://www.arduino.cc/.
Please be aware that there are some critical bugs in Arduino IDE 1.6.6. Make sure that you install 1.6.7 or higher, otherwise this Instructable will not work! If you have not done follow the steps in this Instructable to setup the Arduino IDE to program ESP 8266! The Visuino: https://www.visuino.eu also needs to be installed. Start Visuino as shown in the first picture Click on the "Tools" button on the Arduino component (Picture 1) in Visuino When the dialog appears, select "Arduino UNO" as shown on Picture 2
Step 4: In Visuino Add & Connect Components
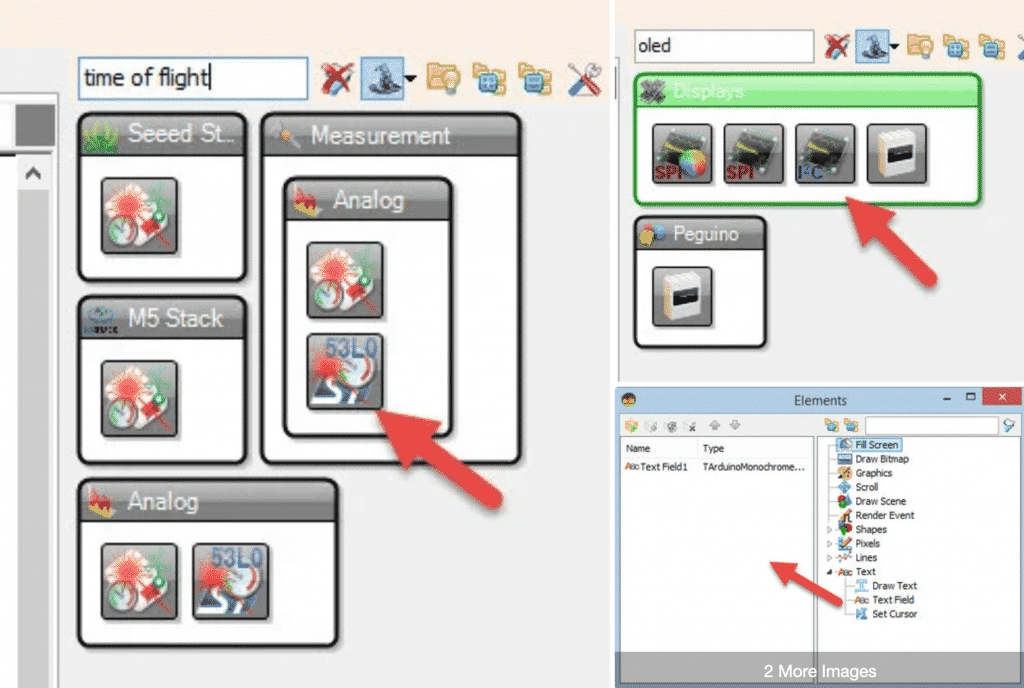
- Add "Time Of Flight Laser Ranger VL53L0X" component
- Add "SSD1306/SH1106 OLED Display (I2C)" component, Double click on the "DisplayOLED1" and in the elements window drag "Text Field" to the left and in the properties window set size:2
- Connect LaserRanger1 pin Sensor I2C to Arduino pin I2C
- Connect DisplayOLED1 pin Out I2C to Arduino pin I2C
- Connect LaserRanger1 pin Distance (mm) to DisplayOLED1 pin Text Field1 > In
Step 5: Generate, Compile, and Upload the Arduino Code
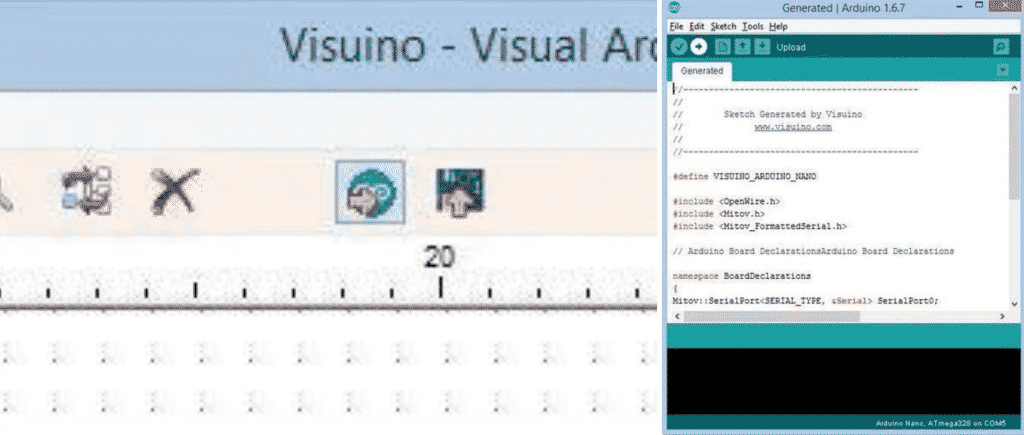
In Visuino, Press F9 or click on the button shown on Picture 1 to generate the Arduino code, and open the Arduino IDE
In the Arduino IDE, click on the Upload button, to compile and upload the code (Picture 2).
Step 6: Play
If you power the Arduino UNO module, the OLED display should start displaying the distance in mm that it is getting from the Time of flight sensor, you can put some object in front of the sensor and the value will change.
Congratulations! You have completed your project with Visuino. Also attached is the Visuino project, that I created for this Instructable, you can download it and open it in Visuino: https://www.visuino.eu
"Visuino" series
Jump to another article
New to the Arduino?
Arduino Step by Step Getting Started is our most popular course for beginners.
This course is packed with high-quality video, mini-projects, and everything you need to learn Arduino from the ground up. We'll help you get started and at every step with top-notch instruction and our super-helpful course discussion space.
Done with the basics? Looking for more advanced topics?
Arduino Step by Step Getting Serious is our comprehensive Arduino course for people ready to go to the next level.
Learn about Wi-Fi, BLE and radio, motors (servo, DC and stepper motors with various controllers), LCD, OLED and TFT screens with buttons and touch interfaces, control large loads like relays and lights, and much much MUCH more.
We publish fresh content each week. Read how-to's on Arduino, ESP32, KiCad, Node-RED, drones and more. Listen to interviews. Learn about new tech with our comprehensive reviews. Get discount offers for our courses and books. Interact with our community. One email per week, no spam; unsubscribe at any time

