MICROPYTHON WITH THE ESP32 GUIDE SERIES
The MicroPython Shell
In this lesson I'll show you a couple of ways to interact with the MicroPython Shell and run interactive programs or execute programs that are already stored on the ESP32 file system.

MicroPython provides an interactive shell that is running on the ESP32 (or any other compatible device, such as the Raspberry Pi Pico or the BBC Micro:bit).
You can connect to the MicroPython shell via a terminal tool like Putty or screen.
Of course, you can also use Thonny or even the Arduino IDE serial monitor.
In this lesson I will show you how to use Thonny and Serial. Both of these tools make it easy to interact with MicroPython via the shell.
Shell with Thonny

The Thonny IDE shell gives you access to the MicroPython interpreter that is running on the ESP32.
Connect your ESP32 to your computer and start Thonny. Ensure that the correct port is selected (see lesson 5).
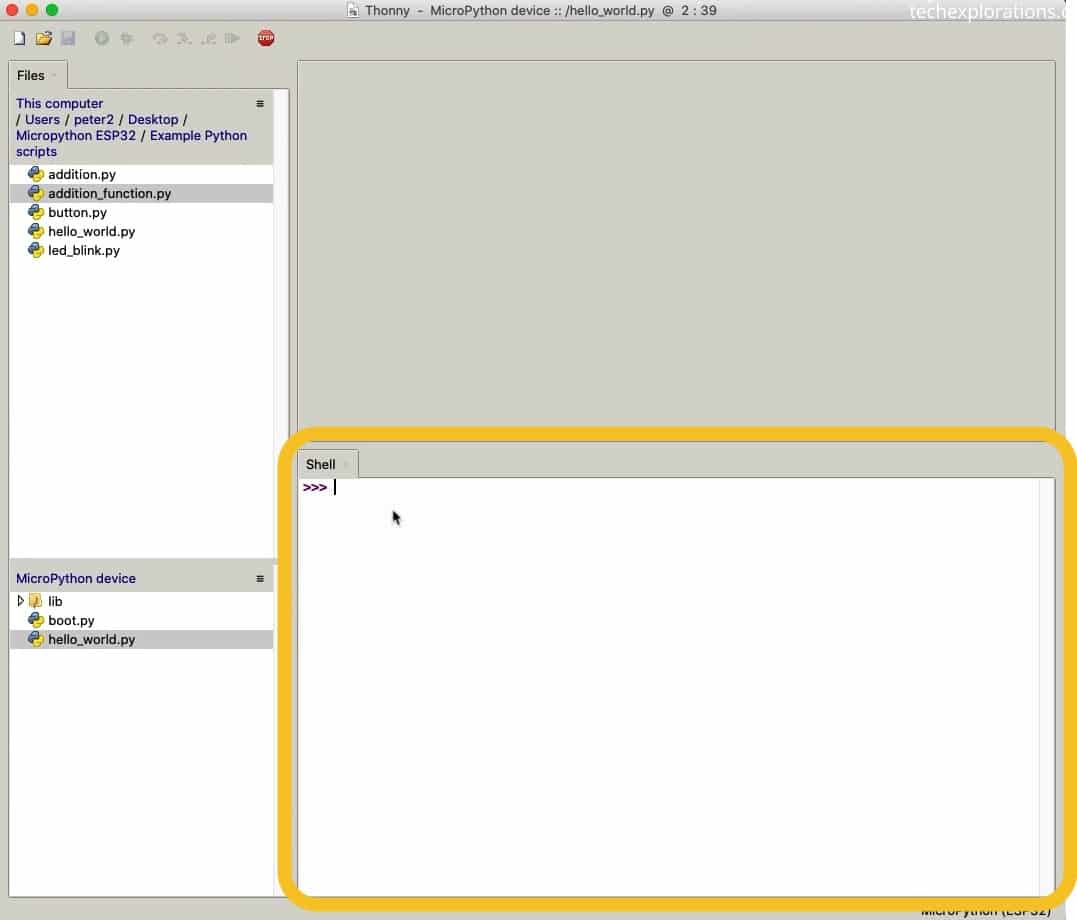
Once your ESP32 is connected, you will see the MicroPython shell prompt in the "Shell" tab, located at the lower half of the Thonny editor. The prompt looks like this (three greater-then symbols):
>>>
The Shell, is running on the ESP32, not Thonny.
Thonny simply provides a tool to access the Shell.
The shell is now active and waiting for me to type in an instruction.
I have already connected an LED (via a 220Ohm resistor) to GPIO 21. Ensure that the short pin of the LED is connected closer to the GND pin, and the longer pin closer to GPIO 21. You can place the resistor on either side of the LED, it really doesn't matter which side.

This LED is controlled by GPIO 21.
MicroPython contains a module that allows us to work with the file system. This module is named "uos". You can see its documentation for details.
Let's use it now.
Start by importing the uos module so you can use its functions:
>>> import uos
Next, call the listdir() function which will list any files in the root directory:
>>> uos.listdir()
The result is this:
")
listdir() returns a tupple with the contents of the root directory.
There are two files ("hello_world.py" and "boot.py") and one directory ("lib") in the root directory of my ESP32's file system.
Say that you'd like to execute the program contained in the hello_world.py file. to do that, use
Of course, the hello_world.py contains this script. And I can just type it in the Shell and run it interactively. I just say hello here and it will come back. Now, let's say that instead of you typing the interactive command into the Shell, you want to execute an existing file like the hello_world.py file, right? So, how do you do that?
You can use the execfile() function:
>>> execfile("hello_world.py")
The response is this:

Use execfile() to execute a MicroPython program on the shell.
Now, let's do the same experiment using the Serial tool, instead of Thonny.
Shell with Serial
Only one client can access the Python or MicroPython shell at a time. Before you can use Serial, you must disconnect Thonny. You can do this by clicking on "Disconnect" under the Run menu.

Disconnect the ESP32 from Thonny to use a different shell utility.
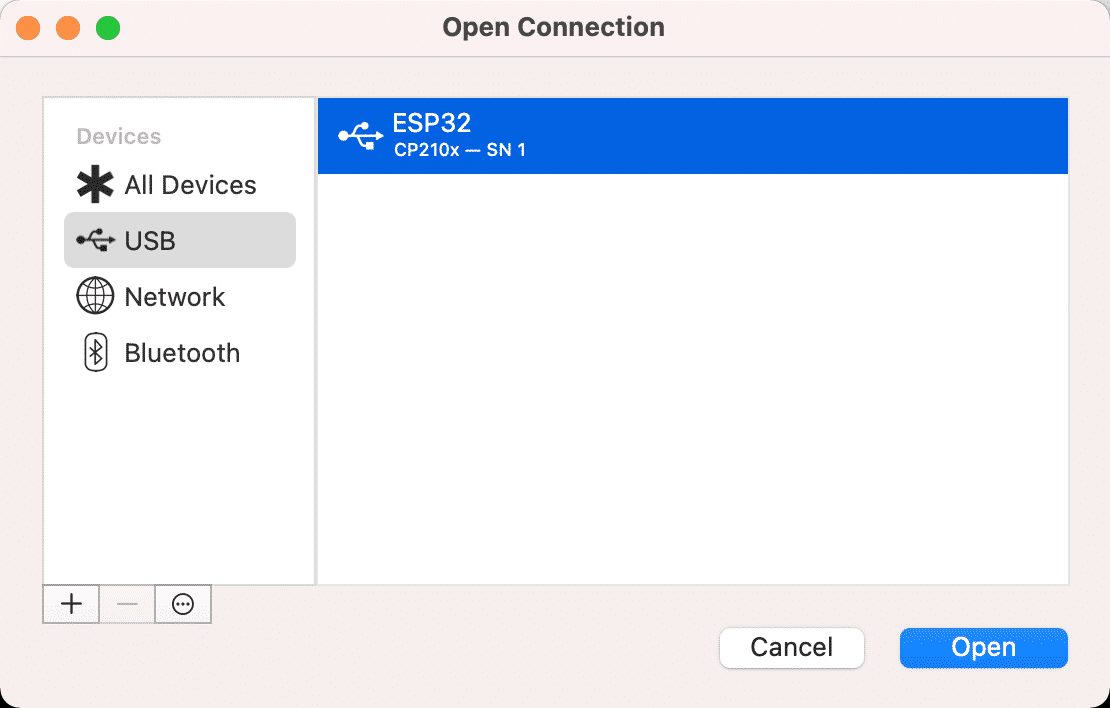
Next, start Serial and type Command-D (or Terminal --> Connect, via the menu) to connect to your ESP32.
In Serial you can bookmark a USB or network device so that you can connect to it quickly. In most cases, Serial will automatically detect and configure a USB serial port. Here's the bookmark for my ESP32:

The bookmark for my ESP32 in Serial.
Once Serial is connected to the MicroPython shell running on the ESP32, you will see the familiar MicroPythyon prompt (">>>"). MicroPython is ready for your instructions.

Serial is connected to the MicroPython shell.
From here, you can interact with the shell as you would in Thonny or any other tool. Let's do the same experiment.
>>> import uos
>>> uos.listdir()
>>> execfile("hello_world.py")
Here is the shell session as it looks in Serial:

An example MicroPython shell session in Serial.
To disconnect Serial so you can use Thonny again, type Command-D or use the menu (Terminal --> Disconnect).
Shell with Thonny: LEDs and blocks
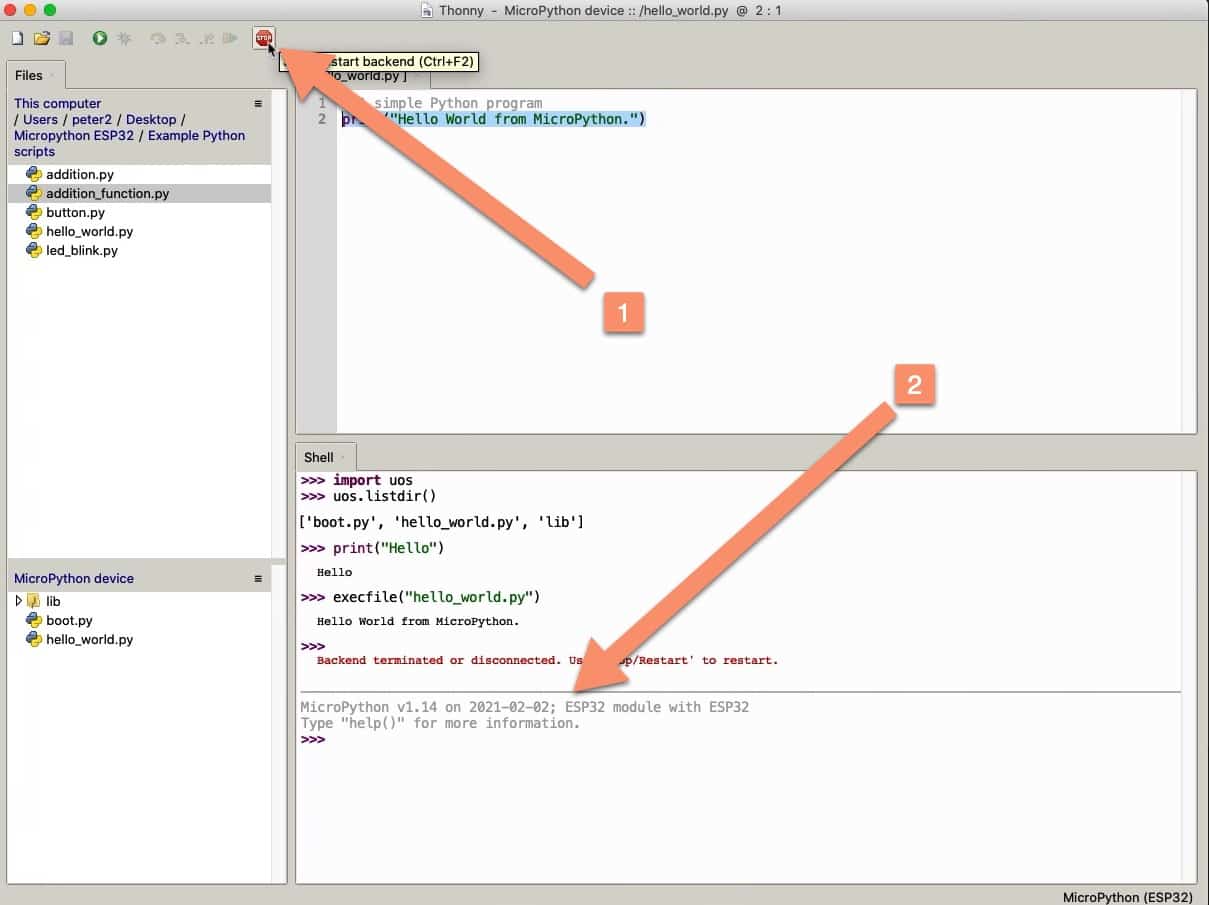
Back in Thonny, you can click on the Stop button (yes, I know, counter-intuitive but that's how it is!). The ESP32 is now connected to Thonny.

The Stop buttons actually toggles connect/disconnect. When you reconnect, you will see a new shell prompt.
Let's have a look at another example that involves the LED.
Copy this code into your MicroPython shell:
>>> from machine import Pin
>>> led = Pin(21, Pin.OUT)
>>> led.on()
>>> led.off()
>>> led.on()
>>> led.off
Here's how this looks in the shell:

Controlling an LED on the MicroPython shell.
I'll be explaining in detail what each of these instructions do in a dedicated part of the MicroPython course. In summary, I am creating an "led" object of class Pin, for the LED that is connected to GPIO 21, and use the on() and off() functions to control its state.
Easy, right?
The MicroPython shell also allows you to create blocks of code, complete with the ability to deal with Python indentations.
Here is one example (use the tab key or the space bar to enter the same indentation for each line inside the "while" block):
>>> from utime import sleep
>>> while True:
led.on()
sleep(0.5)
led.off()
sleep(0.5)
The while block implements an infinite loop. In each cycle, the LED will turn on for 0.5 seconds and off for 0.5 seconds.
To exit the infinite loop, type Ctr-C.

I have used Ctrl-C to interrupt a running MicroPython program
The shell can remember ealier instructions. You can use the up and down arrow keys to navigate history, and hit the return to re-submit an old instruction.
As you can see, the shell is easy to use, and provide a quick way to prototype and test instructions as you are working on a program.
Learn MicroPython for the ESP32
With this video course, you will learn how to use the
MicroPython programming language with the ESP32 micro-controller.
MicroPython is the perfect language for anyone looking for the easiest (yet still powerful) way to program a micro-controller.
Jump to another article
1. What is MicroPython?
2. MicroPython vs Python
3. MicroPython resources
4. MicroPython compatible boards
5. Getting started with Thonny IDE
6. How to install the MicroPython firmware
7. Setup an interpreter in Thonny IDE
8. How to write and execute a MicroPython program
9. Thonny IDE with the Raspberry Pi Pico
10. Thonny IDE with the BBC Micro:bit
11. Thonny IDE advanced configuration
12. How to find MicroPython packages at PyPi
13. The MicroPython shell
14. MicroPython Programming with files
15. How to interrupt a running program
16. How to run a program at boot
17. How to debug MicroPython program
Last Updated 1 year ago.
We publish fresh content each week. Read how-to's on Arduino, ESP32, KiCad, Node-RED, drones and more. Listen to interviews. Learn about new tech with our comprehensive reviews. Get discount offers for our courses and books. Interact with our community. One email per week, no spam; unsubscribe at any time