Motors guide series
What is "microstepping"?
Stepper motors move in steps. The width of a step is determined by the physical characteristics of the motor's rotor. With a clever technique called "microstepping", your stepper motor can double, quintuple or even octuple its precision. Read this article to also learn new words.
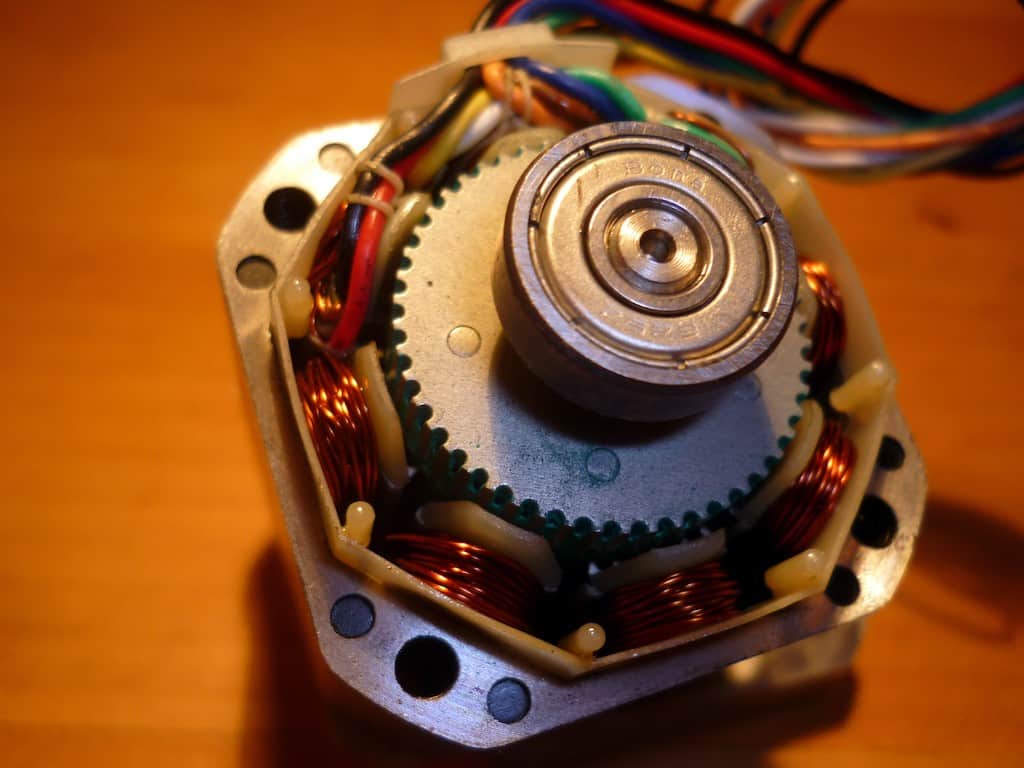
Stepper motors are capable of moving their rotor on specific positions along a 360° arc. The exact positions are defined by the positions of the toothed electromagnets positioned on the central rotor.
What is a stepper motor "step"?
In the photograph below, you can see the exposed central rotor of a stepper motor. Along the perimeter of the rotor, you can see the "teeth", arranged in equal distances from their neighbors.
Because to the magnetic properties of these teeth, and the energizing pattern of the coils positioned on the inside of the motor's casing, the rotor can be aligned precisely.
A stepper motor is designed to move at one step at a time by energizing its coils at the exact right times. When the motor moves like this (1 step at a time) it also moves within its torque specifications.
Standard stepper motors, like the one pictured above, have rotors with 200 teeth. There is a 1.8° separation between each tooth, which means that the rotor can move in steps of 1.8°, and do a full rotation by completing 200 steps.
What is a "microstep"?
If a precision of 1.8° is not enough, it is possible to increase it through the use of "magic" created in electronics hardware and microcontroller firmware. Essentially, we can have stepper motors that can operate at far higher precisions then their manufactured specifications.
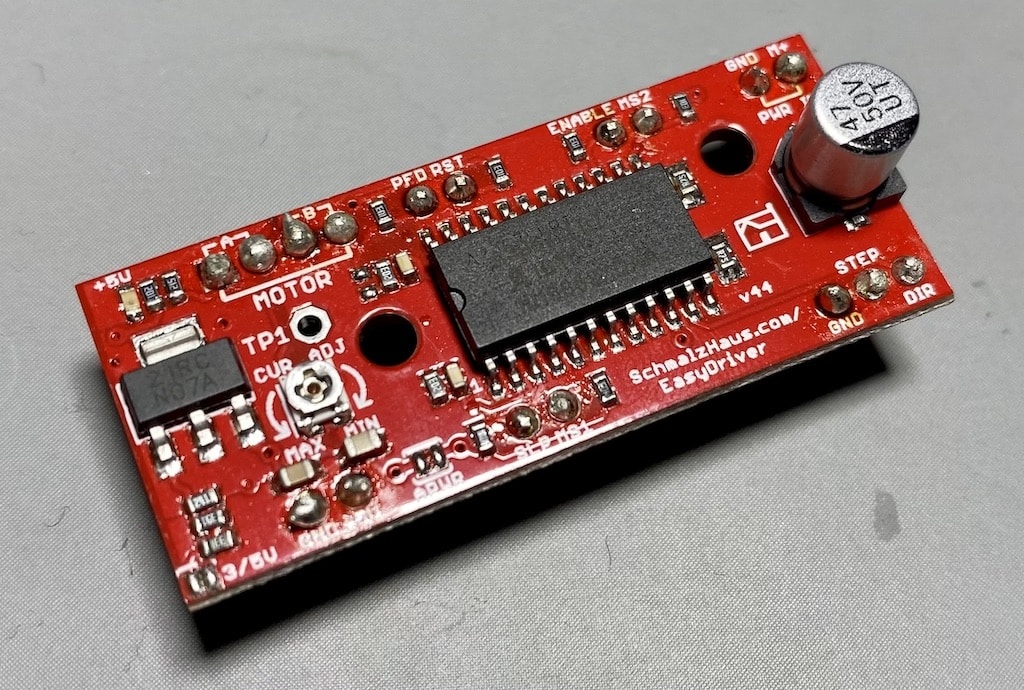
Stepper motor drivers such as the EasyDriver can do microstepping. Microstepping is a technique that makes it possible to reduce the size of a step at the expense of torque. In other words, you get more accuracy and smoother motion with less turning force.
Microstepping is an elegant trick; it is a bit of a juggling act.
Microstepping with Easydriver
The EasyDriver energizes the two coils so finely that it manages to keep the motor in-between its regular resting positions. That is why when you do microstepping, both the motor and the EasyDriver can get very hot. They get hot because microstepping is hard work.
You can read about the EasyDriver microstepping modes in the documentation. Look for Q12. I am copying the relevant part here for convenience:
EasyDriver microstepping
The Easy Driver is able to operate in 1/8th, 1/4, half, and full step (2 phase) modes.
These four modes are selected by the logic levels on the MS1 and MS2 input pins.
Normally, the pull-up resistors on the Easy Driver hold MS1 and MS2 high, which results in a default setting of 1/8th microstep mode.
You can pull either or both to ground to select the other 3 modes if you want. See the table below:
MS1 |
MS2 |
Resolution |
|---|---|---|
low |
low |
Full Step (2 phase) |
high |
low |
Half Step |
low |
high |
Quarter Step |
high |
high |
Eighth Step |
For a motor like the common 28BYJ-48 (pictured below), one step is 5.625° (specs).
With the EasyDriver, depending on the state of the MS1 and MS2 pins, you can get it to move at 5.625° /2 = 2.8125° (half step), 5.625° /4 = 1.4062° (quarter step) and 5.625° /8 = 0.7031° (eight step).
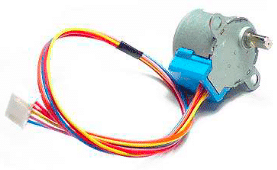
The 28BYJ-48 – 5V Stepper Motor
You can control MS1 and MS2 with wires connected to GND or 5V, dip switches, or just connected to the Arduino and control them in your sketch.
How to figure out the stepper motor coils
To find which wires correspond to a coil, look at the diagram in the datasheet.
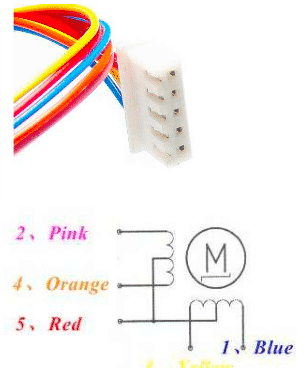
It will be a bit tedious because of the middle connection but think about this: when you connect the pink and blue wires with your multimeter, you will get the largest resistance.
Only one pair can do this because these two pins wire contain the entire coil wire.
If you connect pink-red or orange-red, or red-yellow or red-blue, you will get the smallest resistance because they contain only part of the coil wire.
Now you can know the red (common wire). And when you connect pink-orange and yellow-blue, you will get the middle resistance.
With a bit of patience and a notebook, you can work out the coils.
Learn more
If you would like to learn how to use Easydriver with your Arduino, consider enrolling to Arduino Step by Step Getting Serious.
We have 5 dedicated lectures in Section 18.
New to the Arduino?
Arduino Step by Step Getting Started is our most popular course for beginners.
This course is packed with high-quality video, mini-projects, and everything you need to learn Arduino from the ground up. We'll help you get started and at every step with top-notch instruction and our super-helpful course discussion space.
Jump to another article
2. How to drive a DC motor without a motor driver module
3. What is "microstepping"?
4. Direct current motor
5. Project 1: Control two DC motors with your Arduino and the L298N controller
6. Project 2: Control speed and direction with a potentiometer
7. Project 3: DC motor control with a distance sensor
8. Project 1: Control a servo motor with a potentiometer
9. Project 2: Servo motor control with VarSpeedServo
Done with the basics? Looking for more advanced topics?
Arduino Step by Step Getting Serious is our comprehensive Arduino course for people ready to go to the next level.
Learn about Wi-Fi, BLE and radio, motors (servo, DC and stepper motors with various controllers), LCD, OLED and TFT screens with buttons and touch interfaces, control large loads like relays and lights, and much much MUCH more.
Last Updated 1 year ago.
We publish fresh content each week. Read how-to's on Arduino, ESP32, KiCad, Node-RED, drones and more. Listen to interviews. Learn about new tech with our comprehensive reviews. Get discount offers for our courses and books. Interact with our community. One email per week, no spam; unsubscribe at any time

