Introduction to the ESP32 guide series
Digital output experiment using an LED
In this lesson, you will start the practical exploration of the features of the ESP32 dev kit.
Observing “tradition,” the first sketch and circuit I invite you to experiment with will make a red LED blink. By doing so, you will learn how to control the state of a GPIO on the ESP32.
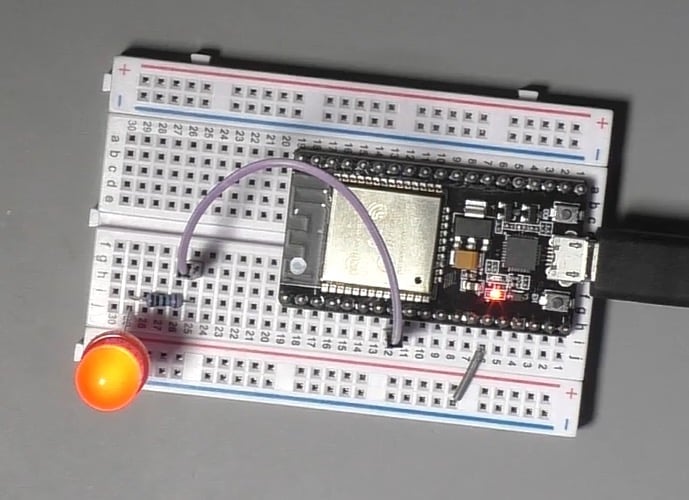
In this lesson, you will start the practical exploration of the features of the ESP32 dev kit. Observing “tradition,” the first sketch and circuit I invite you to experiment with will make a red LED blink. By doing so, you will learn how to control the state of a GPIO on the ESP32.
You can watch the video, or if you are the “reading” type, you can read the text below.
The wiring
This little example contains a single LED connected in series to a 230 Ω resistor. You can use any resistor value between 230 Ω and 500 Ω, and the LED will be bright.
Careful, though, don’t go lower than 230 Ω because then the LED will be drawing too much current from the ESP32, and this can cause damage.
Connect the anode of the LED to one of the GPIOs on the ESP32, and the cathode to the blue rail, which is connected to one of the GND pins of the ESP32 dev kit.
You can see the schematic below.
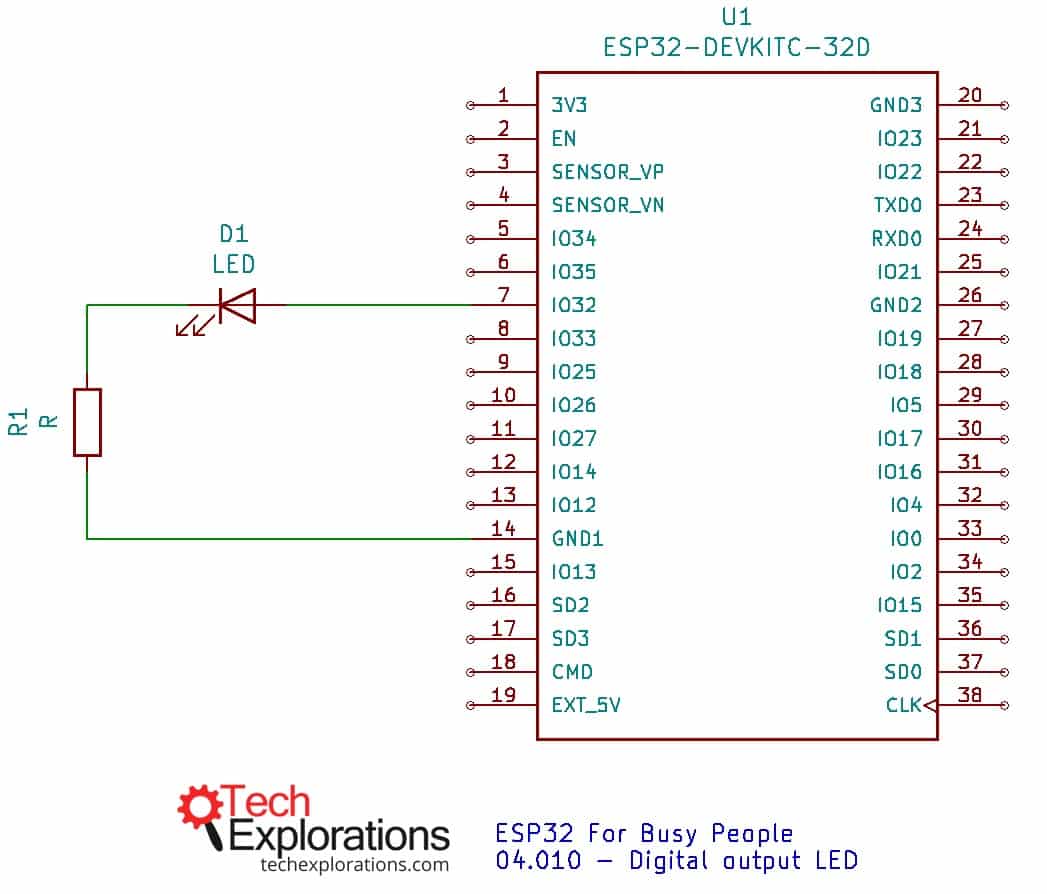
An LED is controlled by GPIO32 and is protected by a 230 Ω resistor connected to GND1.
I have connected my LED to GPIO32, though I could have used any of the other pins (with some exceptions that I’m going to discuss later).
Pins
Throughout this course, I’ll be using this pin map that I’ve put together. You have seen it already in lesson 4, but here it is again:
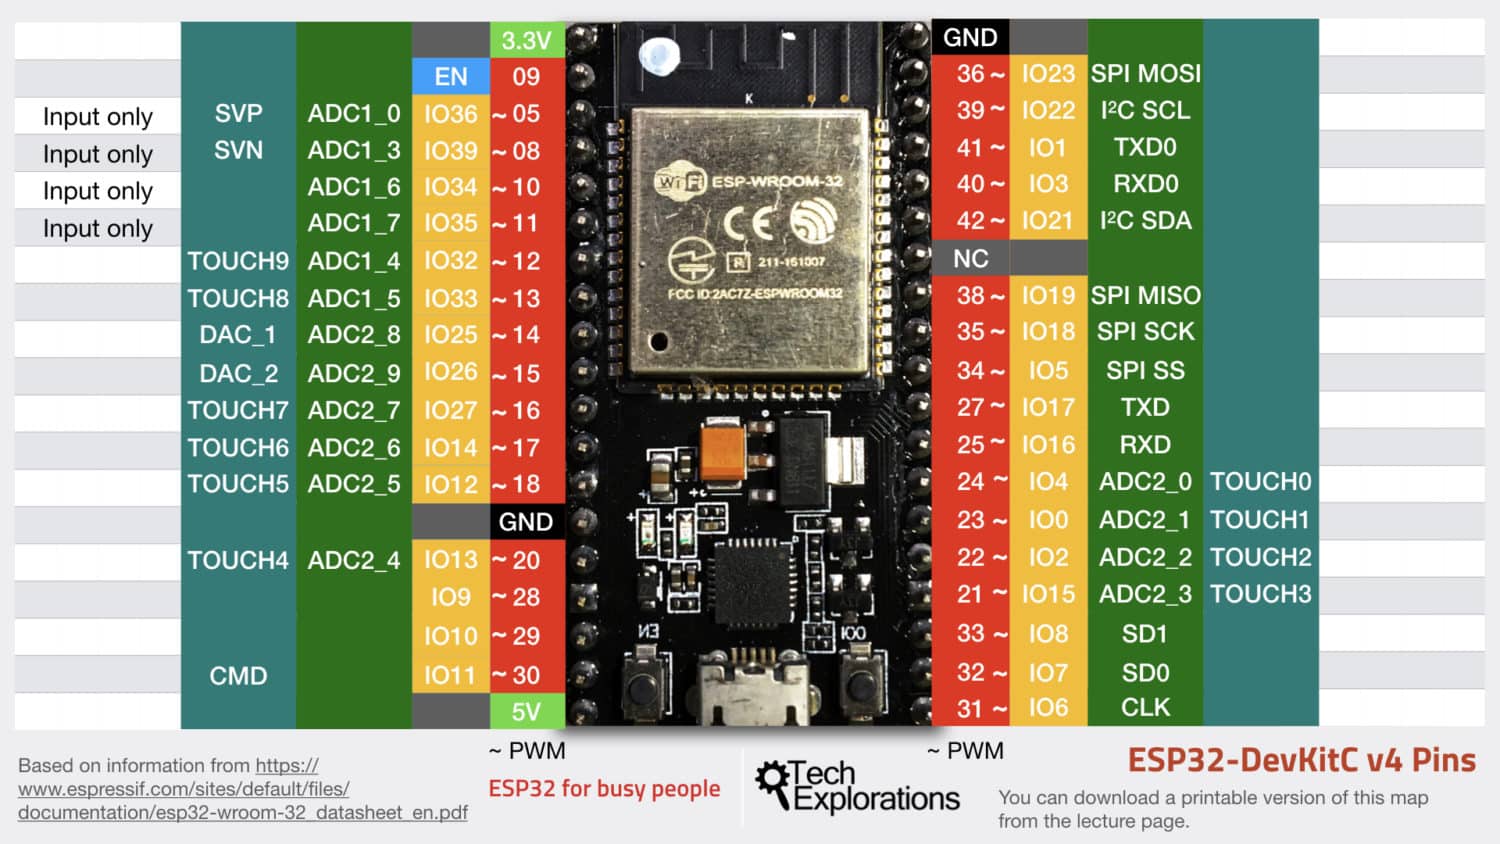
Peter’s ESP32 pin map makes it easy to find the right pin for the job (click on the image for the hi-res version).
In this pin map, you can see the most frequently used functions of each pin.
As you can see, GPIOs 34, 35, 36, 39 can only be used as inputs. Therefore, we can’t use any of them to drive the LED. They can be used for other things, though.
Notice the little “~” marks? A pin that is marked with a “~” can be used for PWM (Pulse Width Modulation) output. I show you how to generate PWM signals in the video course.
Working with the breadboard
For small circuits, you can plug your ESP32 dev kit to a mini breadboard, as I do in the photo below:
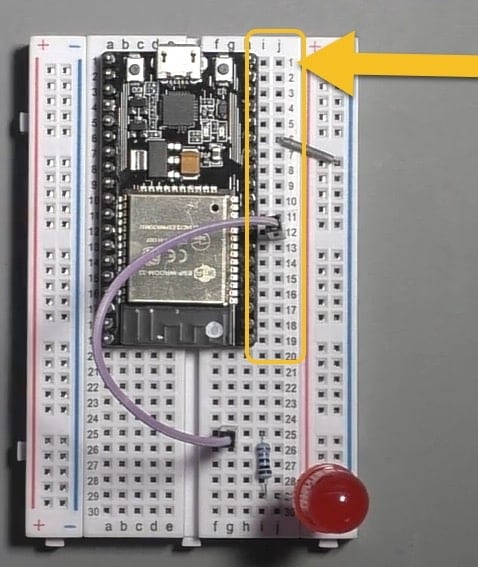
Place the dev kit on the mini breadboard so that holes from column 1 are exposed.
Attach the dev kit to the breadboard so that two rows of pins, starting at column 1, are available for jumper wires. In the majority of the experiments that I demonstrate in the course, I use the pins on the right side of the dev kit, so this arrangement works well.
By placing the top-left pin of the dev kit on column 1 of the breadboard, it is easier to count pins and plug-in jumper wires as you can look at the column numbers on the breadboard.
The sketch
Let’s have a look at the sketch now.
Instead of loading a pre-written sketch, you will load the blink LED example and then modify it slightly to get it to work with the ESP32.
Load the example sketch by clicking on File, Examples, Basics, Blink.
And this is the classic Arduino blink example. It should look like this:
// the setup function runs once when you press reset or power the board
void setup() {
  // initialize digital pin LED_BUILTIN as an output.
  pinMode(LED_BUILTIN, OUTPUT);
}

// the loop function runs over and over again forever
void loop() {
  digitalWrite(LED_BUILTIN, HIGH);   // turn the LED on (HIGH is the voltage level)
  delay(1000);                       // wait for a second
  digitalWrite(LED_BUILTIN, LOW);    // turn the LED off by making the voltage LOW
  delay(1000);                       // wait for a second
}
This sketch will almost work out of the box.
There is a reference to the LED_BUILTIN constant, which does not work with the ESP32, and you must address it.
Create a new single-byte constant, and name it “led_gpio.” The LED is connected to GPIO32, so store the value “32” in “led_gpio.”
Then, replace all occurrences of the LED_BUILTIN reference with “led_gpio.”
The sketch should now look like this:
const byte led_gpio = 32;

// the setup function runs once when you press reset or power the board
void setup() {
  // initialize digital pin LED_BUILTIN as an output.
  pinMode(led_gpio, OUTPUT);
}

// the loop function runs over and over again forever
void loop() {
  digitalWrite(led_gpio, HIGH);   // turn the LED on (HIGH is the voltage level)
  delay(1000);                       // wait for a second
  digitalWrite(led_gpio, LOW);    // turn the LED off by making the voltage LOW
  delay(1000);                       // wait for a second
}
That’s all the modifications necessary. You can go ahead and upload this sketch to your board to see it working.
Upload to the board
Connect your ESP32 board to your computer.
Make sure the board model is selected (look at the status line of the Arduino IDE for the text “ESP32 Dev Module”). If the ESP32 module is not the current target, select it from the Tools menu, Board, “ESP32 Dev Module.”
Then, check that the USB port for the ESP32 module is selected. Again, look at the status line for confirmation, and if the com/serial port does not look correct, select the correct one from the Tools menu, Port.
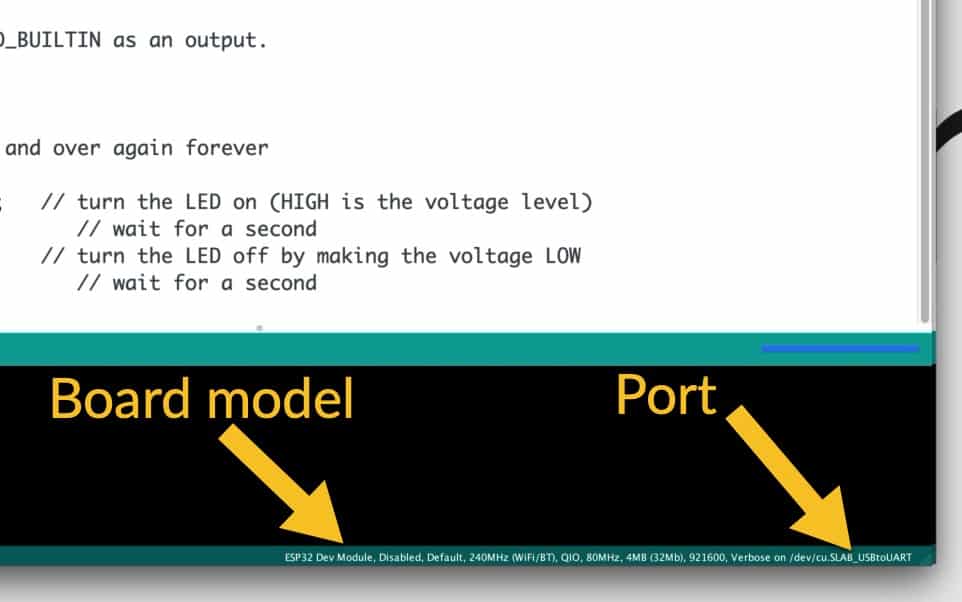
Check that your board is ready to receive the sketch.
When the board model and port selections checkout (i.e., they are correct), it’s time to upload the sketch.
Click on the Upload button. If your board is like mine, and can’t automatically go into upload mode, press and hold the “BOOT” button immediately after you click on the Upload button. Then, observe the Arduino IDE output pane for upload progress information. When the upload starts, you can release the BOOT button.
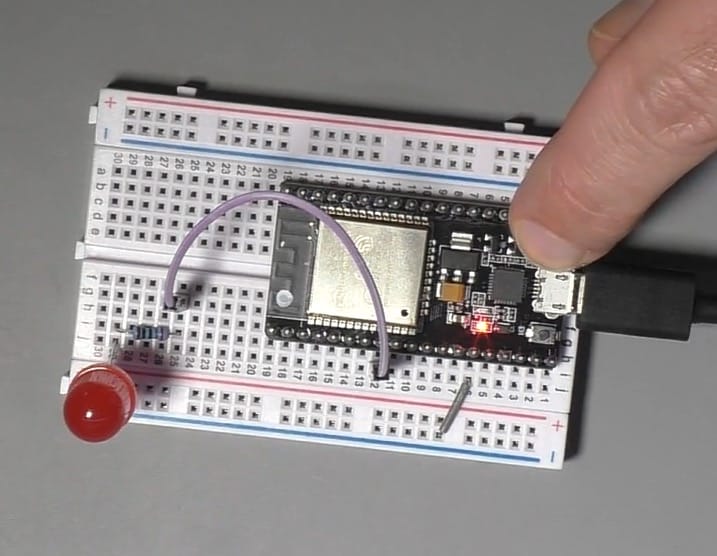
Press and hold the BOOT button until the upload begins.
The upload will complete when progress reaches 100%.

Writing progress is 100%.
When the upload is complete, the board will automatically reset, and the newly uploaded sketch will start running. The LED will blink at a rate of 1Hz.

The LED is blinking, so the sketch is running on the ESP32.
This wasn’t too hard, right?
Let’s take this one step further in the next lesson. You will use the same circuit to make the LED fade on and off, using the ESP32 PWM capability.
Ready for some serious learning?
Enrol to
ESP32 for Busy People
This is our comprehensive ESP32 course for Arduino Makers.
It's packed with high-quality video, mini-projects, and everything you need to learn Arduino from the ground up.
Just click on the big red button to learn more.
Jump to another article
Lessons
1: The ESP32 module
2: The ESP32 Devkit
3: The ESP32 vs Arduino
4: The ESP32 GPIOs
5: The ESP32 communications
6: The ESP32 devkit power supply
7: Setting up ESP32 in the Arduino IDE on Mac OS
8: Setting up ESP32 in the Arduino IDE on Windows 10
9: Install the drivers CP2102 for the USB bridge chip
10: Digital output LED
11: Digital output PWM
Last Updated 2 years ago.
We publish fresh content each week. Read how-to's on Arduino, ESP32, KiCad, Node-RED, drones and more. Listen to interviews. Learn about new tech with our comprehensive reviews. Get discount offers for our courses and books. Interact with our community. One email per week, no spam; unsubscribe at any time
