Arduino programming guide series
The problem with delay() and how to fix it
Microcontrollers have scarce resources. Perhaps their most important resource is compute time, followed by RAM and Flash memories. Therefore, we should not waste our MCU's time. But when you use delay(), you actually waste time.

The Arduino delay() function is a convenient way to delay the execution of a sketch. It is an intuitive instruction that most learners seem to be able to grasp and use without difficulty.
It something drilled to new Arduino makers early on, when they get their first LED to blink:
void loop() {
digitalWrite(13, HIGH);
delay(1000); // <-- here it is, delay for a second
digitalWrite(13, LOW);
delay(1000);
}
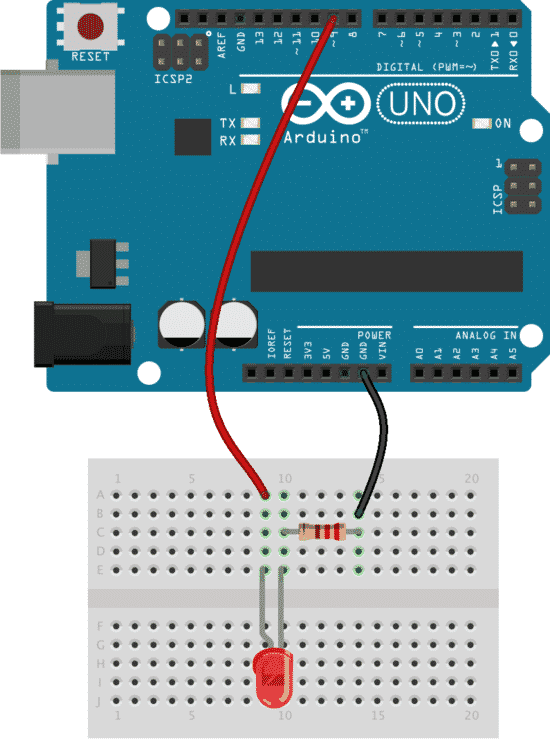
The delay() function makes programming easy. In the example above, we are simply making an LED blink.
No big deal.
You Arduino doesn't have anything else to do, anyway.
But, what if your Arduino had more work to do?
It might need to check a sensor and communicatee with another Arduino.
It might also need to record sensor data to an Internet of Things service and turn on a relay.
With the 1000ms delay that we have imposed with the delay() function, the Arduino is actually forced to do nothing (other than counting milliseconds) twice, in a single loop.
That is a waste of computing cycles!
The problem with the delay() function is that it is "blocking." The functions blocks the execution of any other code, except for interrupt service routines.
Obviously, this is not an efficient way to do programming.
We can improve the situation by exchanging simplicity with somewhat more complicated code. In the example below, I use a construct that checks periodically to determine if a given amount of time has elapsed. If it has, then it toggles the LED. If not, the execution continues.
1. const int ledPin = 13; // the number of the LED pin
2. int ledState = LOW; // ledState used to set the LED
3. unsigned long previousMillis = 0; // will store last time LED was updated
4. const long interval = 1000; // interval at which to blink (milliseconds)
5. void setup() {
6. pinMode(ledPin, OUTPUT);
7. }
8. void loop() {
9. unsigned long currentMillis = millis();
10. if (currentMillis - previousMillis >= interval) {
11. previousMillis = currentMillis;
12. if (ledState == LOW) {
13. ledState = HIGH;
14. } else {
15. ledState = LOW;
16. }
17. digitalWrite(ledPin, ledState);
18. }
19. }
When this code runs on the Arduino, it will make the LED blink on and off once every second. It is the exact outcome of the version of the code that uses the delay() function, except that it works without blocking other code.
Let's drill into the code.
- Line 10: check if the time interval has elapsed.
- Line 11: if the set time interval has elapsed, record the current millis reading (this will be used in the next interval check in line 10).
- Line 3: We use a variable of type long for this since we use the function millis() to get a current time reading.
- Lines 12 to 16: toggle the LED on/off depending on the value of the ledState variable.
The millis() function returns a value that represents the number of milliseconds since the Arduino was powered up. In other words, millis() gives us a way to track the passage of time; it is not able to tell us what time it is. Since we are interested only in elapsed time, not a time and date, this reading is good enough.
In line 10 the sketch subtracts the previousMillis (the time we last checked the elapsed time) from the currentMillis to work out whether the required interval has elapsed, and if it has, the sketch will toggle the LED.
If the interval has not elapsed, then the sketch will continue with other instructions, so the cost of this operation is only a couple of compute cycles; this is a massive gain in efficiency. When you work on busy sketches that flash LEDs or check sensors at regular intervals, this approach is worth considering.
New to the Arduino?
Arduino Step by Step Getting Started is our most popular course for beginners.
This course is packed with high-quality video, mini-projects, and everything you need to learn Arduino from the ground up. We'll help you get started and at every step with top-notch instruction and our super-helpful course discussion space.
Jump to another article
3. Focus on the type parameter in "println()"
4. "0" or "A0" when used with analogRead()?
5. What is the "_t" in "uint8_t"?
6. Save SRAM with the F() macro
7. What is the gibberish in the Telnet output?
9. Confusing keywords? follow the source code trail
10. The interrupt service routine and volatile variables
11. The problem with delay() and how to fix it
12. How to deal with the millis rollover
13. Can you use delay() inside Interrupt Service Routine?
15. A closer look at line feeds and carriage returns
16. Understanding references and pointers
17. Simple multitasking on the Arduino
19. Concurrency with the Scheduler library on the Arduino Due and Zero
20. Bitshift and bitwise OR operators
21. What is a "static" variable and how to use it
22. Understanding the volatile modifier
Last Updated 2 years ago.
We publish fresh content each week. Read how-to's on Arduino, ESP32, KiCad, Node-RED, drones and more. Listen to interviews. Learn about new tech with our comprehensive reviews. Get discount offers for our courses and books. Interact with our community. One email per week, no spam; unsubscribe at any time

