Arduino Sensors & Actuators guide series
Detect motion with the PIR sensor
Passive infrared (PIR) sensors are very common and typically found in home electronics. They detect the heat that is emitted by the body of a person in a room as it contrasts against the background heat.
Knowing if something is moving is useful in many applications.
The classic example is security, where an alarm system can detect an intruder moving inside a room, so that it can notify the police.
Another common use is in home and office automation, where you could get the lights to turn on and off automatically depending on whether someone is still in the room or turning on the flood light in your driveway as your car approaches.
There are several technologies used in motion sensors, each with their own capabilities and price points.
PIR sensors
Passive infrared (PIR) sensors are very common and typically found in home electronics.
They detect the heat that is emitted by the body of a person in a room as it contrasts against the background heat.
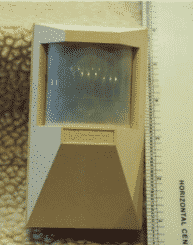
A PIR sensor does not emit any energy, it just sits there and waits for a heat source to enter its field of vision.
They look like this (an example of a home security system motion sensor - below).
Ultrasonic distance sensors
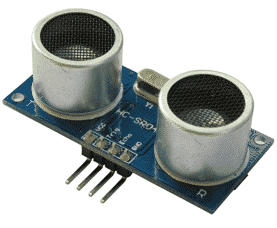
An ultrasonic motion sensor uses ultrasounds to detect moving objects.
Just like bats, an ultrasonic sensor emits ultrasounds at frequencies from 30khz to 50kHz and then picks up their echo.
These sensors can often measure the time a signal takes to return, and from that it can calculate the distance to the object.
Therefore, ultrasonic sensors can calculate both distance from an object as well as whether the object is moving. We had a look at the ultrasonic distance sensor in the previous lesson.
Microwave motion sensors
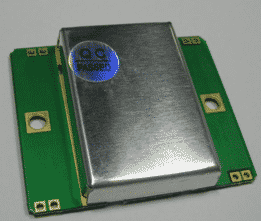
A microwave motion sensor works on the same principle as the ultrasonic sensor, except that instead of ultrasounds it emits microwaves. They are still relatively cheap, and because microwaves are much higher in terms of frequency than ultrasounds, motion can be detected with a lot more detail. Many microwave motion sensors can determine not only the motion itself, but also distance and speed using the Doppler effect.
Here is what a microwave sensor module looks like (of course the module is covered by a plastic cover when installed - below).
In this lecture, we will connect a passive infrared sensor to our Arduino, calibrate it, and turn an LED on every time motion is detected.
Assembly
Let's puts together this circuit and test out the motion sensor.
We will need:
- An Arduino
- Four jumper wires
- A PIR sensor, like the HC-SR501
- One resistor, 1kΩ
- One LED
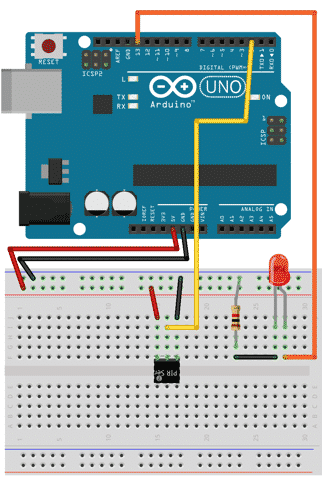
Here's what we are going to build.
While you are connecting the motion sensor, it's a good idea to remove the sensor cover so you can see the pin markings, ensuring that power is connected the right way.

This circuit will detect motion through the sensor, and send a signal to the Arduino via digital pin 2. The Arduino will receive the signal and in turn activate the LED via digital PIN 13. Notice that the Arduino Uno board already has an small LED connected to digital port 13, so you could choose to not connect yours.
Sketch
Done with the assembly, let work on the sketch now.
/*
* PIR sensor tester
*/

int ledPin = 13; 	  // choose the pin for the LED
int inputPin = 2; 	// choose the input pin (for PIR sensor)
int pirState = LOW; // we start, assuming no motion detected
int val = 0; 		    // variable for reading the pin status

void setup() {
	pinMode(ledPin, OUTPUT); 	// declare LED as output
	pinMode(inputPin, INPUT); // declare sensor as input
	Serial.begin(9600);
}

void loop(){
	val = digitalRead(inputPin); // read input value

  if (val == HIGH) { // check if the input is HIGH
		  digitalWrite(ledPin, HIGH);  // turn LED ON

      if (pirState == LOW) {  // we have just turned on
				Serial.println("Motion detected!”);
				                      // We only want to print
				                      // on the output change, not state
			pirState = HIGH;
	}
	} else {
		digitalWrite(ledPin, LOW); // turn LED OFF
		if (pirState == HIGH){
			                      // we have just turned off
			Serial.println("Motion ended!");
			                     // We only want to print on
			                     // the output change, not state
			pirState = LOW;
	}
}
By now, this sketch should be easy to read and understand.
We start by setting constants for the pins and values.
The LED is connected to digital pin 13, and the sensor's output to digital pin 2.
We also assume that when the Arduino starts, there is no motion, so variable pirState is set to LOW, and val, the variable to which the output state of the PIR sensor is stored, is 0 (LOW).
In the setup() function, we set pin 13 to be output, and pin 2 to be input. We also initialize the serial port so that we can see text output in the monitor window.
In the loop() function, we constantly read the value of the PIR sensor by using the digitalRead(inputPin) function. This function reads voltage in the range of 0V to 3.3V (at least for the sensor I am using), and the Arduino translates that to LOW and HIGH respectively.
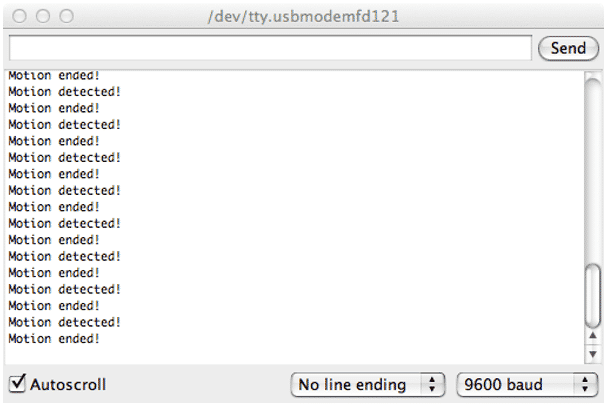
If HIGH is detected, the Arduino will set pin 13 to HIGH and this will activate the LED. If the previous state of the sensor was LOW, then the Arduino detects this as new motion, so it will print a message to the monitor, and set pirState to HIGH. This will prevent the Arduino from continuously printing out that new motion was detected while the actual motion is still continuing.
Upload it to see it working, don't forget to open up the monitor window (Tools > Serial Monitor). You should see something like this:
If you are not sure what the pirState variable is actually doing, do this little experiment:
Modify the sketch by replacing the lines:
if (pirState == LOW) {
Serial.println("Motion detected!");
pirState = HIGH;
}
with only:
Serial.println("Motion detected!");
... and the lines:
if (pirState == HIGH){
Serial.println("Motion ended!");
pirState = LOW;
}
... with only:
Serial.println("Motion ended!");
Upload the edited sketch.
Open the monitor and activate the sensor by waving your hand above it. What can you see in the monitor?
You can calibrate the sensitivity and amount of time that the sensor stays activated by turning the two small orange knobs.
Experiment with them to see the effect they have on the sensor's output.
Ready for some serious Arduino learning?
Start right now with Arduino Step by Step Getting Started
This is our most popular Arduino course, packed with high-quality video, mini-projects, and everything you need to learn Arduino from the ground up.
Jump to another article
1: Introduction
2: How to make an LED blink
3: How to make an LED fade
4: How to use a button
5: How to use a potentiometer
6: Infrared line sensor
7: Measuring light
8: Detect tilt and impact
9: Measuring acceleration
10: Detect motion with the ultrasonic sensor
11: Detect motion with PIR sensor
12: Temperature and barometric sensor BME280
13: Measuring Temperature And Humidity
Last Updated 1 year ago.
We publish fresh content each week. Read how-to's on Arduino, ESP32, KiCad, Node-RED, drones and more. Listen to interviews. Learn about new tech with our comprehensive reviews. Get discount offers for our courses and books. Interact with our community. One email per week, no spam; unsubscribe at any time
