An IoT Mastery Project guide series
How to use Git in PlatformIO
In this article, I’d like to spend a bit of time with Git to show you a few tricks on how to use Git version control in your PlatformIO projects.
In this article, I’d like to spend a bit more time with Git to show you a few more tricks on how to use Git version control in your PlatformIO projects.
There is a really good comprehensive book on Git, that you can use right now to learn the basics.
Although it goes down to a lot of detail, in effect you only need about 20 percent of what is in this book to be very productive with Git and to have a good repository-related practice.
But in this article, I'm going to show you the few commands that you need to use in order to always be able to restore your application to a commit that you know is working and to be able to do experiments without affecting the main working branch.
Let’s start where we left off in the previous article.
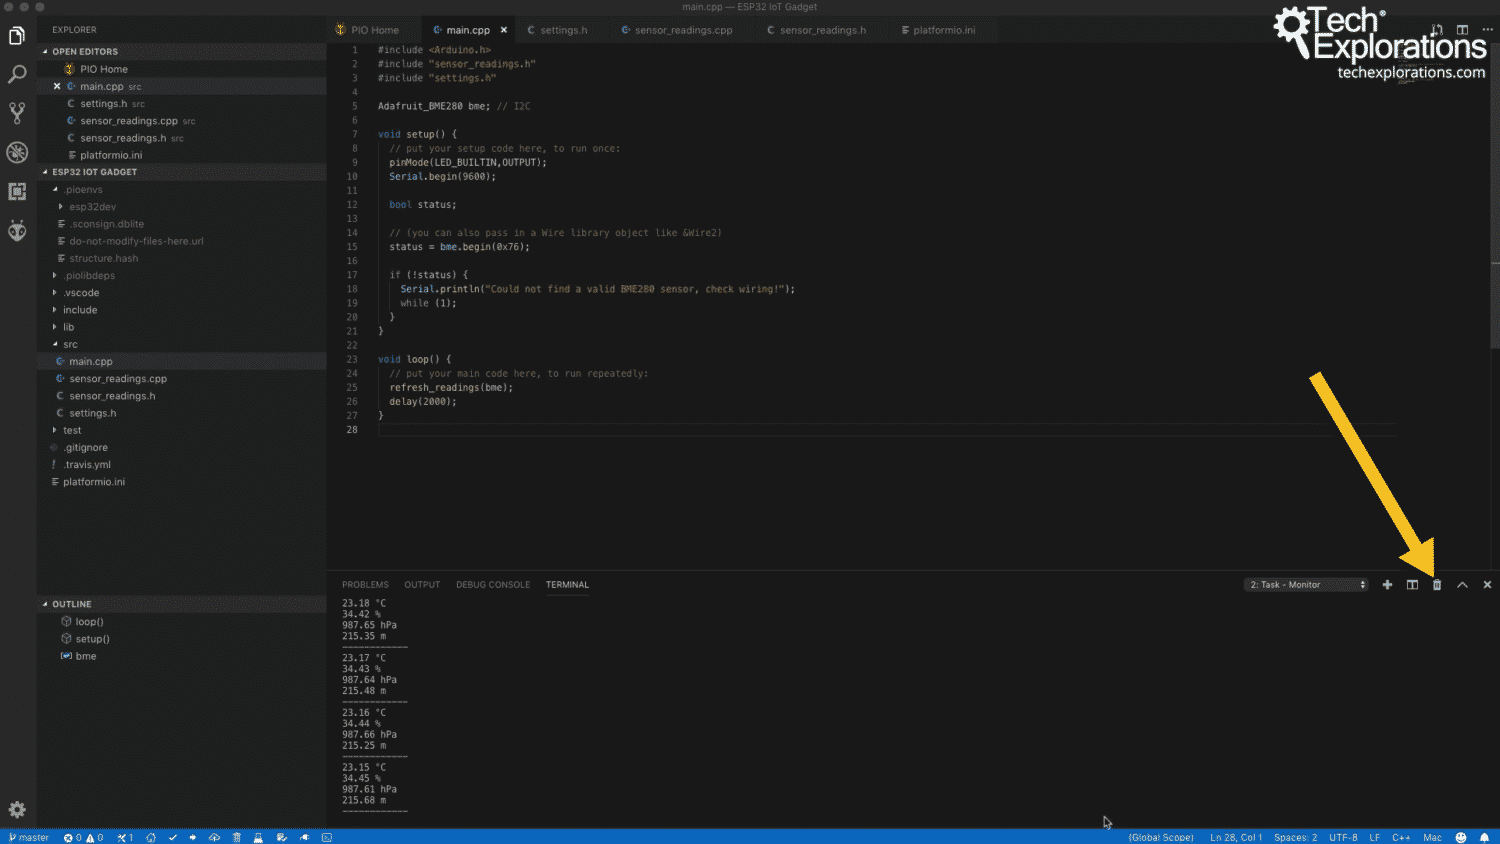
Kill the terminal by clicking on the rubbish bin button (that belongs to the terminal pane).
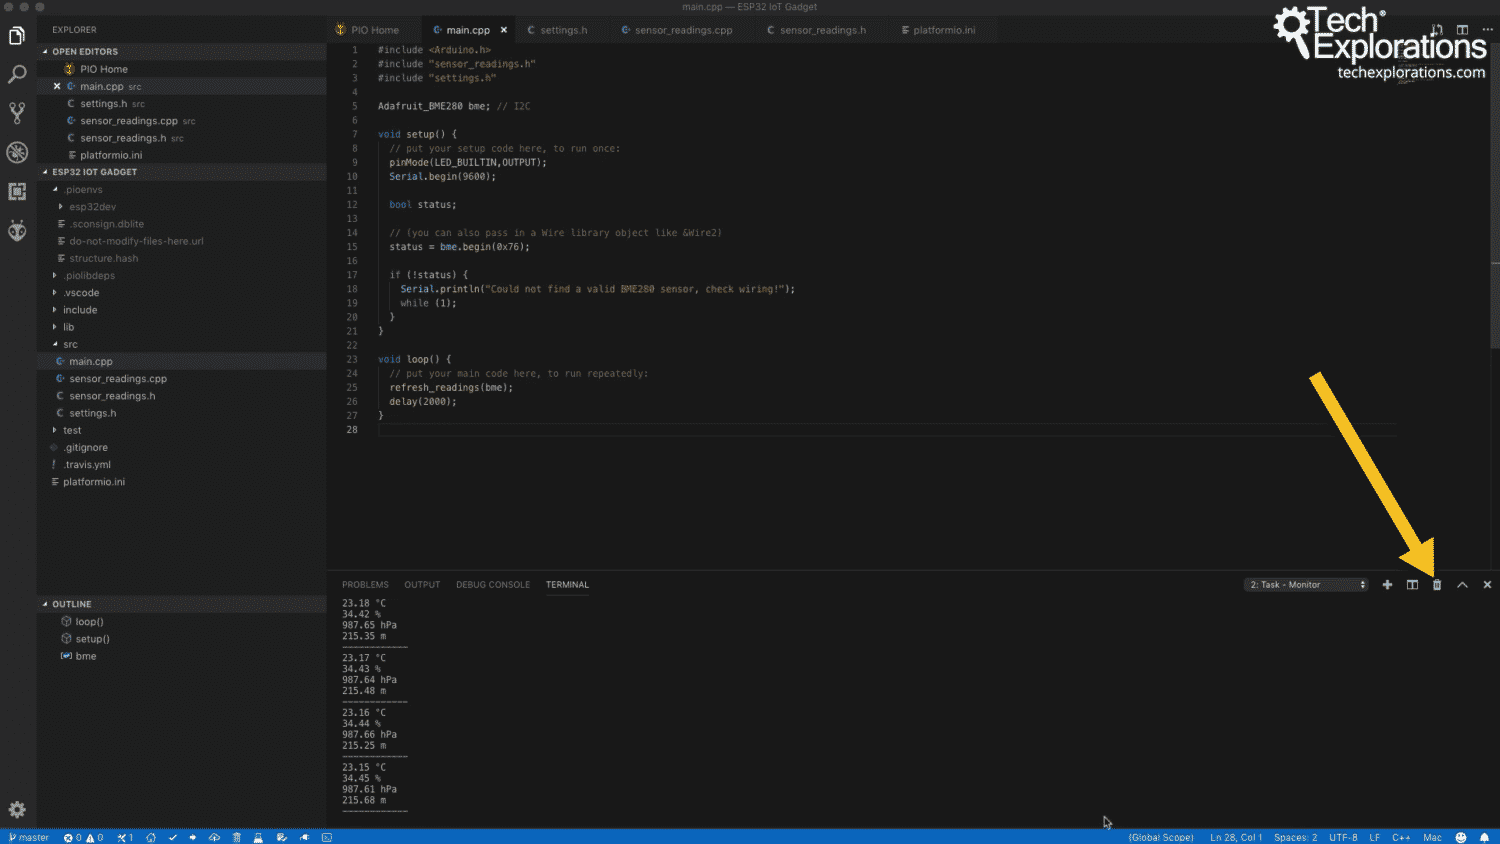
To remove any pane, click on the garbage bin button
Then, clear the terminal by typing:
clear
Now, let's have a look at where are we standing with Git by typing
git status
The response from Git shows that we are on the master branch (the default branch when you start a new repository), and there are no changes to commit. Our working tree, our repository, is clean.
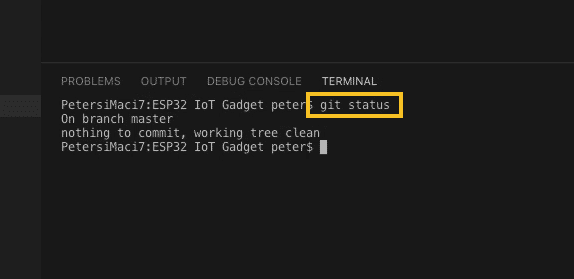
Check the status of the repository
Now let's look the history for the project repository. There’s not much in it since we have just started. Type:
git log
Here’s the response of this command:
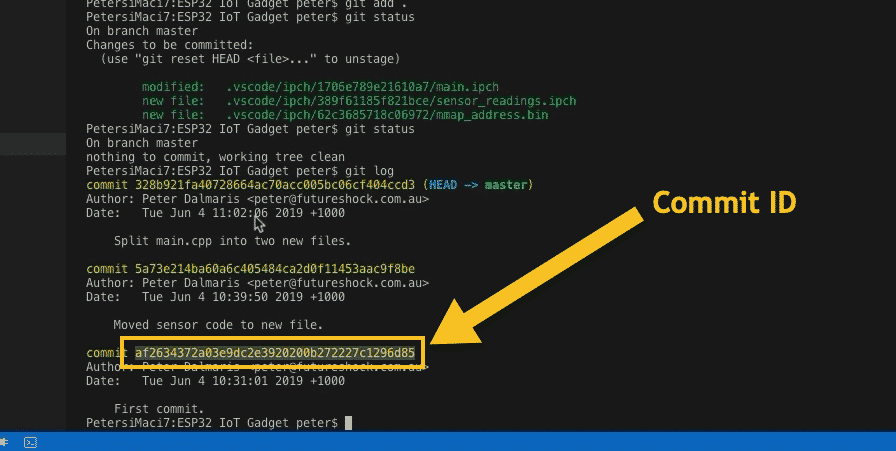
The commit ID is unique for each commit
The list of past commits in the branch (master) contains their ID and the commit message for each one. We’ll be using the commit ID to “turn back time” in our project. In other word, the commit ID is the information we need to travel through our project history.
The ID “HEAD” is special. It points to the latest commit in this branch.
Let’s try out a small experiment.
Say that you have made a mistake in your project and that you want to go back to the previous commit that contains good working code.
To do this, use the "checkout" command. You will need to provide the ID of the commit that you want to check out. In our current project, we can checkout commit af2634372a03e9dc2e3920200b272227c1296d85 (which is the first commit I made in this project), like this:
git checkout af2634372a03e9dc2e3920200b272227c1296d85
This will replace the contents of our project directory with the files that are committed to the repository for the commit I have just checked out. Your project will now look like this:
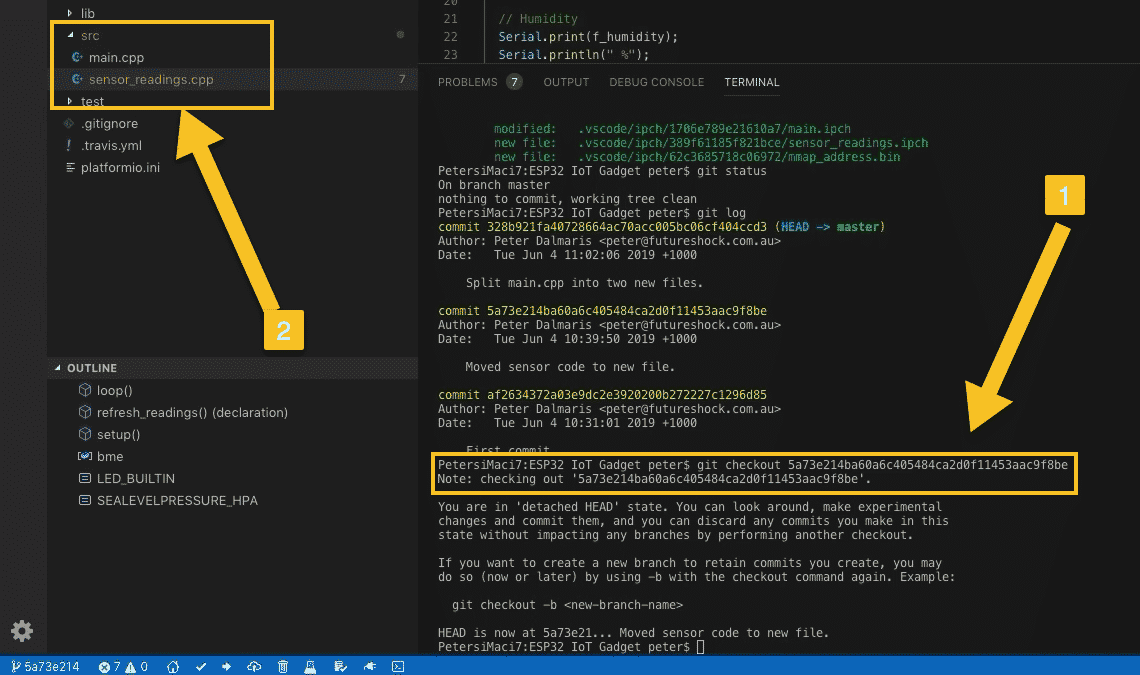
Checkout a commit to bring the project back to that point in time
After I checked out my target commit (1), the contents of the src directory changed (2) to contain the files from that commit.
Cool! This capability alone is extremely valuable in my workflow.
Let’s look at another scenario: you want to do an experiment.
You got an idea, but you're not sure exactly how you will implement a new feature.
You want to do some testing, but you don't want to mess around with your master branch.
The master branch is where you keep your working and tested code at all times. It’s the branch you can share with other people.
You don’t do experiments in the master branch. You do your experiments in a new branch.
Here’s how to do it
First, make sure that everything is committed in the current (master) branch before you continue your work in a new branch,
When the working branch is clean, create a new branch.
Let's say that you want to look at how you can activate and work with a TFT screen.
No problem. Create a new branch with a name that describes your experiment:
git checkout -b “TFT_experiment”

Create a new branch; the IDE will show the name of the current branch in the status bar
Creating a new branch (1) will also switch your working branch to the new branch automatically. Code will confirm that by showing the name of the current working branch in the status bar (2).
You can also confirm this in the terminal. Type:
git status
And the response will give you the name of the current working branch:

The status of the new branch
With the contents of the master branch safe, you can start your experiment.
Add a couple of files:
- tft.cpp
- tft.h
Add some comments to these files (no need for working code, we are learning Git at the moment, not coding).
Save the files.
Check the status of the repository (1, from the image below):
git status
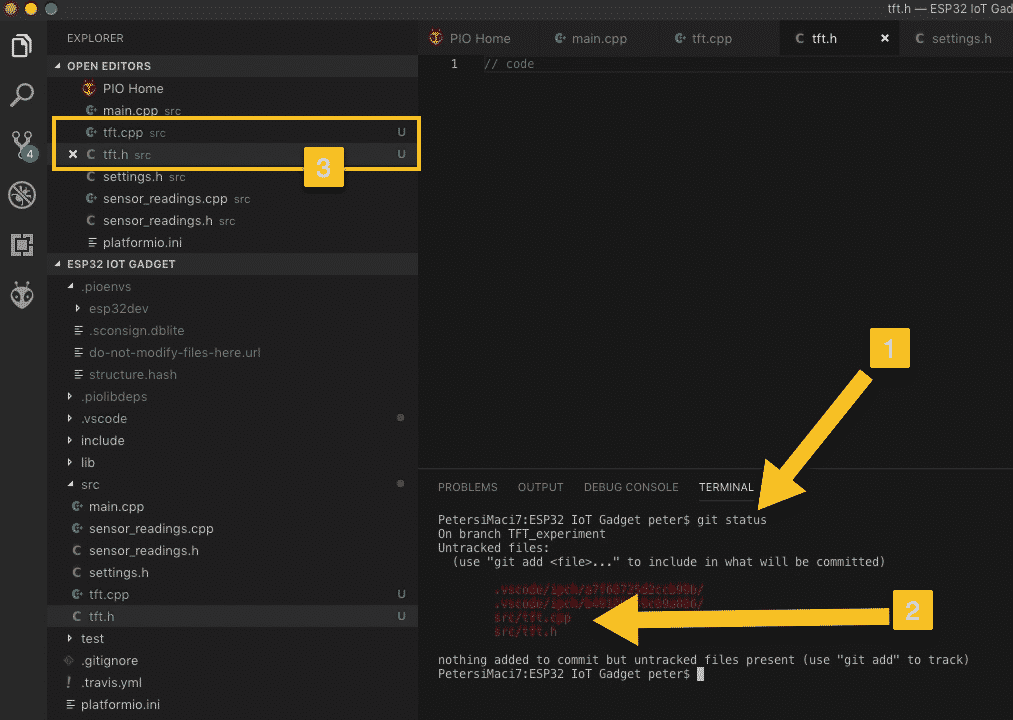
The new files are untracked in this branch
Git has detected that there are two new files, that are untracked (2). Also, notice the “U” indicator against these files in the Explorer tab (3). You will also find this information in the source control pane.
Ask Git to start tracking these files by adding them in the index (1):
git add .
And then, commit them to the repository (2):
git commit -am "TFT files h and cpp."
This process looks like this:
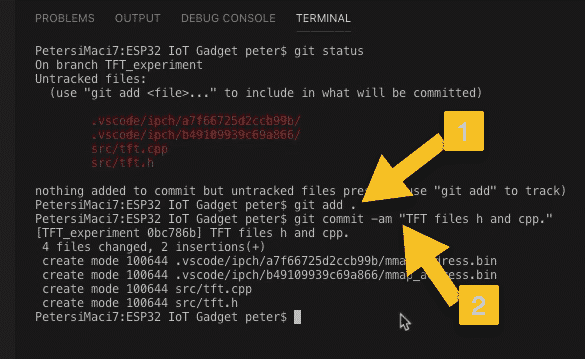
Commit the new files to the branch
You can go on with your work and commit your changes as you would in the master branch as well.
When you complete your experiment and you are happy with the result, you will want to merge your new code with the code in the master branch.
The process for this is to checkout the master branch, and then merge master and your experimental branch.
Let’s do this now.
First, make sure that the current branch (“TFT_experiment”) is clear. Use “git status” for this. If it isn’t clear, commit any changes until it is.
Then, switch to the master branch:
git checkout master
When you do this, you will notice that the files you created in the “TFT_experiment” ("tft.h" and "tft.cpp") no longer exist.
Do not panic, this is totally fine. These files don’t exist in the master branch, but they do exist in the “TFT_experiment” branch. Let’s merge the two so that we can see these files in master.
Type (1, image below):
git merge TFT_experiment
Git will update master with the commits in TFT_experiment. The output from Git looks like this:
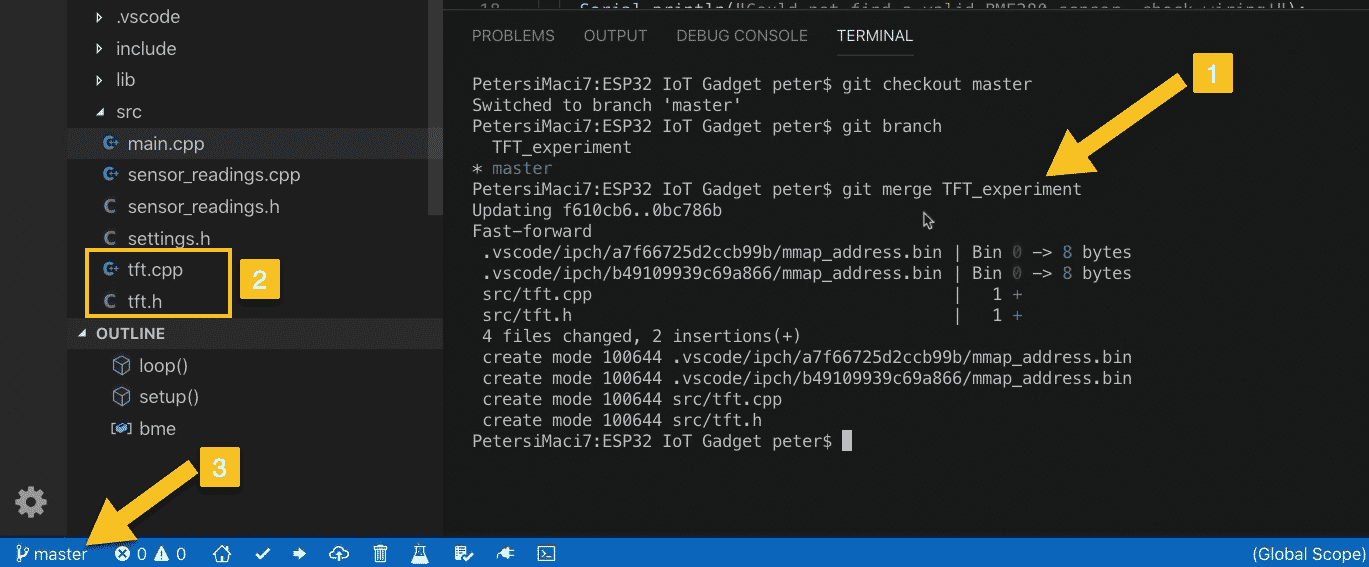
Merged two branches
After the merge command, you will see the two files you created in “TFT_experiment” appear inside the src folder (2). The IDE also shows the current working branch in the status (3).
Perfect!
Now you can continue your work in the master branch, or create a new branch to safely run another experiment.
This was a quick demonstration of one of the most common Git workflows. During the progress of the work in the project in ESP32 Unleashed, I will be using Git to keep track of all my changes. I will create new branches to run my experiments, and only commit tested code in master.
Before you continue, I encourage you to spend some time to read the Git book.I promise that it will give you valuable insights and guidance for many of the very useful features that are available through Git.
Ready for some serious learning?
Enrol to
ESP32 Unleashed
A new learning adventure awaits you.
Create an application that will stretch your existing knowledge and skills.
ESP32 Unleashed is a project course
This course is perfect for people familiar with the ESP32, especially graduates of ESP32 For Busy People.
It is a guided project, designed to teach you how to use modern tools to create modern embedded applications based on the ESP32.
Just click on the big red button to learn more.
Jump to another article
Lessons
1: Why use PlatformIO to program the ESP32?
2: How to install PlatformIO and MS Code (Mac OS)
3: How to install PlatformIO and MS Code (Windows 10)
4: Set up an ESP32 project in PlatformIO
5: Upload and test the new project
6: Create the Git repository
7: Split the program into two files
8: Test the multi-file project
9: How to use Git version control
Last Updated 2 years ago.
We publish fresh content each week. Read how-to's on Arduino, ESP32, KiCad, Node-RED, drones and more. Listen to interviews. Learn about new tech with our comprehensive reviews. Get discount offers for our courses and books. Interact with our community. One email per week, no spam; unsubscribe at any time
