MICROPYTHON WITH THE ESP32 GUIDE SERIES
How To Run A Program At Boot
In this lesson, I'll show you how to set your ESP32 to execute a program when it powers up or when you press the reset button.
To make this possible, we'll use the boot.py and main.py files.
I will also show you how to stop autostart so you can regain control of your ESP32.

I updated this guide page on October 6, 2023. In this update I added information about the "main.py" file, on how to stop "boot.py" from hijacking your ESP32. I will update the video shortly.
Up to now, you have been programing the ESP32 by having it constantly connected to the computer. From Thonny, you click on the green "play" button to trigger the selected program to run.
Imagine that you have finished working on your program, and want your ESP32 to be independent of your computer. You want the ESP32 and to be able to automatically execute a given program when power is applied.
There are a couple of ways by which you can do that.
In this lesson, I will show you both of them.
In the first method, we'll use the "boot.py" file. In the second method, we'll use the "main.py" file. Before we start, let's understand the differences and similarities between boot.py and main.py.
In this lesson, I will show you both of them.
In the first method, we'll use the "boot.py" file. In the second method, we'll use the "main.py" file. Before we start, let's understand the differences and similarities between boot.py and main.py.
boot.py vs main.py
When you're working with MicroPython, you'll often come across two important files: boot.py and main.py. These files serve distinct purposes and understanding their roles can help you structure your projects more effectively.
Think of boot.py as the welcoming committee for your MicroPython board. As soon as the board powers up or resets, boot.py is the first file that gets executed. This file is your go-to place for setting up initial configurations like network settings or initializing peripherals. It's crucial to keep this file as minimal as possible. The reason is simple: if something goes wrong in boot.py, it could prevent the board from booting up properly, and you might not even get to the point where main.py runs.
Once boot.py has done its job, main.py takes over. This file is where the meat of your application resides. Whether you're running a web server, reading from sensors, or executing any other main tasks, main.py is where all this action happens. Unlike boot.py, which runs just once at boot-up, main.py runs in a loop, continuously executing its code unless you've programmed it to do otherwise.
The Order of Execution
The sequence is straightforward. Boot.py runs first, setting the stage for main.py, which follows immediately after. If boot.py is the opening act, main.py is the main event.
Handling Errors
It's worth noting that errors in boot.py can stop main.py from running. On the other hand, if something goes awry in main.py, it won't affect the initial boot process, which is managed solely by boot.py.
Flexibility and Control
Both boot.py and main.py are accessible via the file system, meaning you can edit or even remove them as you see fit. However, it's generally a good idea to exercise caution, especially with boot.py, to ensure a smooth boot-up process.
As you can see, you can add code to both files. Generally, you'll add initialisation code to boot.py, and the main application code to main.py. But in simple scenarios, such as getting an LED to blink, you can add your code to either file. That's what we'll do next.
boot.py
In MicroPython, "boot.py" is a special-purpose file.
If it exists in the root of the MicroPython filesystem, the ESP32 will try to read it and execute the program it contains.

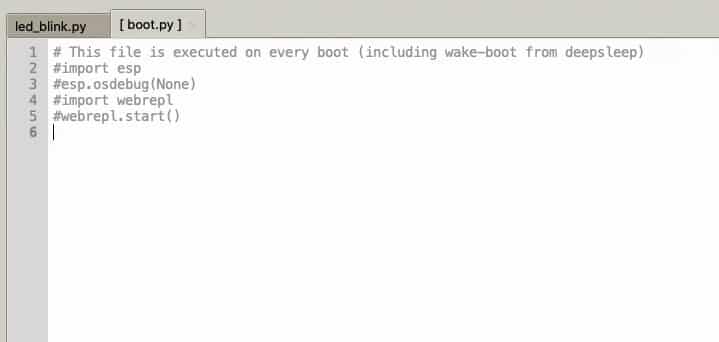
The default boot.py file. Notice that the program it contains is commented out.
When you install a fresh instance of the MicroPython firmware on your ESP32 or other hardware target, a boot.py file will be written in the filesystem. You can open this file in Thonny to have a look. As you can see in the screenshot above, the default boot.py file does contain some code, but it is commented out, and therefore inactive.
You can replace this code with yours.
Let's do that now.
Experiment 1: using boot.py
To demonstrate how boot.py works, I'll use the sample code from the previous lecture.
Here's the code:
from machine import Pin
from utime import sleep
led = Pin(21, Pin.OUT)
while True:
print(".")
led.on()
sleep(0.5)
led.off()
sleep(0.5)
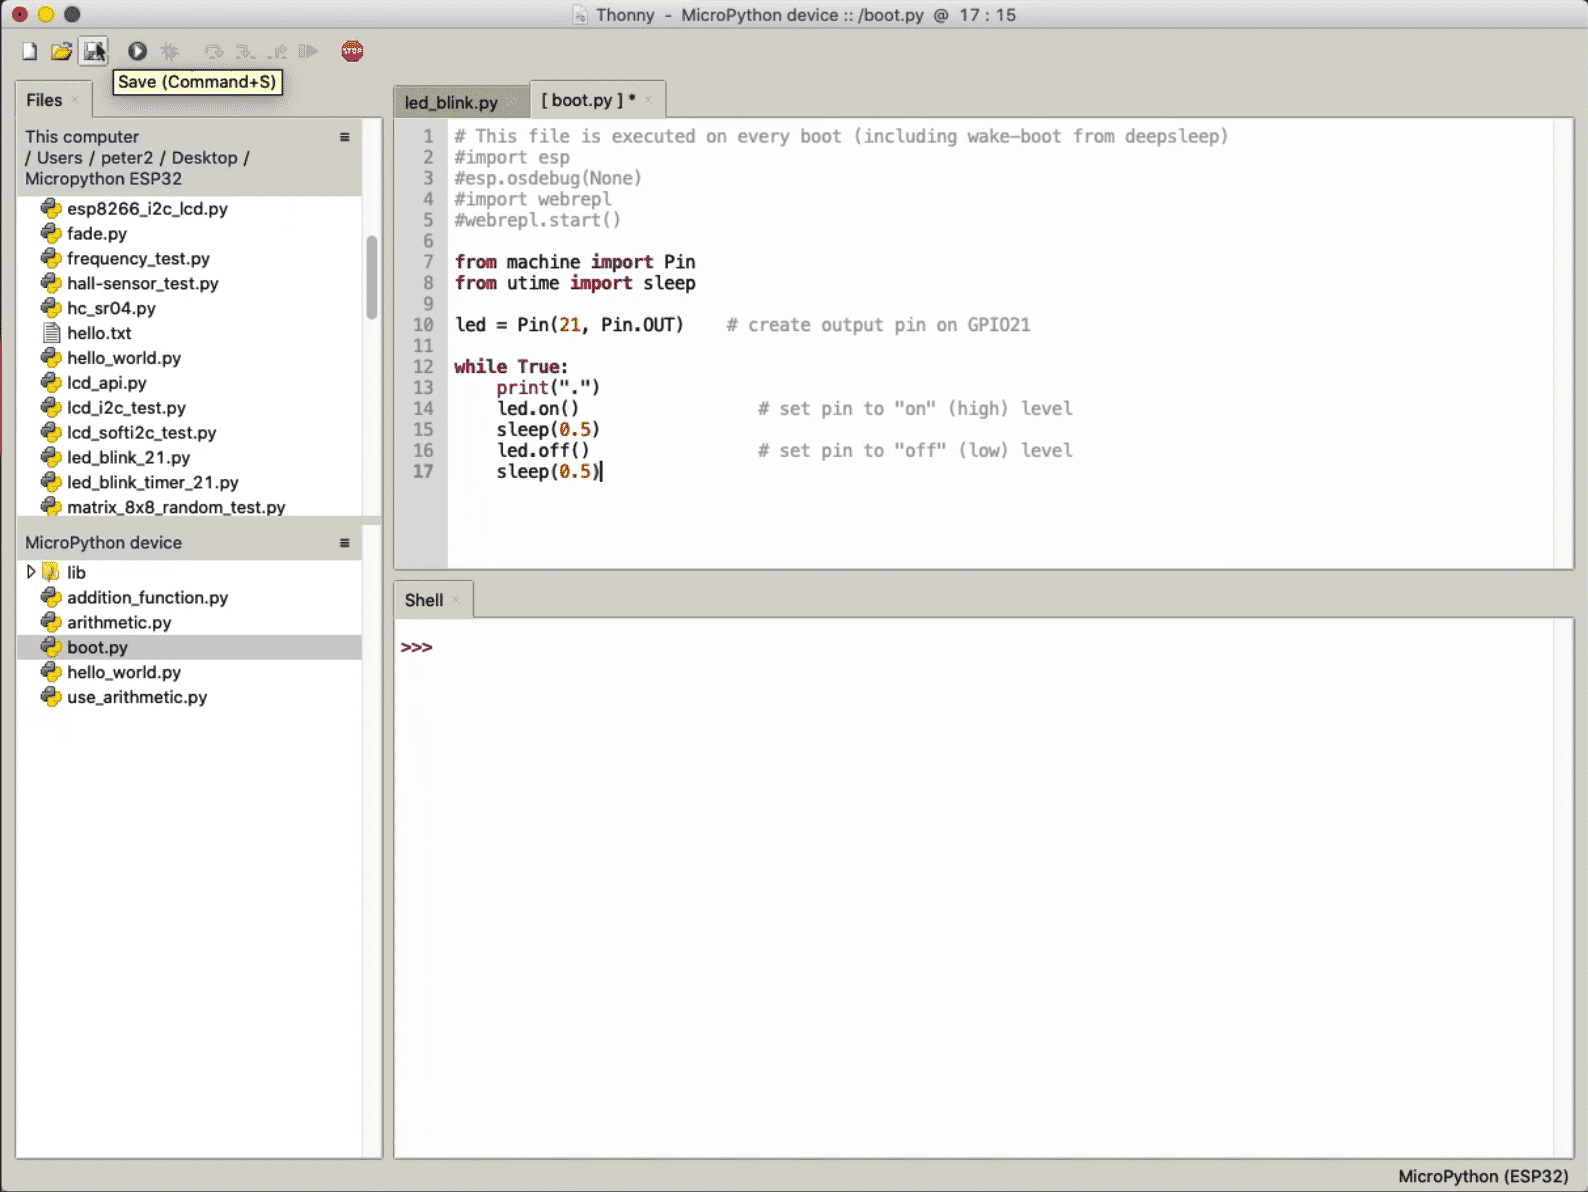
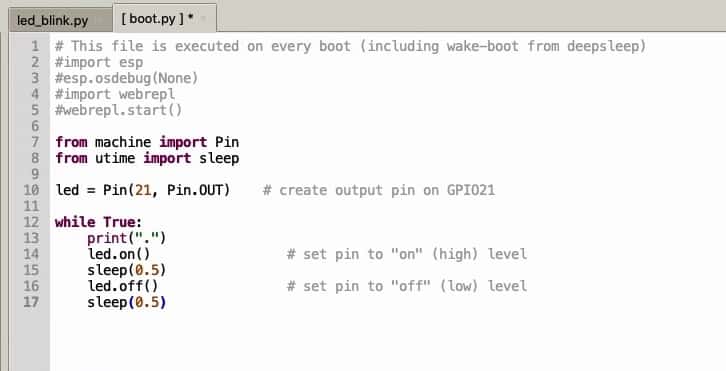
Copy this code in the boot.py file so that it looks like this (I did not replace the existing commented-out code):

The new content of the boot.py file.
Now that this code exists in the boot.py file, it will execute automatically next time I power-up the device. I don't need to connect the device to the computer, and I don't need to click on the play button in Thonny to run the program.
To test this, follow this process:
- Disconnect the device from the computer by unplugging the USB cable from the computer USB port (leave the cable connected to the device).
- Connect the USB cable to a USB power supply, like a phone charger. This will power up the device.
- The program stored in boot.py will start , and the LED connected to GPIO 21 will start to blink.
What you have achieved is to make your ESP32 independent of your computer.
Problem: boot.py takes over your ESP32 (and how to deal with this)
Because the example code in boot.py contains an infinite loop, when you reconnect the ESP32 to your computer so that you can continue your work in Thonny, the ESP32 will be busy blinking the LED and will not give you a MicroPython shell, allow you to modify the program, or interact with the filesystem. Essentially, your ESP32 is locked up in the infinite loop.
Normal ways of interrupting the program will not work. Clicking on the Stop button or typing Ctrl-C will simply reboot the board, and restart execution of the program in the boot.py file.
The only way (that I am aware off) for regaining control of your board so that you can make changes to the boot.py program (or to delete it) is to re-flash the board. Follow the method you learned in this earlier article in this series.
Experiment 2: import a program into boot.py
When you have a small program to run at boot up, copying it into the boot.py file is not a problem; it just works.
Imagine that you have a larger and more complicated program. You've been working on it for a while, and it works well enough to deploy in the field.
Copying a large file into boot.py is an option but it is messy. You will end up with two copies of the same file. If you need to make changes, you'll have to remember to apply the changes to both files.
That's a recipe for problems down the track that is easily avoided using an import statement.
You have already learned how to use the import statement.
In this example, the program that you want to execute in boot up is stored in the file titled "led_blink.py".
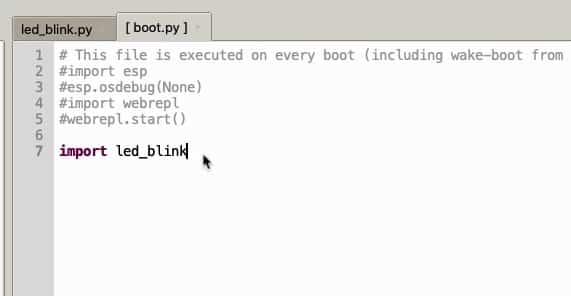
Inside boot.py, simply use this line of code:
import led_blink
At boot up, the ESP32 will read boot.py which contains the import statement. Then, the ESP32 will import the code stored in led_blink.py and execute it. The result will be, predictably, a blinking LED.

The boot.py file contains an import statement for the main program file.
To test that this method works, repeat the same 3 steps as listed in Experiment 1 in this lesson. Power up the ESP32 from an external power supply (not your computer), to confirm that the LED on GPIO21 is blinking.
main.py
As you learned earlier, in Micropython, there is the main.py file that is executed automatically after boot.py. If your program is simple, and does not need any special code such as boot-up configuration, you can use main.py instead of boot.py to automatically execute a program when your board starts.
In almost every respect, boot.py and main.py do the same thing: they automatically execute a program at startup. However, with main.py, you can easily stop execution with Ctrl-C instead of having to re-flash the board. Therefore, main.py is easier, and more appropriate in most use cases.
Let's repeat the LED-blink experiment with main.py. In Thonny, copy the following program into a new file with name "main.py", and save this file on the device.
from machine import Pin
from utime import sleep
led = Pin(21, Pin.OUT)
while True:
print(".")
led.on()
sleep(0.5)
led.off()
sleep(0.5)
The program in main.py
Just like with boot.py, after you save the main.py file, power-cycle the board (i.e. unplug the USB cable, and then plug it back into a USB port). When the board is powered again, the LED will blink, indicating that the code in the main.py file is running.
To stop the program, follow this process:
1. click on the STOP button in Thonny (this will connect the Thonny shell to the board),
2. Press and hold Ctrl-C until you see the "soft reboot" message.
At that time, the program in main.py will stop, you will re-gain control of the shell, and you will see the files in the device file system.
After clicking STOP and hold Ctr-C until a soft reboot occurs, you are back in control of your board.
Once you are back in control of your board, you can make any changes you want to the contents of the main.py file. Next time you power-cycle the board, the program in main.py will automatically start.
If you don't want to auto-start, simply rename or remove the main.py and boot.py files.
With the help of the boot.py and main.py files you can automatically run a program when your ESP32 is powered up.
The next thing that I want to show you is how to do simple debugging of your MicroPython scripts using Thonny IDE. Let's do that in the next lecture.
Learn MicroPython for the ESP32
With this video course, you will learn how to use the
MicroPython programming language with the ESP32 micro-controller.
MicroPython is the perfect language for anyone looking for the easiest (yet still powerful) way to program a micro-controller.
Jump to another article
1. What is MicroPython?
2. MicroPython vs Python
3. MicroPython resources
4. MicroPython compatible boards
5. Getting started with Thonny IDE
6. How to install the MicroPython firmware
7. Setup an interpreter in Thonny IDE
8. How to write and execute a MicroPython program
9. Thonny IDE with the Raspberry Pi Pico
10. Thonny IDE with the BBC Micro:bit
11. Thonny IDE advanced configuration
12. How to find MicroPython packages at PyPi
13. The MicroPython shell
14. MicroPython Programming with files
15. How to interrupt a running program
16. How to run a program at boot
17. How to debug MicroPython program
Last Updated 2 years ago.
We publish fresh content each week. Read how-to's on Arduino, ESP32, KiCad, Node-RED, drones and more. Listen to interviews. Learn about new tech with our comprehensive reviews. Get discount offers for our courses and books. Interact with our community. One email per week, no spam; unsubscribe at any time
