Arduino Sensors & Actuators guide series
Infrared line sensor
An infrared line sensor is a simple device made up of an infrared emitting LED and an infrared sensitive photo-resistor. You could use one of these sensors to build a robot that follows a dark line on the floor, or your own heart rate monitor.

An infrared line sensor is a simple device made up of an infrared emitting LED and an infrared sensitive photo-resistor.
You could use one of these sensors to build a robot that follows a dark line on the floor, or your own heart rate monitor.
The principle of operation is very simple: The transmitter produces infrared light which bounces of a surface and comes back to be captured by the photo-resistor.
The more infrared light is reflected back into the photo-resistor, the higher the output of the sensor gets.
In our experiment we will use a QRE1113 line sensor from Sparkfun. You can get something like this on eBay for less than $2.
Assembly
Let's puts together this circuit and test out the motion sensor.
We will need:
- The Arduino
- Three jumper wires
- An QRE1113 line sensor or equivalent (like this ywRobot device).
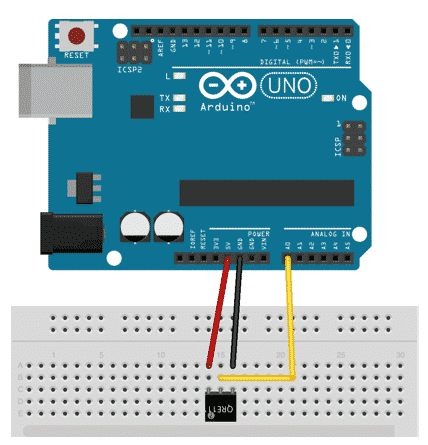
Here's what we are going to build (below).
For power, you can plug this sensor into either the 3V or 5V sockets on the Arduino.

The completed circuit of the Arduino with an QRE1113 infrared line sensor
Sketch
This one is very simple, just read the analog output at pin A0 and print it to the monitor (here is the sketch on Github):
// Line Sensor Breakout - Analog
int out;

void setup()
{
	Serial.begin(9600); // sets the serial port to 9600
}

void loop()
{
	out = analogRead(0); // read analog input pin 0
	Serial.println(out, DEC); // print the value of the sensor
	delay(100); // wait 100ms for next reading
}
First, create the variable that will hold the value from the analog pin, named out.
Inside void setup(), we set the Serial port to 9600 baud rate so that the sensor values can be displayed on the serial monitor while the sketch is running.
Inside the loop() function we read the input from analog pin 0 (A0) and store it in the out variable.
We display the value in the Serial monitor using the Serial.println(out, DEC) command. We use println() (instead of just print()) to display each value in a new line. We use the DEC parameter inside the println() command to display the value as a decimal.
We introduce a 100ms delay to reduce the rate by which the sensor is read.
Ready for some serious Arduino learning?
Start right now with Arduino Step by Step Getting Started
This is our most popular Arduino course, packed with high-quality video, mini-projects, and everything you need to learn Arduino from the ground up.
Jump to another article
1: Introduction
2: How to make an LED blink
3: How to make an LED fade
4: How to use a button
5: How to use a potentiometer
6: Infrared line sensor
7: Measuring light
8: Detect tilt and impact
9: Measuring acceleration
10: Detect motion with the ultrasonic sensor
11: Detect motion with PIR sensor
12: Temperature and barometric sensor BME280
13: Measuring Temperature And Humidity
Last Updated 2 years ago.
We publish fresh content each week. Read how-to's on Arduino, ESP32, KiCad, Node-RED, drones and more. Listen to interviews. Learn about new tech with our comprehensive reviews. Get discount offers for our courses and books. Interact with our community. One email per week, no spam; unsubscribe at any time