RASPBERRY PI GETTING STARTED SERIES
How To Set A Fixed IP Address
In this lesson you will learn how to set a fixed IP address for your Raspberry Pi.

In addition to setting a hostname, it is good practice to set a fixed IP address to network hosts that provide services to other hosts. This way, a client will be able to use the same IP address for all its requests to the server, instead of first doing a lookup request to the DHCP server.
To set a fixed IP address for your Raspberry Pi, you will need to login to your router’s admin panel. Every router has an admin panel with its own “branded” design elements, but in general there is a page titled “DHCP” or “Bind IP” that allows you to edit the configuration of a host’s IP address.
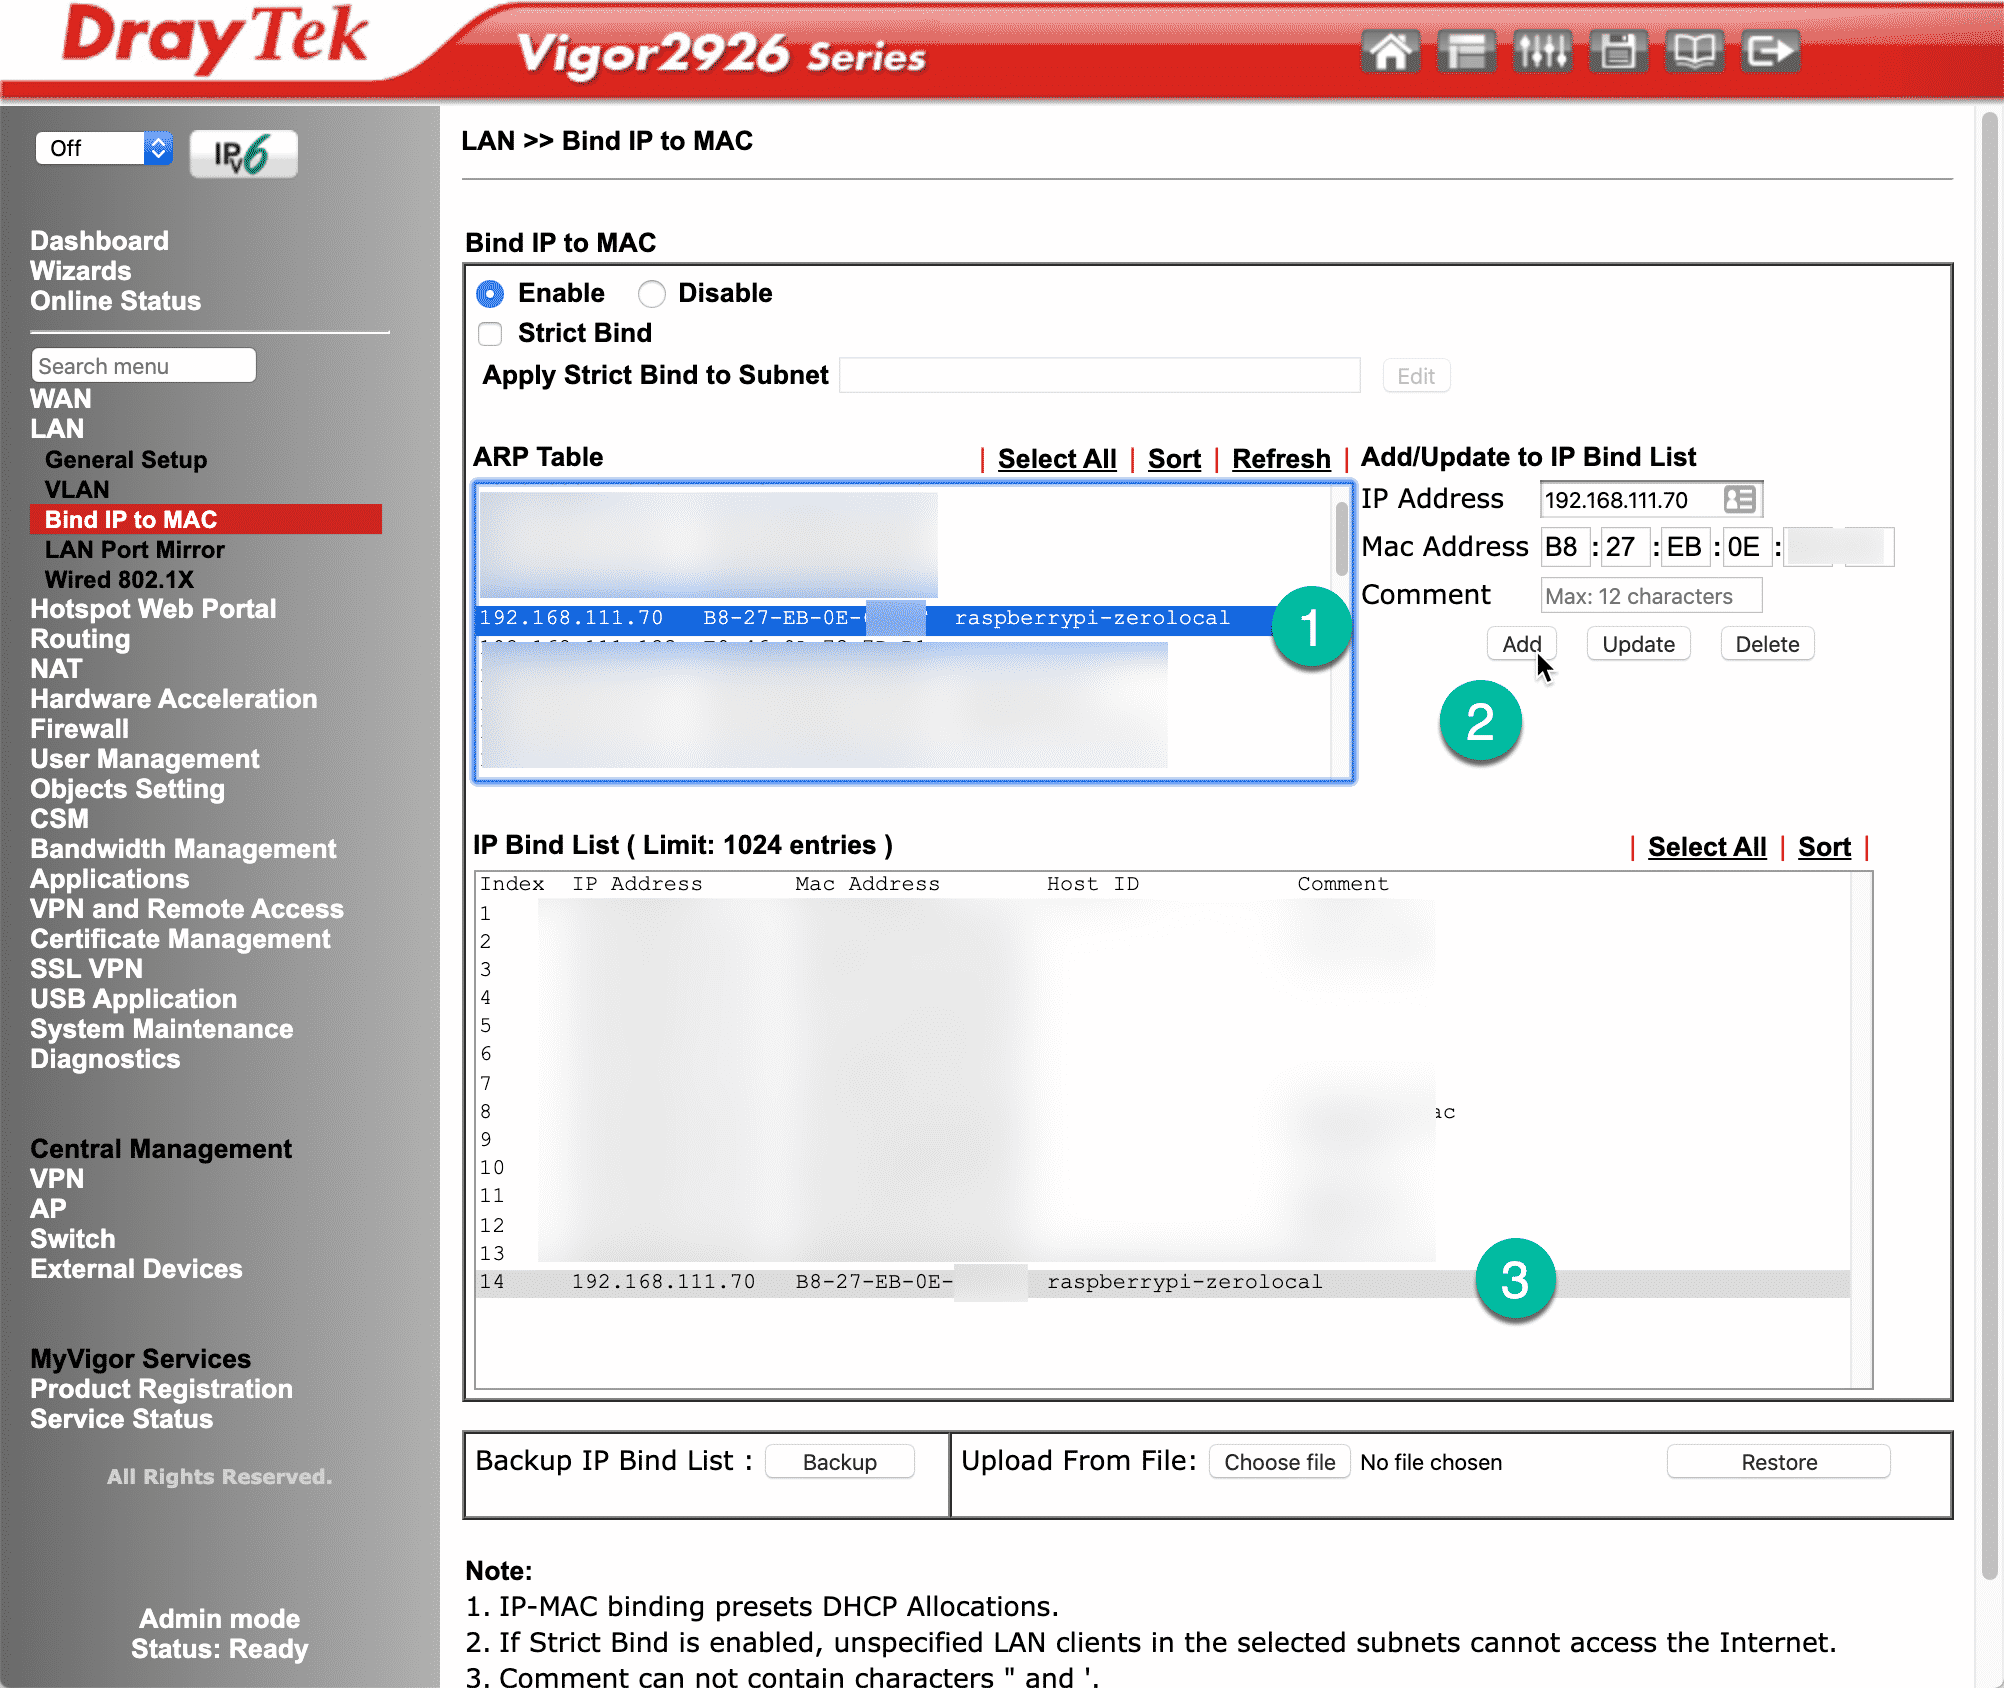
In the screenshot below you can see the relevant page in my router’s administration panel. This page is available under the LAN menu item.

My router allows me to bind an IP address to a MAC address.
To bind an IP address to a MAC address, first select the Raspberry Pi by identifying its hostname from the ARP Table (“1”), then click on the “Add” button (“2”), you may change the IP address to something else, or accept the one that DHCP has already assigned).
In the IP Bind List box, you can now see the fixed IP address for your Raspberry Pi ("3").
Ready for some serious learning?
Start right now with Raspberry Pi Full Stack - Raspbian
This is our most popular Raspberry Pi course & eBook.
This course is a hands-on project designed to teach you how to build an Internet-of-Things application based on the world’s most popular embedded computer.
You will learn how to build this application from the ground up, and gain experience and knowledge with technologies such as...
Jump to another article
1: What is the Raspberry Pi?
2: Raspberry Pi vs Arduino
3: Raspberry Pi operating systems
4: Headless and graphical (GUI) operating systems
5: How to install Raspbian Lite
6: SSH and headless configuration
7: How to set a host name
8: Booting for the first time
9: How to set a fixed IP address for your Raspberry Pi
10: Basic configuration
11: Working as the 'root' user
12: Raspberry Pi pins, roles, and numbers
13: A taste of Python on the Raspberry Pi
14: Python functions
15: A simple Python program
16: A simple circuit
17: Control an LED with GPIOZERO
18: Read a button with GPIOZERO
19: Setup the DHT22 sensor with Git
20: Use the DHT22 sensor
21: Raspberry Pi OS 64-bit vs 32-bit
Last Updated 1 year ago.
We publish fresh content each week. Read how-to's on Arduino, ESP32, KiCad, Node-RED, drones and more. Listen to interviews. Learn about new tech with our comprehensive reviews. Get discount offers for our courses and books. Interact with our community. One email per week, no spam; unsubscribe at any time